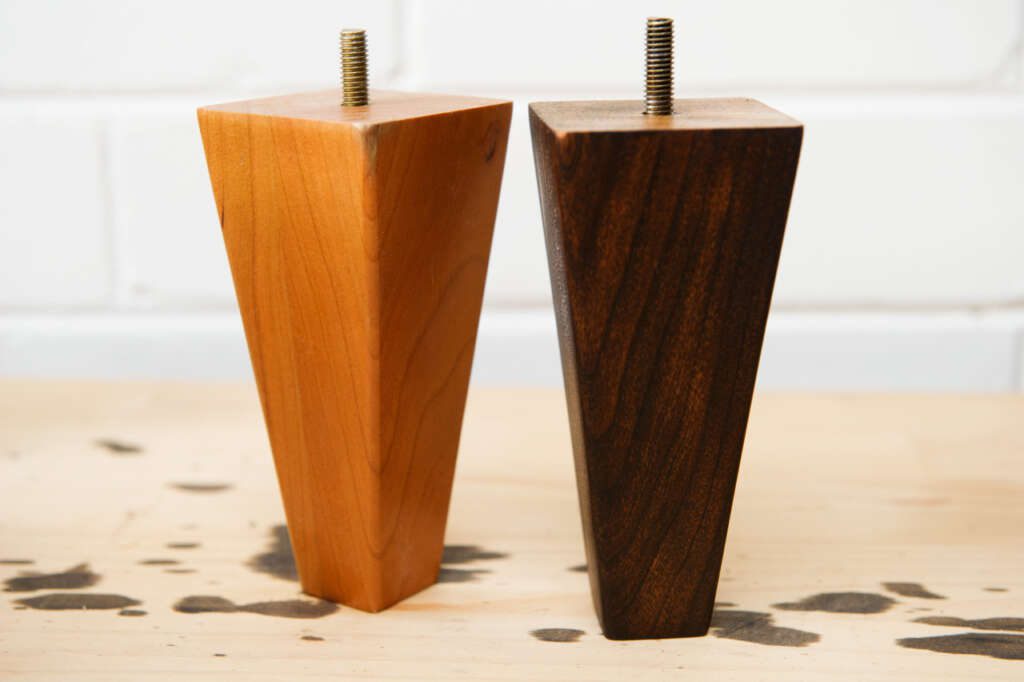
Spend an afternoon working with your hands and you’ll be surprised at what you can make. We did this and custom stained our own replacement IKEA sofa / furniture legs (We used the Jager legs)
1. Preparation
My friend is a big supporter of the saying, “Measure twice, cut once.” He learned this after making Biggie Smalls, a custom made armchair with differently sized armrests. Here’s what we used:
Things you will need
- Wooden Sofa / Furniture Legs (featured Comfort Works’ Jaeger sofa legs)
- Wood Stain (in my case I used Minwax’s Dark Walnut)
- 1 x sponge brush (for even surface application)
- Sanding sponge or block if you’re using sandpaper (for an even sanding surface, I used 3M’s 60 grit for paint stripping and 100 grit to even it up and 1500 grit for finishing)
- Respirator (highly recommended)
- 2 pairs of latex gloves
- Wood Balsam (optional)
- Clean rags
- A stand to hold the sofa legs in place ( I used a 2 x 4 scrap piece and drilled a couple of holes in it to allow the sofa legs to dry evenly)
P.S my friend actually prefers the 6P’s but that’s not family friendly (proper planning prevents…)
2. Getting Sandy With It
Sand down the lacquer coating with the coarse grit (60), running along the wood grain’s direction and then switching it to the 100 grit and finishing with the 1500 grit. It’s important to remove all the coating as the wood stain will not be able to penetrate through if there’s still some lacquer.
I used the latex gloves to keep the surface of the wood clean from sweat and oil that might stain the wood. If you have access to a belt sander, that will save you a lot of time and muscle power.
3. Paint And Pray
Shake the can evenly for a good few minutes before application. The latex gloves will help to keep your hands clean.
Coat evenly and follow the instructions as per the manufacturer to achieve the colour you want. Recoat to give it a darker colour.
Shouting “WITNESS ME!” before painting may improve things, or might result in you being labeled MEDIOCRE.
4. Watching Paint Dry
Wipe off excess coating after allowing it to soak through, I left mine at 35 mins before I gave it a clean wipe and left if to dry for 6 hours.
Recoat the next day, and repeat the same process.
Optional
Finish off with the wood balm to protect the sofa legs.
Show Off Your New Wood
Get some friends, throw a party, stick them on things. It’s a new life for your sofa, or furniture, as long as they take M8 (8mm diameter) bolts.
Want to see these legs in action with a specially customised IKEA sofa? Let us know in the comments below!


Russesll Owens
Jun 21, 2021Your post is awesome. It’s very helpful to me and easy to follow. Thanks for sharing this! I’m looking forward to reading more of your posts because you do have some really great insights on a lot of different topics that are important to me, like safety gear related stuff haha :)
Naomi
Sep 8, 2021Thanks SO much Russesll, we’re really happy that you enjoyed reading our post :)
We hope this has helped somehow. Cheers!
Brett Ehlert
Apr 28, 2021Love the dark walnut stain. Thank you for sharing this guide!
Naomi
Apr 30, 2021Glad you liked it, Brett :)