Everyone knows the Ektorp sofa. Pleated long-skirt, round arms, a classic look. Is it too dated and unfashionable? I say ‘Yes’, but it doesn’t have to be! But first…
But how?
With minimal work, that’s how. Simply obtain a set of customised slipcovers, or sofa covers for the non-US, for your Ektorp sofa. We are unashamedly the best (read: only) option for these custom slipcovers ;)
The covers will arrive at your door in a nice waterproof bag. Inside said bag will be both your covers and the other half of a velcro reel. Replace the loose covers with our tailored slipcovers and flip your sofa on its back. Grab a staple gun and staple the velcro to the underside of your Ektorp, you can adjust the placement of the velcro for a better fit if you wish.
We’ll have a nice video up for you soon on this – but in the mean time, here’s some additional shots of our snug fit Ektorp sofa covers in woollen Shire Rust!
“Help, help! How do I put my Ektorp sofa covers on my sofa?”
We get this question sometimes, and it’s always been an interesting question to ponder because it’s actually really easy. It’s normally a simple process to pull off your old slipcovers and put new ones on, but we’ve put together a step-by-step video on how slipcovers can be easily installed on your sofa.
Here’s our step by step guide on how to put on your Ektorp sofa covers:
Reasons it may be difficult to fit your slipcovers on your sofa:
The Ektorp sofa (and many round armed sofas) are technically narrower at the base than at the armrests, which means that the bottom of the slipcover is also narrower than the top, around the armrests. To make things easier, put the slipcover on all 4 corners of the armrests first before pulling it downwards. Is that hard to imagine? Think about putting on a T-shirt – you put it over your head and both arms first before pulling it down your torso, not pulling it over your head and one arm.
The smaller your sofa is, the less room you have to maneuver, as there’s just less fabric overall. It’s often slightly more complicated to put an armchair slipcover on compared to a loveseat slipcover, for example.
Where can I get a custom slipcover for my Ektorp sofa?
With a classic design that’s unchanging and comfort that’s unbeatable for its price, we can’t miss the opportunity to make slipcovers for the IKEA Ektorp sofa. Choose your ideal slipcover from our wide selection of fabrics, or get free fabric samples to try out first before you decide.
With St Patrick’s day coming up and 2017’s Pantone colour of the year, we’ve decided to bring in a hack for all lovers of the colour – Green.
And what better way to do it then to showcase it alongside our Rouge Emerald velvet slipcover, upgraded with new legs and Chesterfield-inspired sofa tufting.
But first, here’s what inspired us to do so:
The Inspiration
Chesterfield Tufted Sofa c/o AnnaSuiShop
A few of us here really like the Chesterfield sofa and were thinking, “Wouldn’t it be really cool if we could hack a sofa into a Chesterfield, like the Klippan?”
And that was the lightbulb – the Klippan is pretty much like the Chesterfield minus the round arms and tufting.
Brayden Studio Verdi Tufted Sofa c/o Wayfair
Then we thought maybe we should be a bit more realistic and consider other options since the Chesterfield’s trademark look is precisely because of the round arms (something that we can’t really create) and tufting (something we can definitely do).
We continued searching and eventually we found something we liked.
Simple Tufted Sofa c/o Dylan Gallery
A square-arm sofa with a very modern and minimal look, something we thought we could recreate very easily.
Thus began our journey, here are the before photos:
The IKEA Klippan – Without Slipcovers
IKEA Klippan with Rouge Emerald Covers
The Prepwork
First and foremost, here are some tools that you’ll need:
– 1 Comfort Works Klippan Slipcover (Assuming you already have an IKEA Klippan)
– 1 Tufting Kit (Twine, Needle, Scissors, Buttons)
– 1 Pencil for marking
– 1 Ruler
– 1 Willing Friend/Partner who can help you
Next, you’ll need to decide on how much tufting you want to do. Initially we wanted to do the entire sofa, back and armrests – the whole shebangs.
That was when we thought the Klippan could become a Chesterfield, but we realised that it’s best to have it minimalist with its square arms, so we settled for 8 buttons the end.
As such, using my expert mathematical skills, we figured a 15.6cm gap between each button would work the best.
The Fail
Before we move on to the full instructions, here are some things you SHOULD NOT do because we did – and realised we made a mistake.
We flipped the couch – DON’T do this
Basically start measuring and calculating to see what would be the best way to get 8 buttons placed equidistant from each other.
The problem unfortunately, was that we marked and measured from the back instead of the front – where we’re supposed to be putting the buttons on.
Here are some photos documenting our silliness nonetheless:
The Hack
Lesson learned: Instead of marking where you want the buttons to be at the back, mark it at the front on the slipcover – a white chalk from the tufting kit would work.
And yes, we didn’t take pictures here because we wanted to jump straight into tufting.
Surprisingly the board used in the Klippan wasn’t as thick as we imagined, so the needle poked right through fairly easily with some elbow grease.
First sign of the needle going through
Once the needle’s through, tufting it with a button is the easy part.
If you have forgotten how this works – check it out in this tutorial:
The tricky part would be tying it to the back of the sofa, so it’s important to make sure you use about an arm’s length of twine to get it to the other side and onto the springs of the Klippan sofa.
The best part is that if you don’t like how deep the buttons are tufted into the cushion, you can adjust them by moving the string accordingly – you will need a friend on the other side to push the button in more for a more obvious tuft.
And yes we’ve tested – the springs are thankfully safe, and will not break upon sitting.
You can also see how uneven my “arm’s length” was throughout the process but hey it worked out fine at the end!
Here’s how the front looks:
It gets easier once you get the first and second tufts done; You’d have completed it before you know it.
Okay, it did take us about 2-3 hours in total at the end as we did have to figure out measurements firstly, make a mistake and then get the job done.
The Reveal
And there you have it, an IKEA Klippan sofa hacked with a Rouge Emerald slipcover and tufting buttons.
Looks pretty damn premium and “not IKEA” yea?
It’s no surprise that this would be one of IKEA’s most popular sofa – check out our IKEA Klippan review here.
Want a Klippan sofa now? Let us know what you think in the comments below!
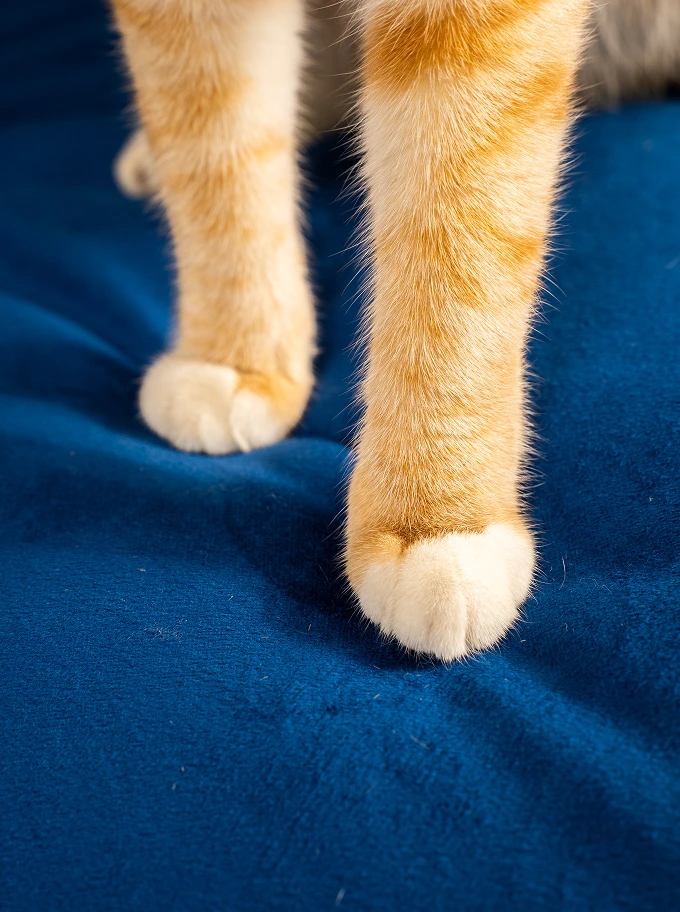
Sofa struggles? We've got you covered.
From pet mishaps to everyday spills, our sofa covers tackle life's little messes effortlessly.