If you’re not a Halloween fanatic, it would be easy to totally forget about setting up Halloween decorations until the very last minute. And even if you’ve started planning early this year, easy DIY Halloween decorations are always welcome, aren’t they?
Whether you’re totally in the mood or not, here is a compilation of some pretty impressive Halloween home decorations that are not only simple, but fun to do with your friends and family.
PS: Some of these are also great for getting the goblins kids to help out!
TABLE OF CONTENTS
- Timeless DIY decor ideas
- Dark vintage DIY decor ideas
- Easy-peasy kid-friendly DIY decor ideas
Timeless DIY decor ideas
Let’s start easy. Some of the best Halloween decorations are the ones that would never become “so last year”. Here are our top favourites that you may recycle annually!
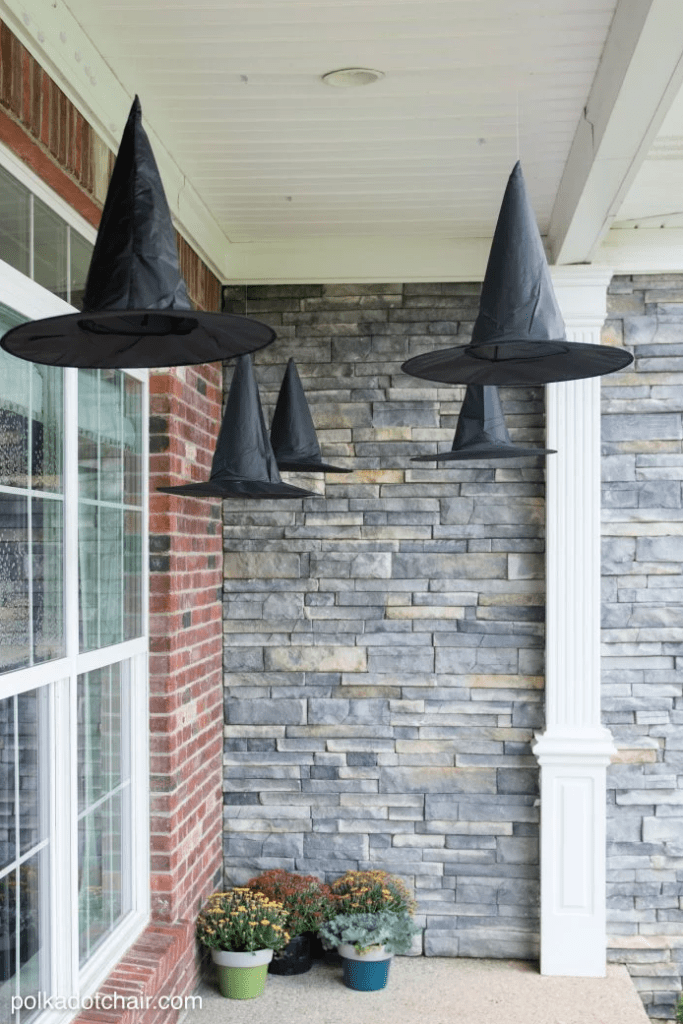
1) Floating Witch Hats
Now here’s a clever front porch decor idea.
If you plan on not turning on your porch light at night, you may consider adding some battery-powered candles/lights inside and around the floating hats!
You will need:
Witch hats (as many as you want)
Fishing line
A long needle
Safety pins
Command hooks
How to make this decor:
- After deciding how many witch hats you want hung over your porch, attach some command hooks to the ceiling where they will be hung.
- Using your needle, pull a fishing line through the point of the hat.
- Remove the needle and attach the fishing line to a safety pin.
- Hang your witch hat to the command hook on the ceiling, as high or as low as you wish.
- Repeat the process for all of your other hats and voila!
PS: you may include some hanging lights or fake candles (battery-powered) around the hats for a more Harry Potter themed look ;)
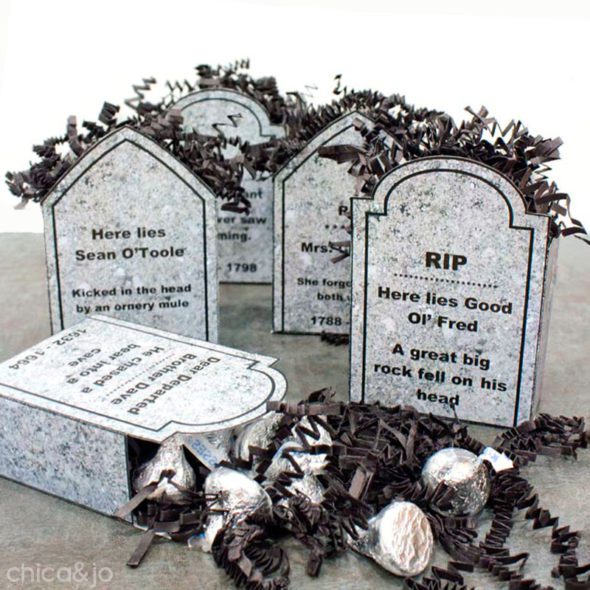
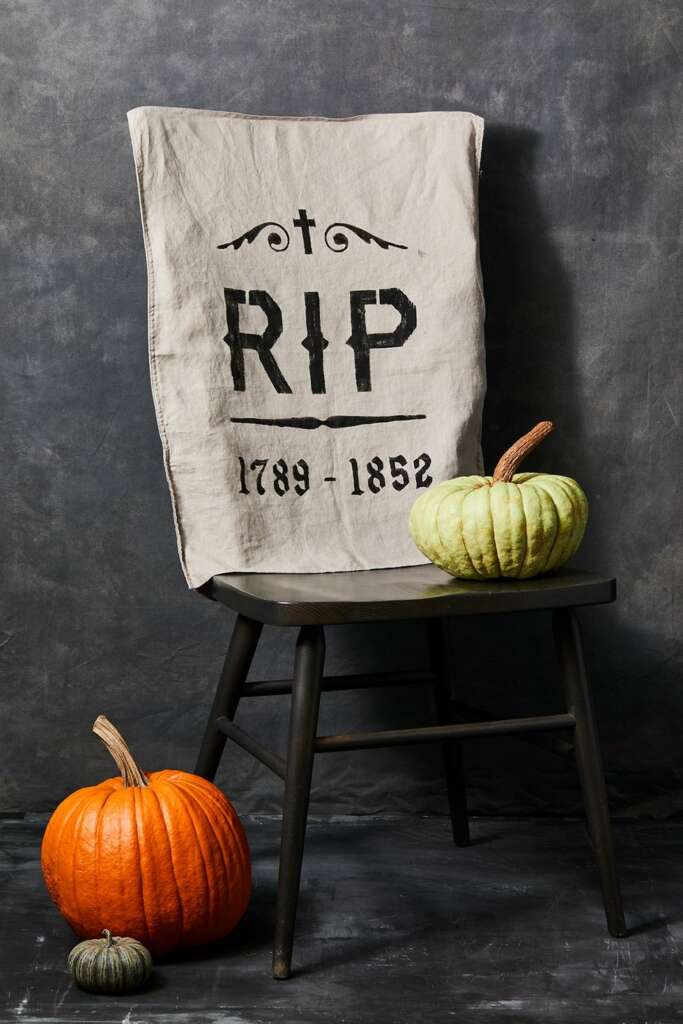
2) Personalised Tombstone Chair Covers
This is the ultimate dining seat setup if you’re hosting a Halloween dinner at home!
This is one time-consuming decor idea, but we promise this is well worth it when properly executed.
You will need:
Some RIP stencils with birthdates and names
Pillow cases in a similar colour of tombstones
A craft knife/scissors to cut out the stencils
Some tape
Black fabric paint
How to make this decor:
- Print out the tombstone templates on a large paper (or make your own by drawing them) based on the guests you’re having over. Be sure that each tombstone stencil contains RIP, their birth year to the current year, and their name.
- Cut the templates out into stencils and tape them over the pillow cases.
- Paint the stencils in carefully, using the black fabric paint.
- Carefully remove the stencils and let them dry completely for a few hours.
- Place them over your chairs!
PS: You can make the tombstone chair covers as personalised or as generalised as you wish.
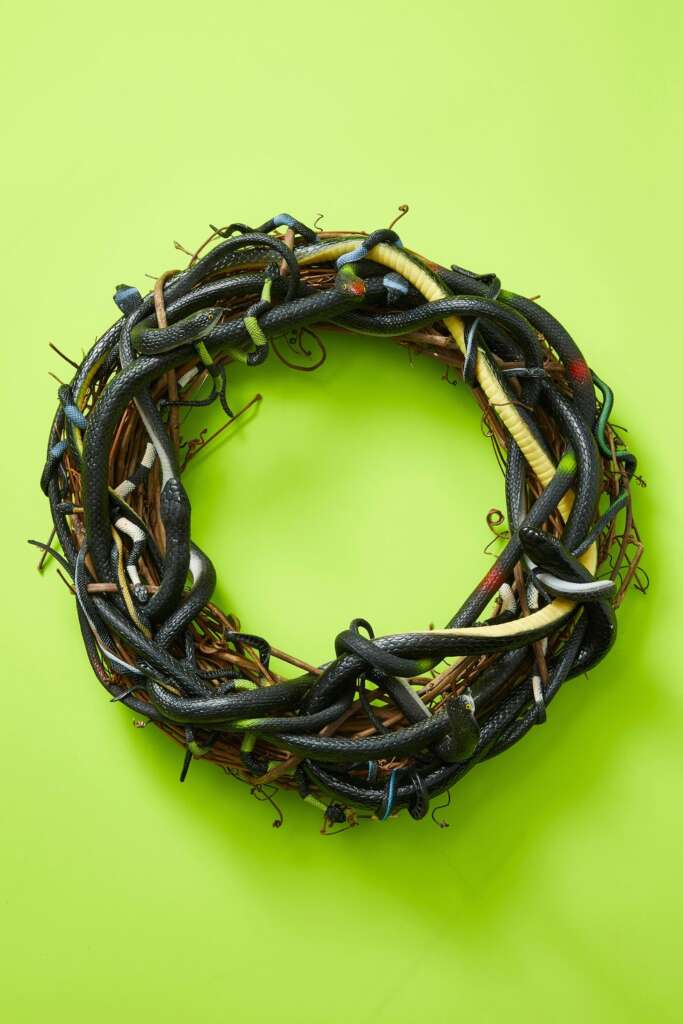
3) Rubber Snake Wreath
This one’s easy and creepy – and definitely a keeper!
For best results, be sure to hang this on your front door. It forces people to look at it!
You will need:
Many rubber snakes of various sizes, ranging from tiny to medium
A hot glue gun
A wreath
How to make this decor:
- Start by weaving each snake into the wreath, wherever they will fit.
- Continue doing this until all parts of the wreath’s original twigs are covered and only snakes are visible.
- Glue them using the hot glue gun wherever needed.
And you’re done! Welcome to the tombs of Medusa :)
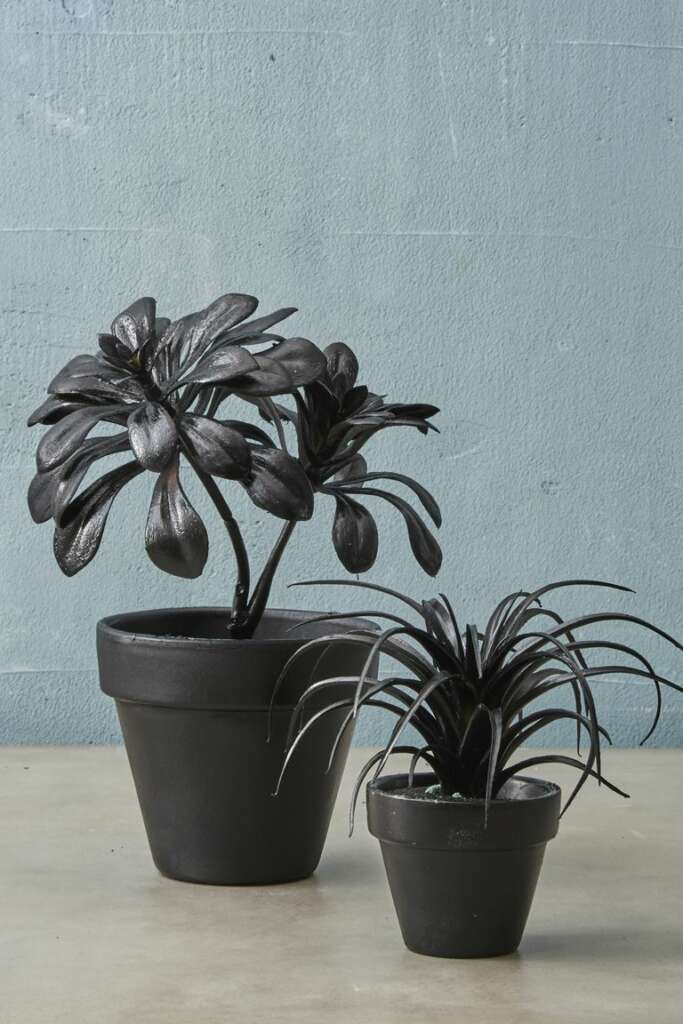
4) Blackened Plants
It is said that when Death walks into a room, all traces of life get sucked right out.
This is a simple creepy addition to any home or party during Halloween – and can be done with any ugly plastic plant props that you’re about to throw away!
You will need:
Plastic plants in pots
Black spray paint
Scrap paper (only if needed)
How to make this decor:
- Go somewhere outdoors or clear a space. Make sure you don’t do this anywhere exposed to flooring that you won’t want stained.
- Place your plastic plant props on the ground or on top of scrap paper.
- Spray paint all the plastic plants, leave to dry, and then repeat until it is completely blackened.
- Once completely dried, use these props to decorate any part of your home.
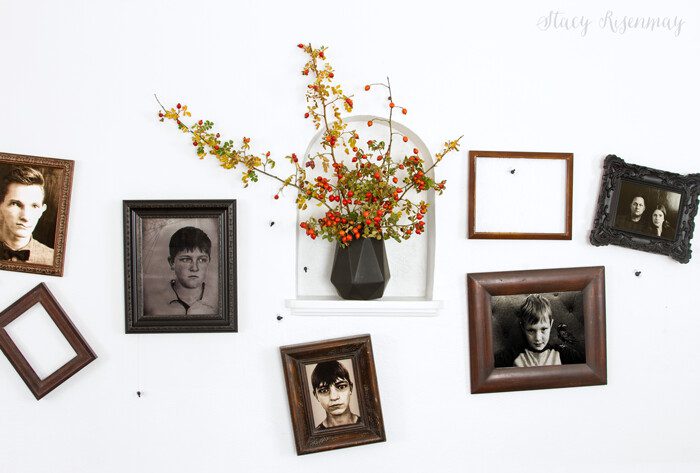
5) Cursed Gallery Wall
These kinds of family portraits sure aren’t common!
Your kids will have a blast posing for these! But if you don’t want to go through the trouble of taking new pictures, you can download stock images or simply print out creepy pictures off the internet for this.
You will need:
Printed out photos (either of yourself and your family, or stock images from online)
Photo frames for each photo
Plastic spiders and white thread
Hot glue gun
Command strips
How to make this decor:
- Choose the images you want hung on the gallery wall, and insert them into their respective photo frames (the older/darker-looking, the better)
- Plan the layout of the photographs on the wall – some would be lopsided, some would be upside down, some may even be hanging by a thread!
- Stick command tape on where you’ve planned the photographs to be
- Hang the photographs on the wall
Bonus: Glue some plastic spiders to the frame, or tie a white thread around them and hang them off the photo frames at random.
Tip: you can even arrange the plastic spiders to look like they are crawling out of the photographs.
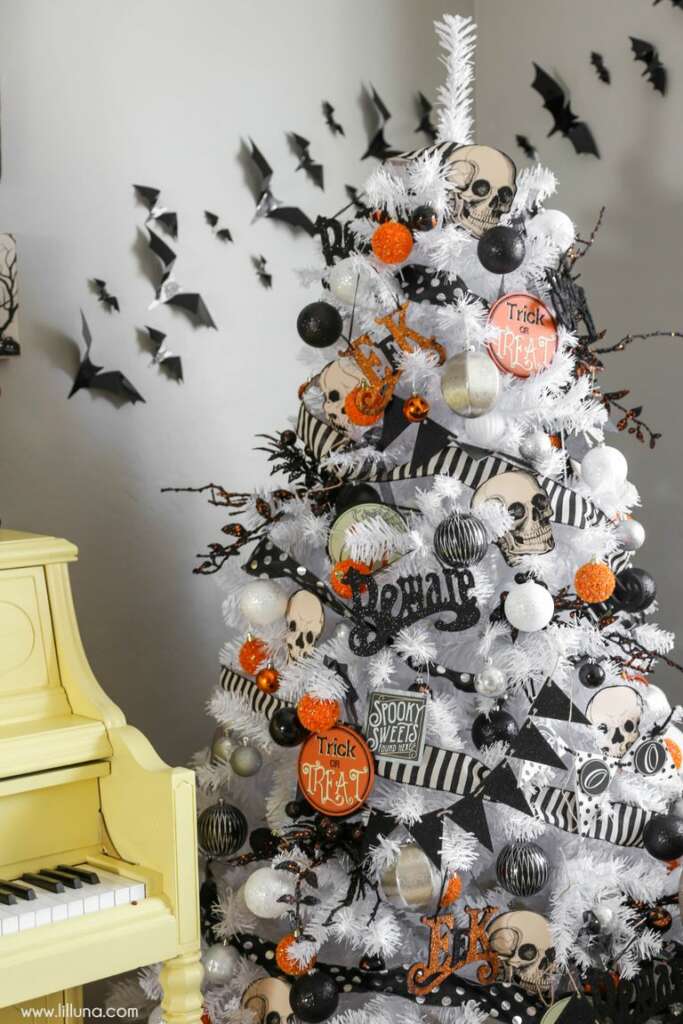
6) Halloween Tree
Why wait till December? Put up a tree for Halloween!
A Halloween tree is a great statement piece that can be made with discounted knick-knacks found at Halloween decor sales and any spare fall decorations!
You will need:
A black or white Christmas tree
Ribbons, banners, or any streamer decorations you want on the tree
Ornaments in Halloween colours (like black, white, orange, red, etc.)
Skull cut-outs or skull ornaments
Plastic or rubber bats
How to make this decor:
- Start by wrapping the ribbons, banners, or any streamers you have around the tree.
- Hang the Halloween-coloured ornaments around the tree so that they are as balanced as you want them to be
- Fill in the gaps with the skulls and other decorations until satisfied
Bonus: If you’re putting this tree in a corner or against any wall, you may also stick up some paper/rubber bats on the wall behind!
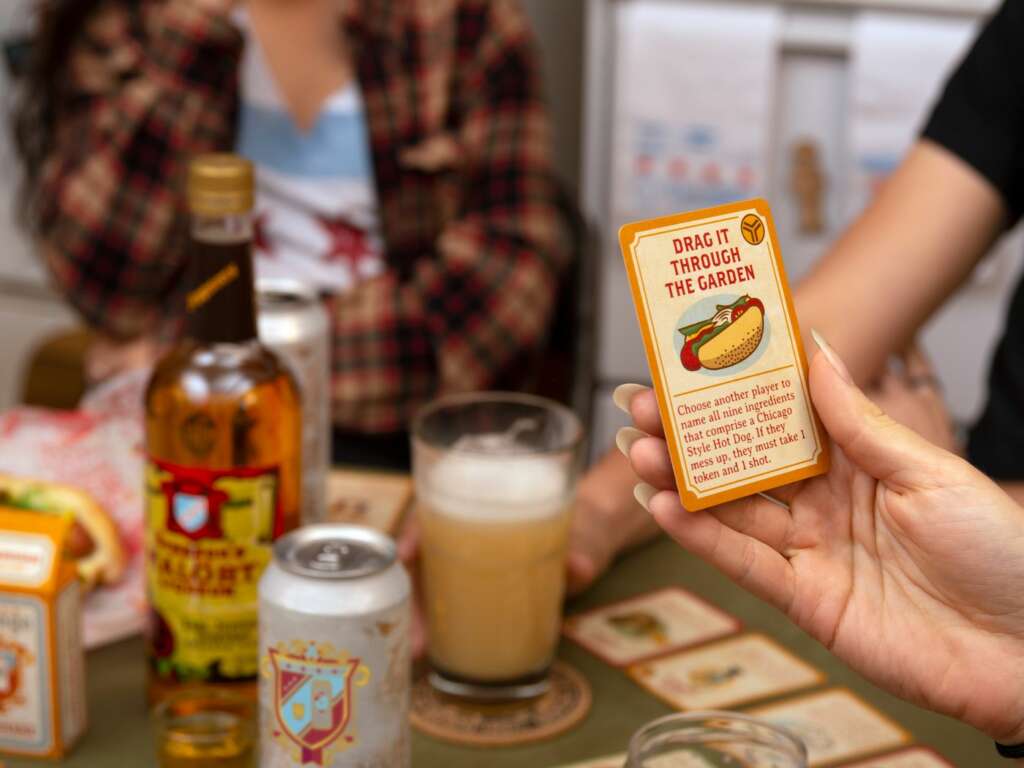
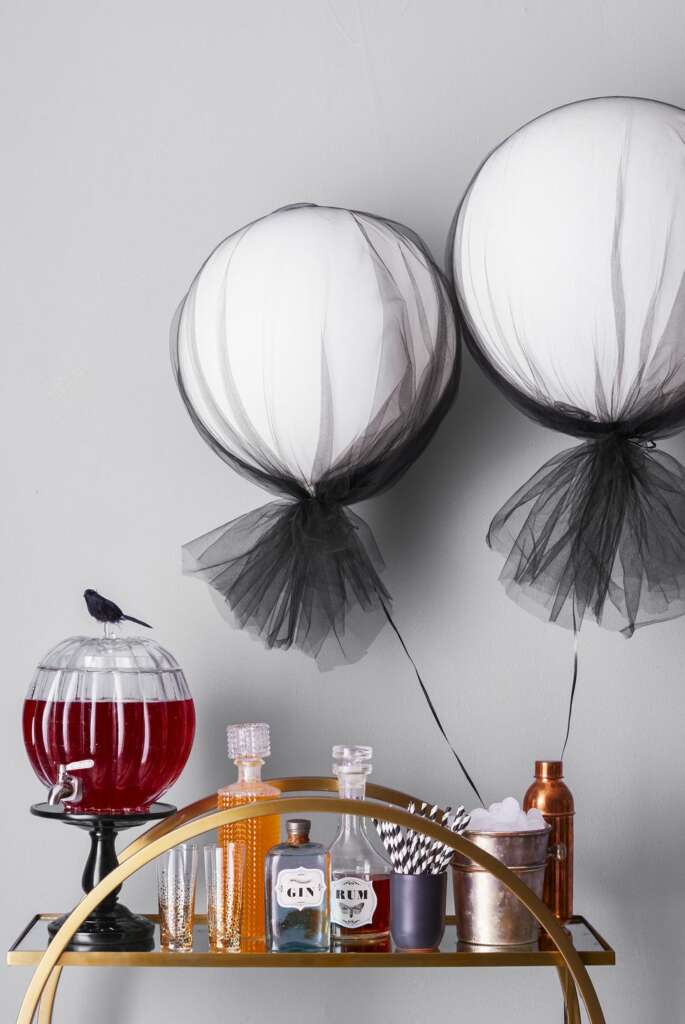
7) The Bar of Ghosts & Spirits
What a way to incorporate Halloween puns into your decor!
This decor is especially effective for those who have a bar or an alcohol display at home. But if you don’t have a bar, you can simply use the ghostly balloons anywhere in the house – and stick over the labels of all your canned and bottled drinks!
You will need:
White helium balloons
Black tulle (enough to wrap all the balloons)
Black ribbons (or fishing line)
DIY paper labels (or you could print them out from templates online)
How to make this decor:
- Print out (or write your own) labels for all your bottled drinks at home. These may say “Poison” or “Rat’s blood” or etc. Make sure they are big enough to cover the labels on your bottles at home.
- Stick these labels over all of the bottled drinks you have at home.
- Wrap your white helium balloons with black tulle and tie the ribbon/fishing line around them to make the “ghosts”.
- Tie the balloons around the spirits bar.
If you do not have any bottled drinks at home, simply make the ghost balloons and tie them wherever you want!
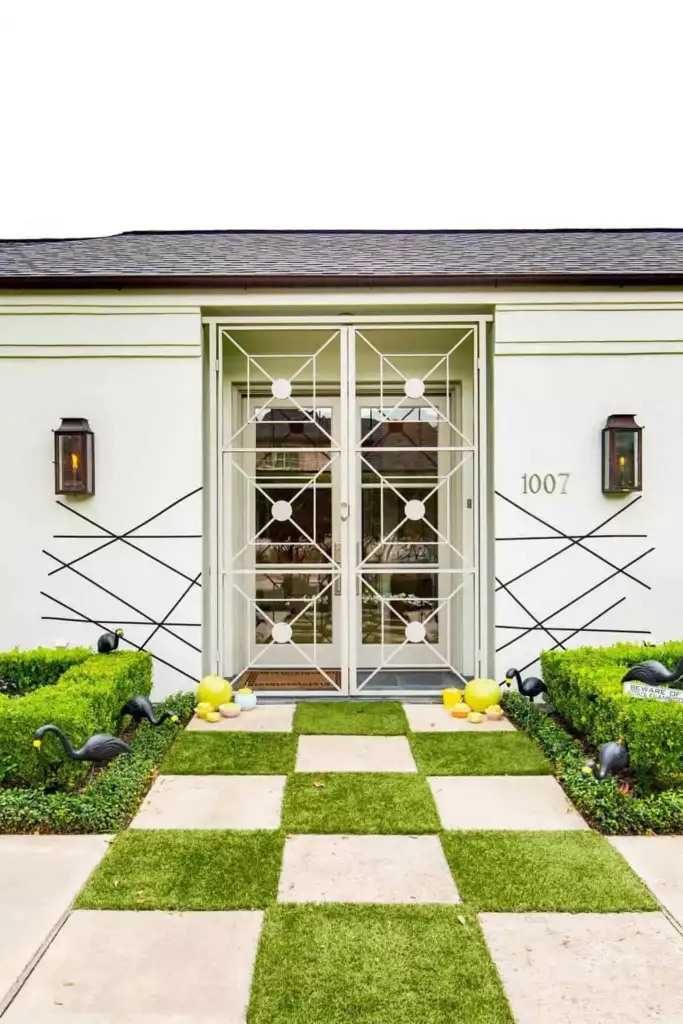
8) Black Flamingos
Turn your perfectly manicured front lawn into a twisted dystopia with black flamingos (ready to peck anyone who dares come near!)
Have you ever looked at a picture of a seemingly-innocent scene, only to find something disturbingly wrong with it? This decor makes for a subtle Halloween-turned front yard. In this case, less is definitely more.
You will need:
Ready-bought black flamingos,
Or;
DIY spray-painted black flamingos
If you do not want to sacrifice your pink flamingos (assuming you already have these), then you might want to get some new black ones. They’re easy to find, Amazon sells heaps!
Just stick them all over your lawn where the pink ones would normally be.
For the best effects, make sure your lawn grass is always perfectly green, short, and neat.
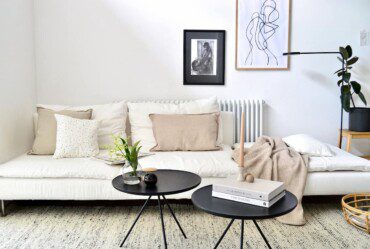
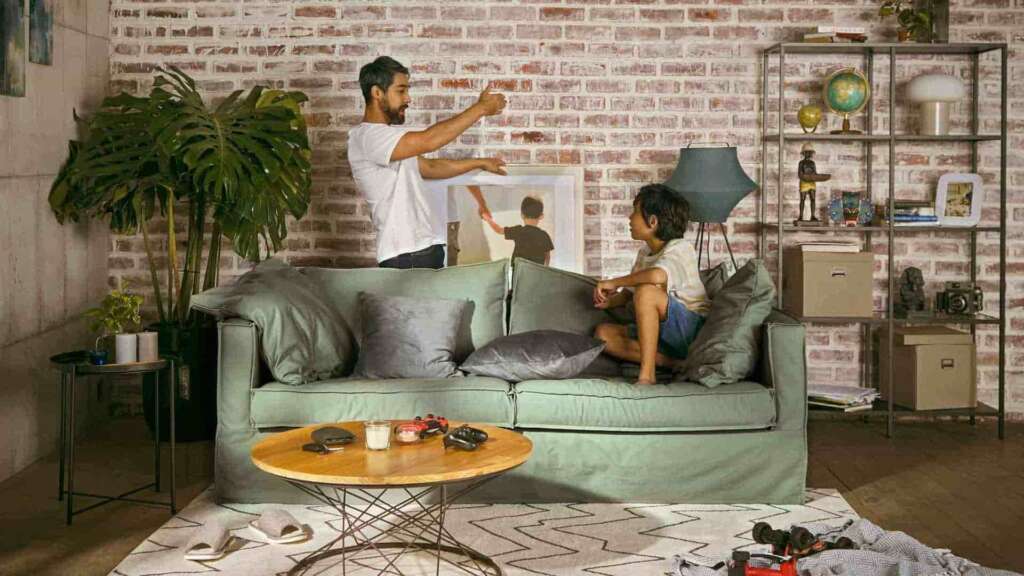
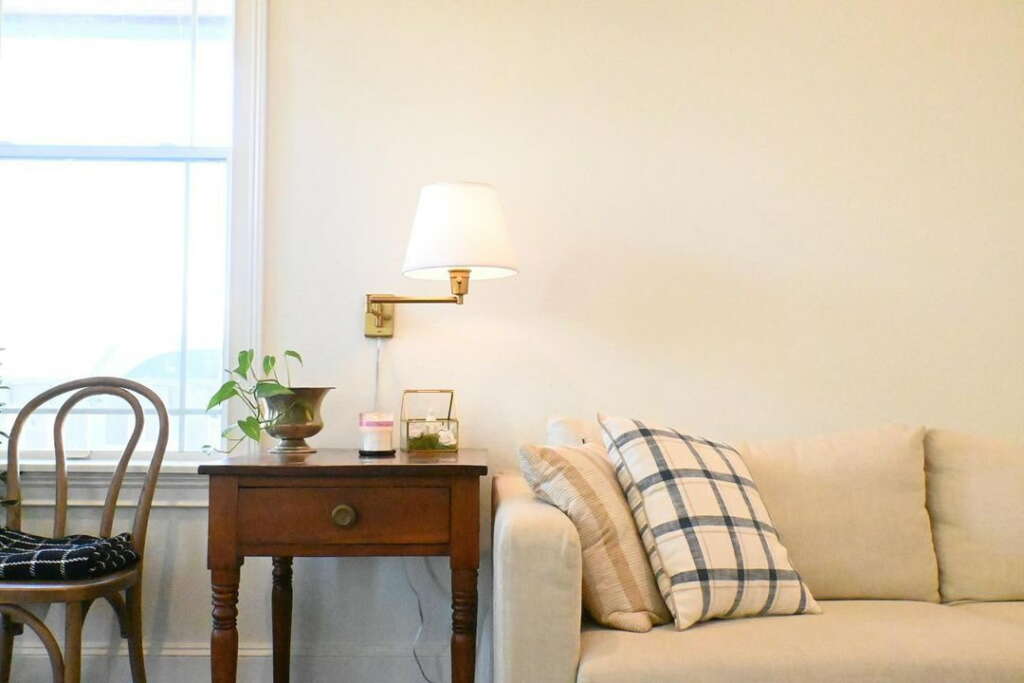
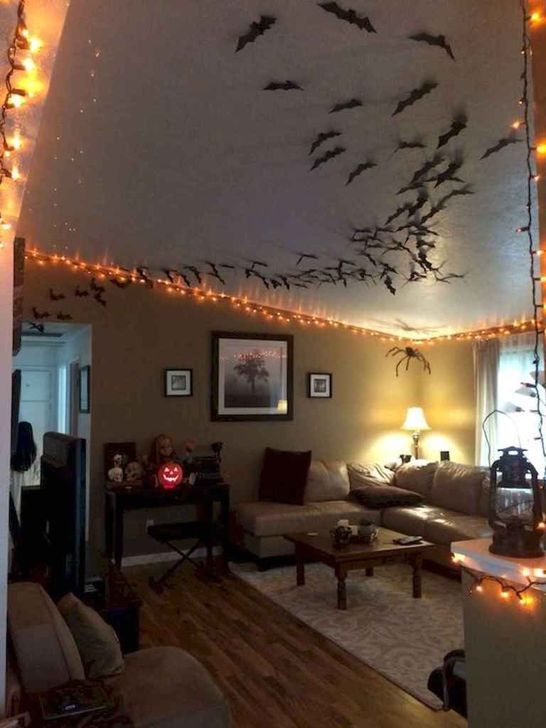
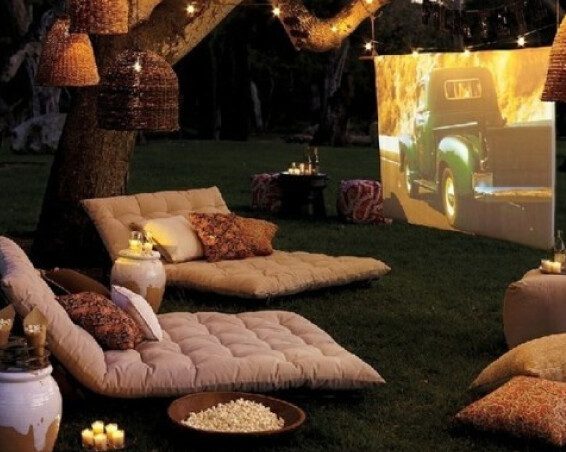
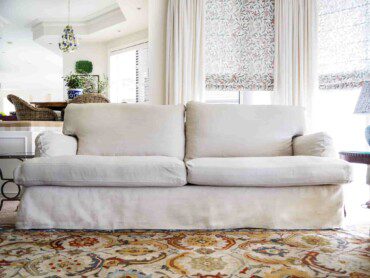
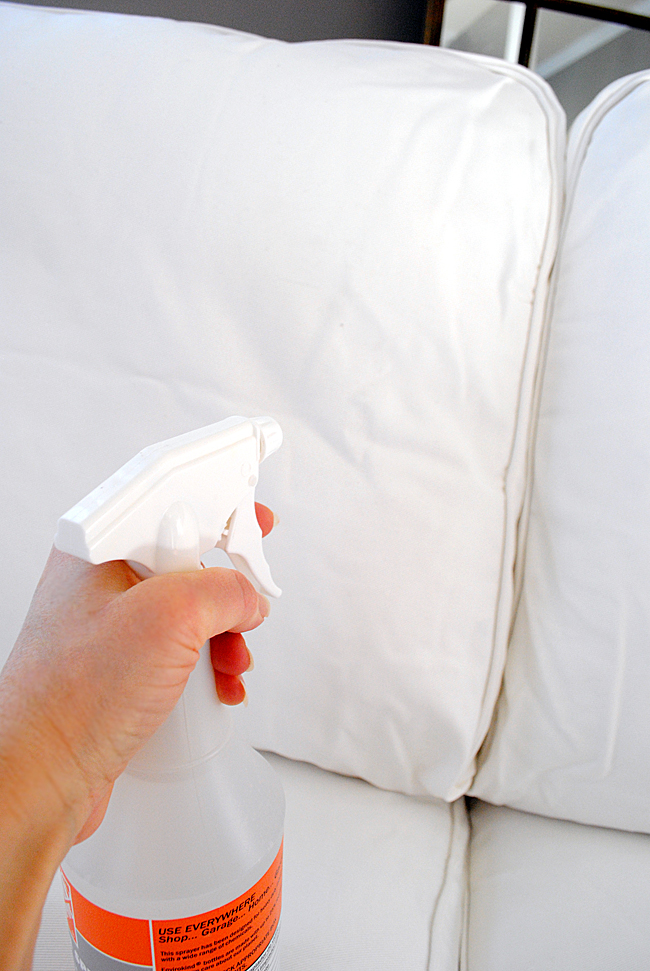
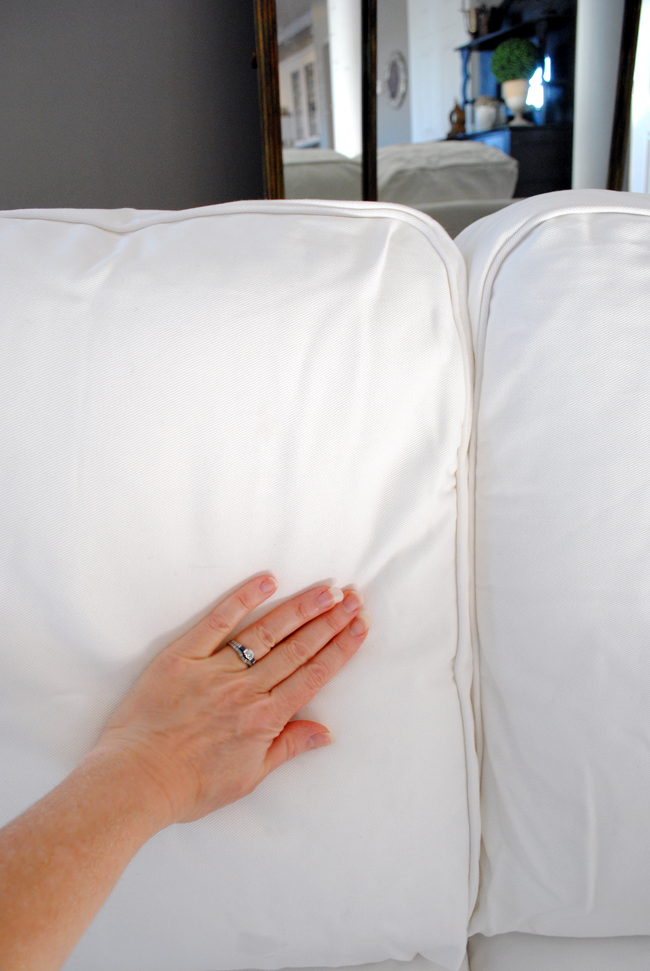
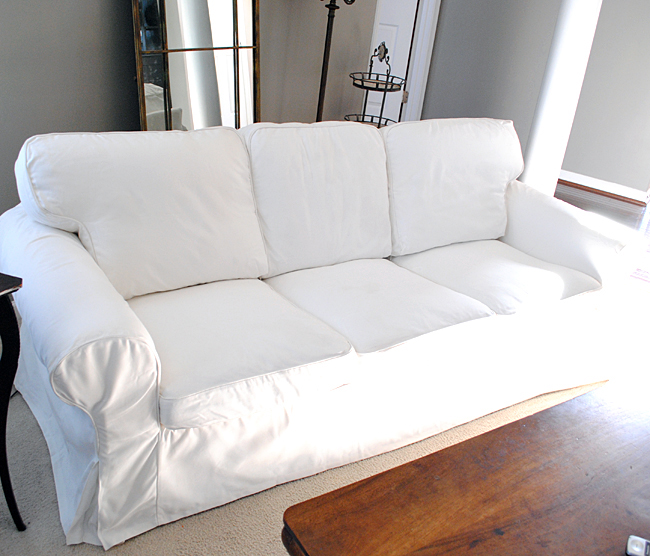
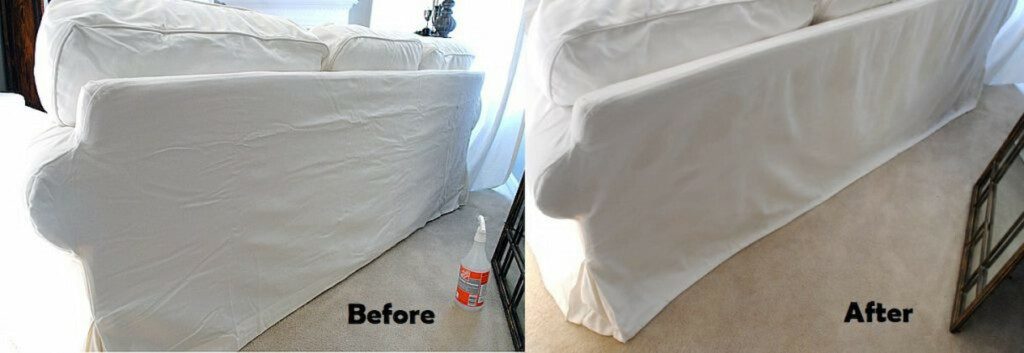
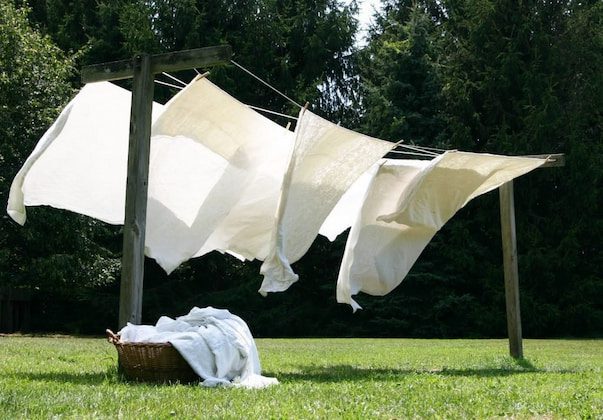
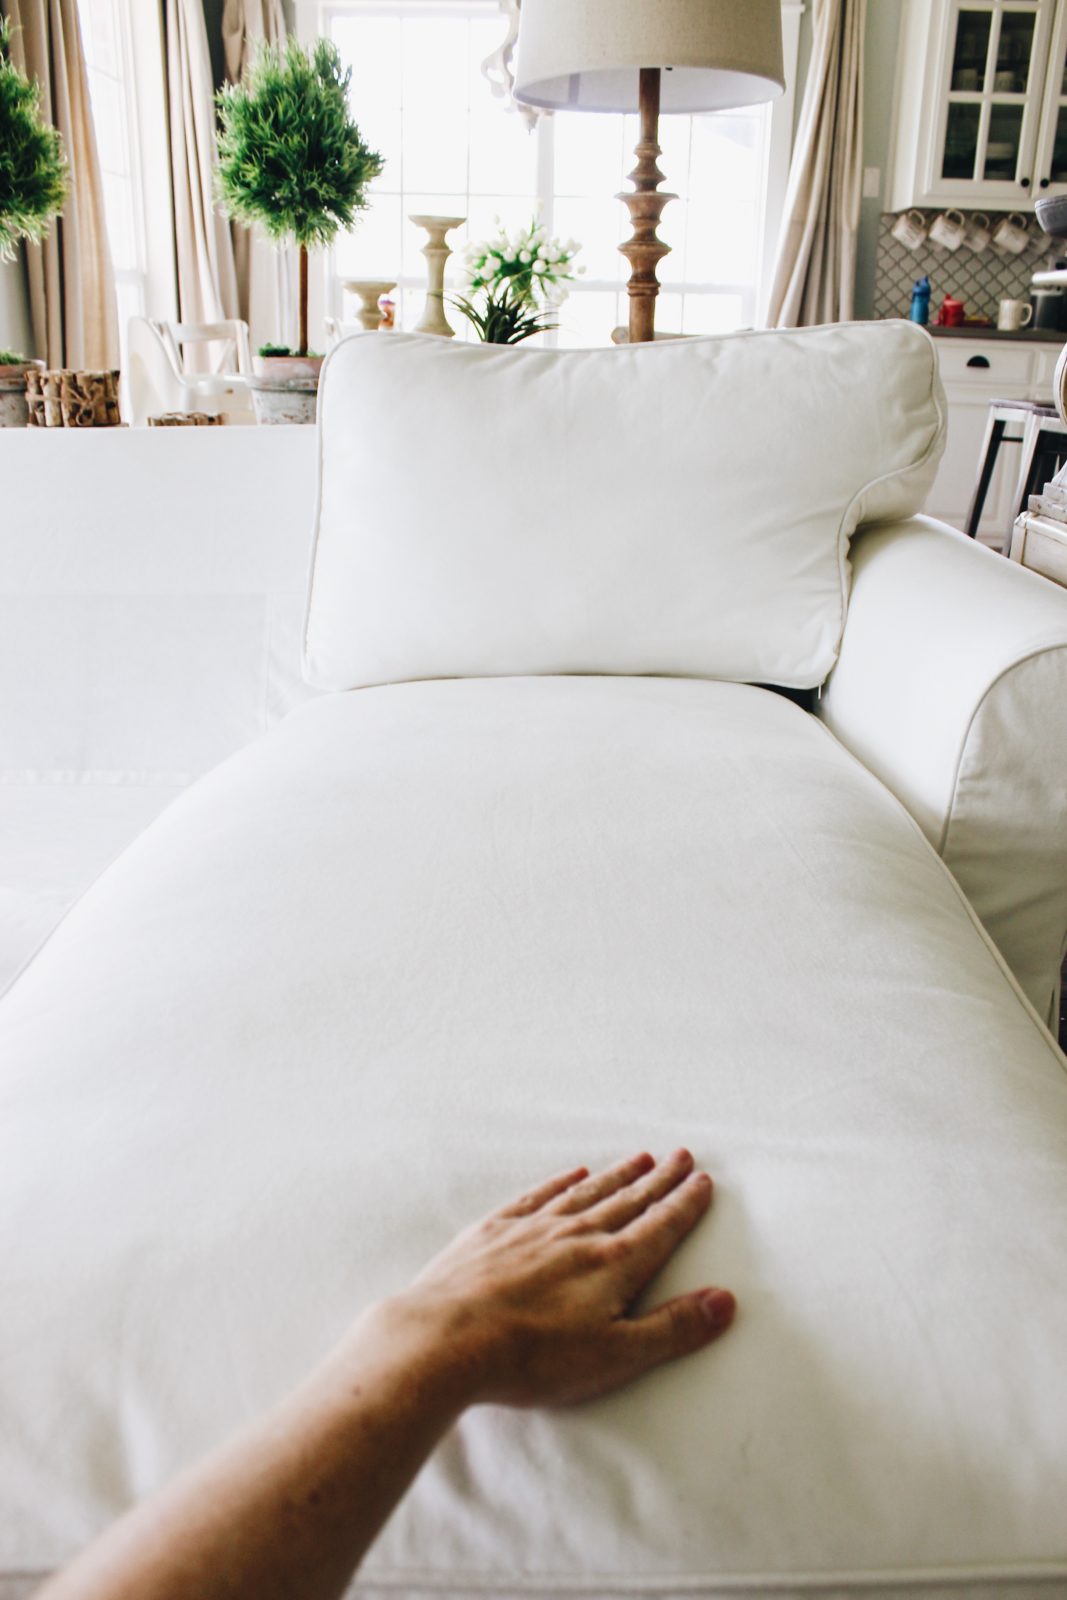
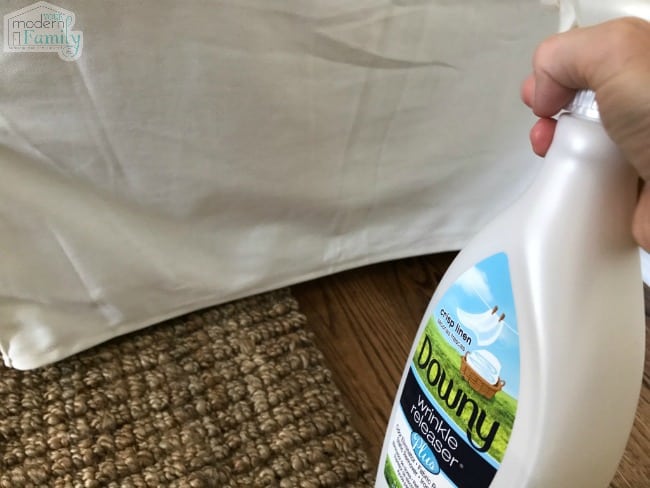
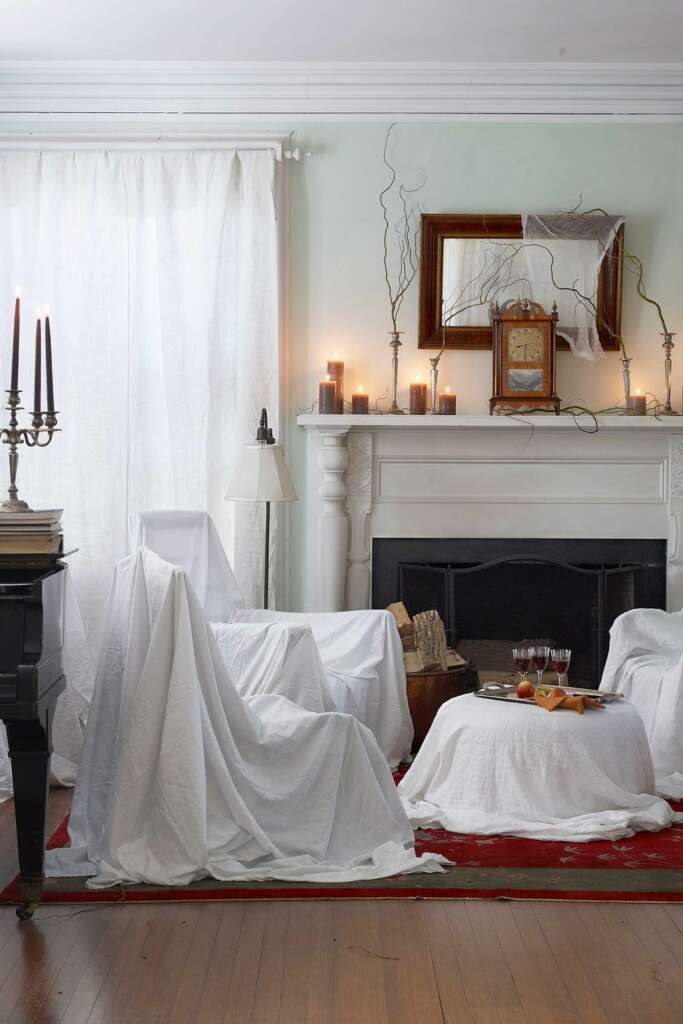
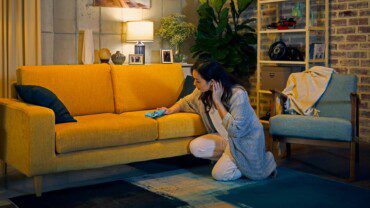
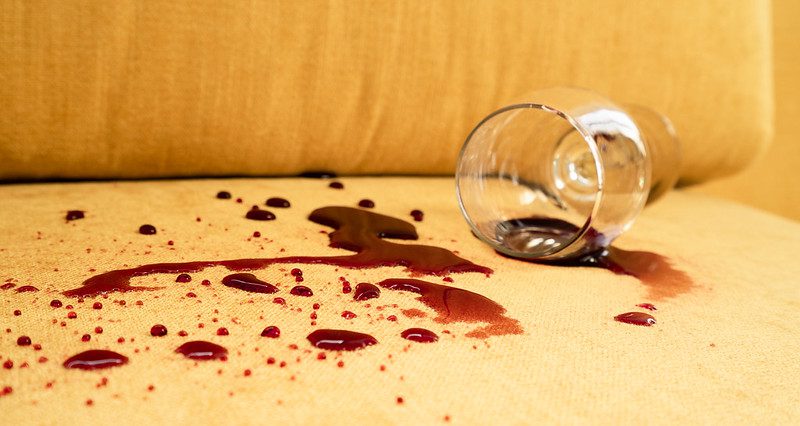
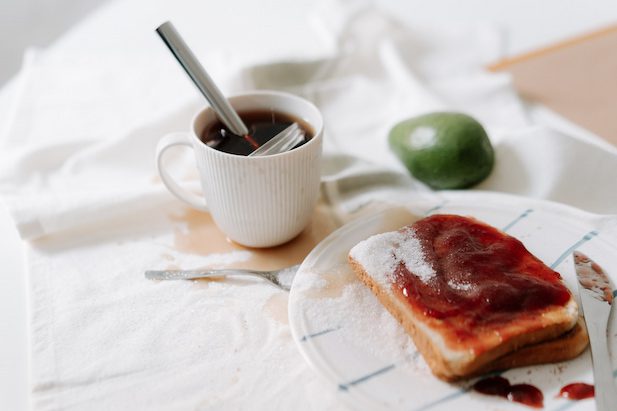
9) Eerie Abandoned Living Room
So easy, yet so creepy.
With a LOT of white cloth, drape over all of your chairs, tables, footstools, couches, and even your dining table. You may even use an off-white fabric to give it an older look. Then, adjust the lighting to make the atmosphere dim and spooky.
This decor sets the mood just right for Halloween – AND keeps your furniture clean from food and drink spills. Genius!
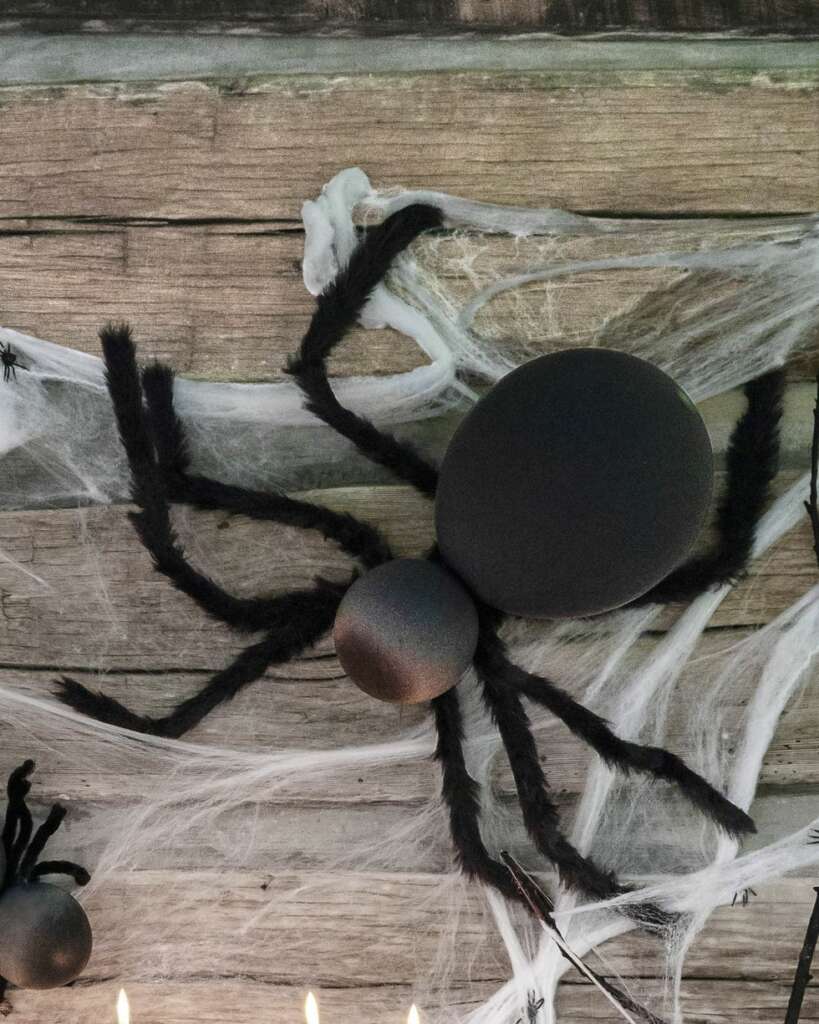
10) Large Balloon Spider
Spiders this big are best hung on the corners of the ceiling, or high up on walls. If they fall on your guests midway through dinner, be prepared to hear a lot of screaming.
They may be large, but they’re lightweight – which makes them ideal for hanging on walls and on top of furniture. For an extra creepy effect, fill the balloons with helium. You wont need to hand them!
You’ll need:
Black balloons big and small (they can either be normal or helium balloons)
Black pipe cleaners
Large black fuzzy wire
Fishing wire
How to make this decor:
- Make the body: Blow up the big and small balloons, tie them together in pairs. The large balloon would make up the spiders’ bodies, while the small balloons would make up the spiders’ heads.
- Make the legs: Using a black pipe cleaner, tie 8 large and long black fuzzy wires together and then twist wires on both ends to form a bundle of spider legs.
- Assemble the spider: Use another black pipe cleaner to tie the middle of the leg bundles and the neck of the balloons where they’re tied together.
- At last, hang the balloons up either with fishing wire, or let them float to the ceiling if they’re able to.
And there you have it! Ten timeless DIY Halloween home decorations that will never go out of date in or out of your home.
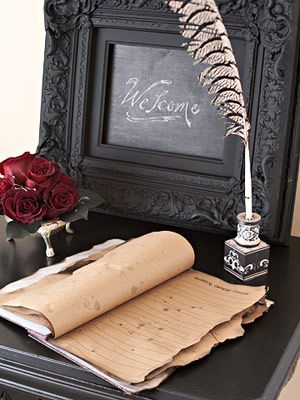
Dark Vintage DIY Decor Ideas
It’s now time to be transported to the past! These Halloween decorations will turn your house into a dark, spooky Victorian portal for you, your family, and especially your house guests.
Before diving in, keep in mind that the recurring elements of a haunted Victorian theme are things like; candles, black lace, vintage newspaper-wrapped items, old silver or bronze trinkets, old stained (almost matte) mirrors, dried branches and flowers, skulls, old bones, the occasional black crow, and old cloth.
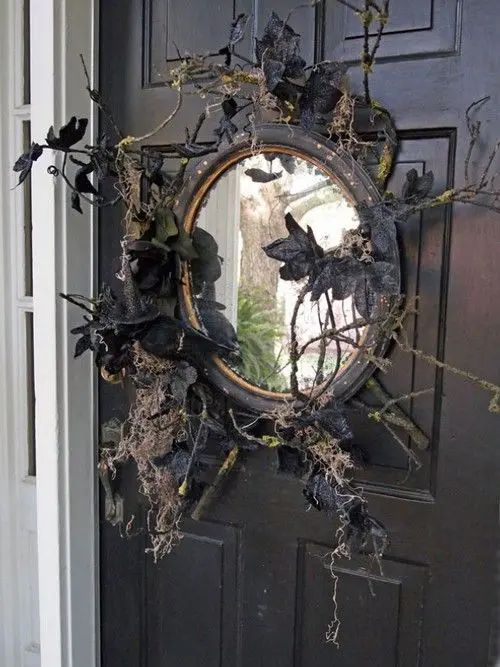
1) Haunted Mirror Wreath
Haunted mirror on the door, who’s the scariest of them all?
Put a vintage twist to your Halloween wreath and you’ll be sure to set the mood for your house guests even before they enter your house.
You will need:
A hanging mirror (preferably old)
Black spray paint and tape (optional)
Twigs and dried leaves
Hot glue gun
How to make this decor:
- Begin with spray painting the twigs, leaves, and mirror black (optional). Use the tape to cover the mirror portion before spraying it, to keep it clean.
- Once dried, angle the twigs and arrange them behind the mirror so that the bent parts are facing you.
- Glue the twigs to the back of the mirror. Then stick the leaves on the twigs or behind the mirror where you want them to be.
- Once the glue has completely dried, hang the mirror outside your front door.
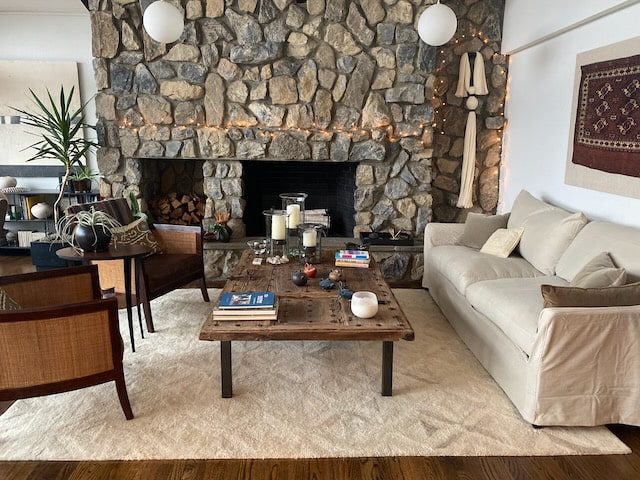
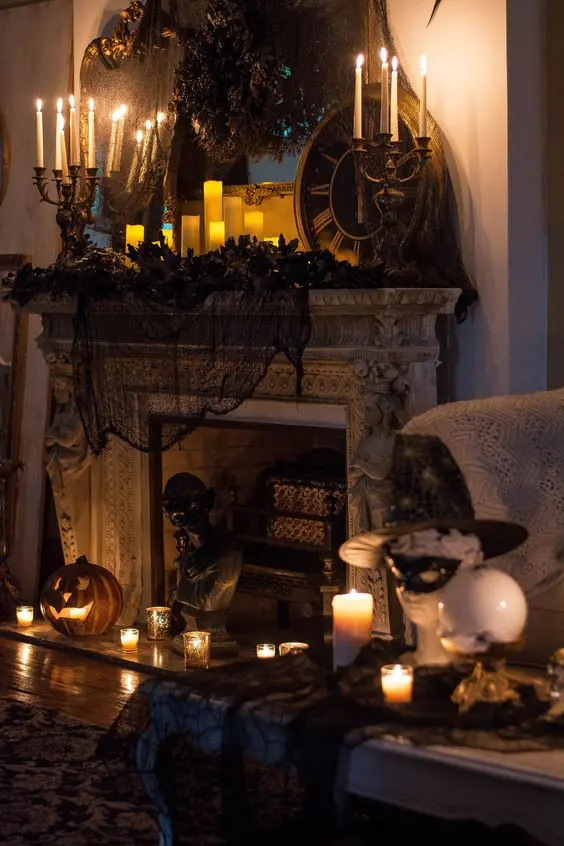
2) Vintage Fireplace
If you watch the TV series What We Do In The Shadows, then you’d pretty much have an idea of how a vintage fireplace would be set up.
This is a decor setup that uses almost every element of vintage Halloween decor ideas! You can go as busy or as simple as you want – whichever suits your home best.
You will need:
A large old clock (optional)
Old candelabras
Thin long white or black candles
Long black lace
Short pillar candles
Faux black or dark-coloured blooms
Stacks of old hard-covered books (optional)
A large or small old mirror with a metal stand/frame
How to make this decor:
- Start by draping black lace fabric all over the top of your fireplace mantle and letting it spill over the front a little.
- Next, arrange the larger objects in the background first. This would be your clocks, mirrors, and anything else that takes the most space.
- Arrange your candelabras and candles all around and in between the rest of the decor, leaving some space to later snake your faux black blooms in between them.
- Do the same for the floors – you can either pile your candles altogether in front of the fireplace, or scatter them in the corners of the fireplace.
- Depending on whether or not you want to use your fireplace, you may stack some old books where the fire would normally be. If you do plan to use the fireplace, then you may stack the books on the mantle of the fireplace and put candles on top of them instead.
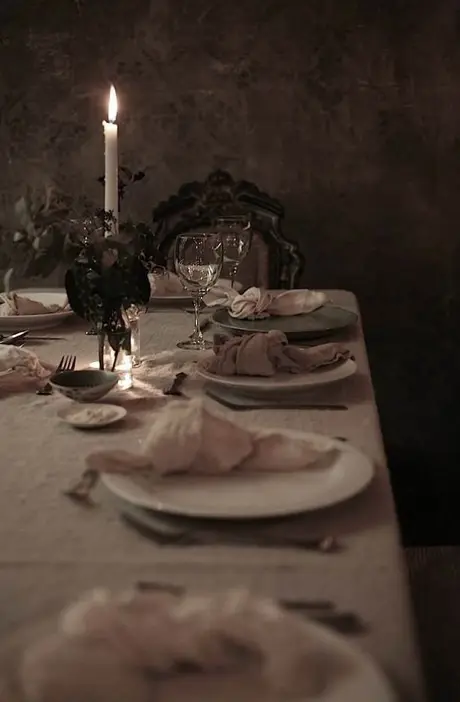
3) Dark Victorian Dining Table
A vintage Halloween home theme would certainly not be complete without a Victorian dining setup!
In old Victorian fashion, dining tables were elaborately set up for dinner parties. Each place setting would be arranged so that there were plates, bowls, cutleries, and a water goblet at the right of the plate. There were even separate kinds of cutlery present for different types of food!
In modern day, we tend to focus on the aesthetics rather than the elaborateness of a certain look or theme. This is largely for the sake of practicality – we can’t always have ten cutleries on the table; or stretch out a dinner three hours long!
You’ll need:
Your dining table and chairs (a wooden set would work best)
Neutral-toned table cloth for the entire table
A matching set of plates, bowls, and saucers (the more old-fashioned, the better)
A set of shiny metal or silver cutleries (the more intricately designed, the better)
Napkins for each sitting place
Drinking glasses or wine glasses
A metal water pitcher
Tall candelabras and candles
Slim vases
Dried flowers and leaves with stems
How to set up the table:
- Start by spreading the table cloth evenly out on the table so that each side is perfectly even.
- Arrange the candlesticks, candelabras, candles, vases, and dried flowers in the very middle of the table. They may either be set in a straight line, or gathered around the centre (keep in mind that food will be laid out on platters around the centrepiece!).
- Space out each sitting place according to your table size or number of guests planned. Then, lay a plate on each sitting place, along with the forks, spoons, knives, and finally a drinking glass (or better yet; a wine glass) on the right front side of each plate.
- Place a napkin on top of each plate – if the napkin is made of fabric, you may twist it into a knot or simply fold it into a square.
- When serving food, be sure to fill a few water pitchers with water and place them along the table, every 3 sitting places or so.
Bonus: To amplify the setting, use taller candles and more dried flowers to decorate the centre. This will create a gothic “frame” for the food when it is served around the centrepiece! You can also play around with the dark or light themes of the table cloth as well as the plates and bowls.
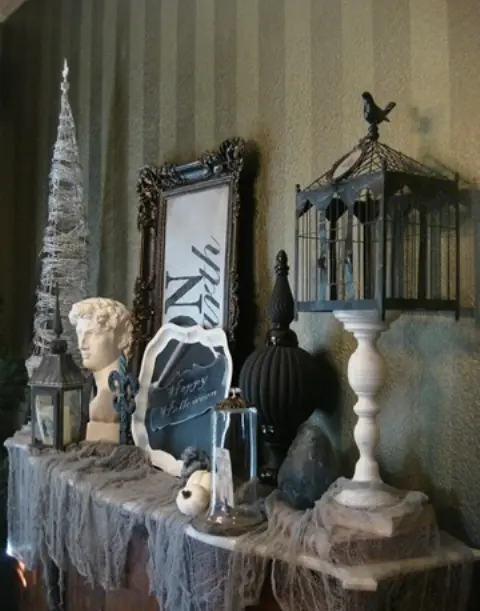
4) Gothic Vintage Shelves
This decor is to keep with the vintage theme around the house; be it in the kitchen, the bathroom, the foyer, or even in the entryway.
You’ll need:
Grey, black, or dark brown sheer fabric
Metal or bronze photo frames
Metal or bronze candlesticks
Any other available decor such as vases with dried flowers or glass vials, or crow statues
How to set the shelf:
- Firstly, lay the sheer cloth over the shelf and make parts of it look like it is hanging off the shelf.
- Next, place your largest decorations first. The most effective large decorations would typically be picture frames and candlesticks.
- Fill in the gaps with all of the smaller decorations, and your shelf is complete! Repeat the process for any other shelves you plan to decorate.
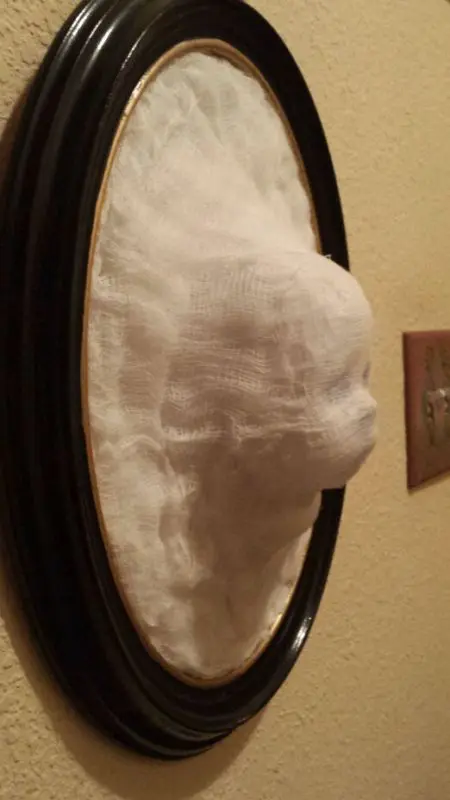
5) Trapped Baby Ghosts
This puts a spin to the common tale of ghosts caught in pictures – these ghosts are literally caught inside the picture frame!
You’ll need:
Round black picture frames (you may also spray-paint them black)
A plastic baby doll head
10 cheesecloths large enough to generously cover the frame and the baby head
Cardboard/existing frame backing
Wax papers
Petroleum jelly
Heavy starch spray
Hot glue gun
Sellotape
Scissors
How to make this decor:
- Cover the cardboard or frame backing with wax paper, use sellotape to lightly secure it.
- Cover the baby face with petroleum jelly and place it in the middle of the wax paper board.
- Drape a cheesecloth over the baby face and spray it with the starch spray. Smooth the saturated cheesecloth over the features of the baby face with your fingers.
- Continue adding 1-2 layers of cheesecloth at a time and spray with more starch until all 10 layers are done. Leave to dry for a day or so.
- Carefully peel away the cheesecloth form from the wax paper – the baby face should lift quite easily from the baby head.
- Remove the wax paper from the board and then trim the cheesecloth forms to fit the board exactly. If needed, you may also lightly glue the cheesecloth to the frame backing to keep it in place.
- Place the ghost baby face into the picture frame and hang on the wall to haunt your fellow house guests!
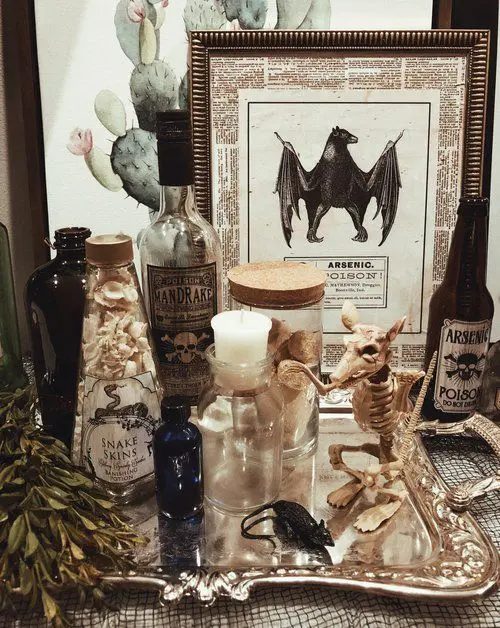
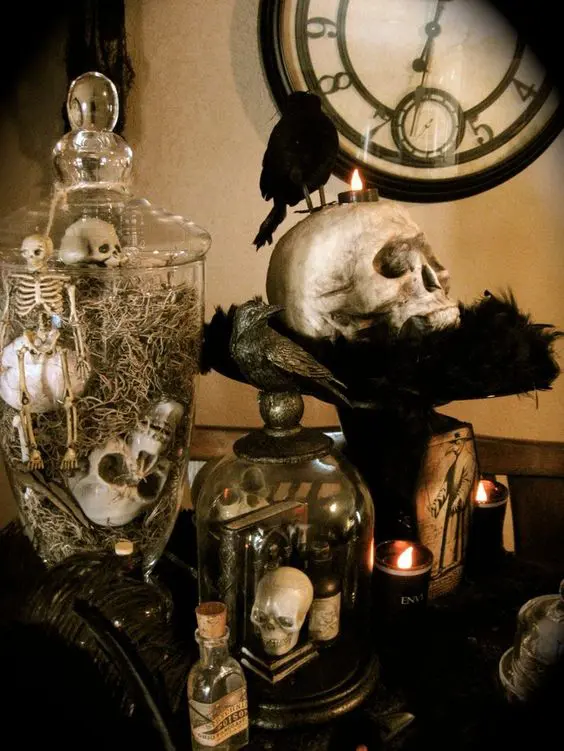
6) Dark Apothecary Decor
Dark apothecary = twisted experiments. Think of Dr. Charles Montgomery from American Horror Story – Murder House. This would be anything similar to animal taxidermy, displays of dried body parts from unknown creatures, anatomy drawings of rats and humans, dark liquid-filled bottles, old-fashioned cursive notes on browned paper, poison-labelled bottles, and similar items laid out on silver trays.
You’ll need:
All of the items mentioned above.
How to set up this decor:
Using a metal tray, you may either arrange these items to create a display, or you may use them individually to decorate different areas of your house.
7) Cottagecore Dark Magic
Dark vintage home decor wouldn’t be complete without some gothic cottagecore elements. The rural aesthetic of cottage-themed items easily create an old-fashioned atmosphere. When in doubt, just throw together some bones, black crows, candles and dull linens for a truly sinister vibe!
You’ll need:
Skulls and bones
Glass jars with or without lids
Candlesticks or pillars
A black crow (or several)
Candles
A dull white or dark coloured linen (optional)
Black feathers (optional)
Hay (optional)
How to set up this decor:
- Line the surface with the linen you have chosen (optional) and set up the largest decorative pieces first. If you have candlesticks or pillars, place them where you want to display the skulls.
- Fill up your glass jars with hay or other stuffing materials, then place some bones and feathers in it.
- Lay more feathers down on the surface of the linen around the taller decorations. Lay the smaller decorations on top of it.
- Place some candles around the decoration pieces. Light them up when you have guests over.
*Be careful not to leave the candles burning unattended, especially if there are feathers or hay close to it!
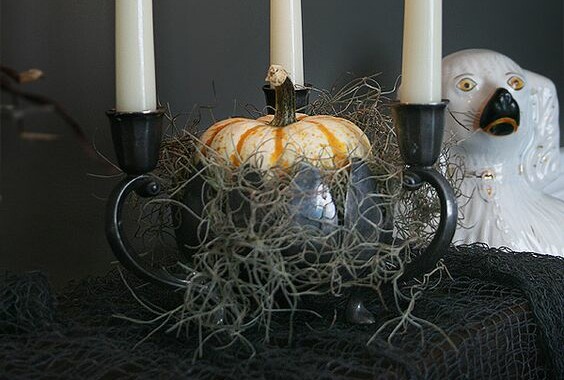
8) Dark Medieval-Styled Candles
There’s no faster way to project a vintage vibe than to use something that seems even slightly medieval. There’s something about the simplicity in the craftsmanship of things made in olden times that you cannot replicate with modern everyday items.
You’ll need:
An old black metal candelabra with a space in the middle
A pumpkin small enough to fit the space in the middle of the candle holder
Candle(s)
Fresh or dried hay
How to set this decor:
- Place some hay in the middle of the candle holder. Let the hay stick out of the space a little, as it would give it a nice rustic look.
- Place the pumpkin right on top of the hay.
- Place the candles in the candle holder. Use this when guests come over, or at night.
This simple candle arrangement can be used in various parts of the house, including in places like the kitchen, bedroom, and even the bathroom!
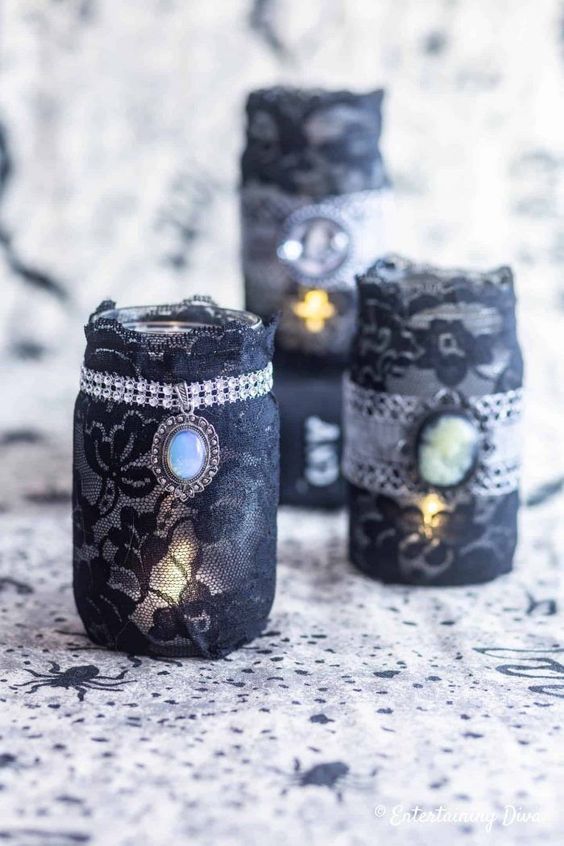
9) Victorian Candle Jars
These may be the fastest way to turn modern everyday household items into a Victorian decorative piece for Halloween.
You’ll need:
Mason jars
Tealight candles
Black lace
Silver, black, red, or white ribbon (any colour you prefer)
Double-sided tape or a hot glue gun
Victorian style pendants (available at most dollar stores)
How to make this decor:
- Neatly wrap the black lace around the mason jar, folding and tucking the corners in. Glue or tap it directly to the jar.
- Glue a ribbon around the neck or the centre of the jar
- Glue a pendant onto the ribbon to hide where the ribbon connects
- Light a tea candle and slowly slide it inside the mason jar
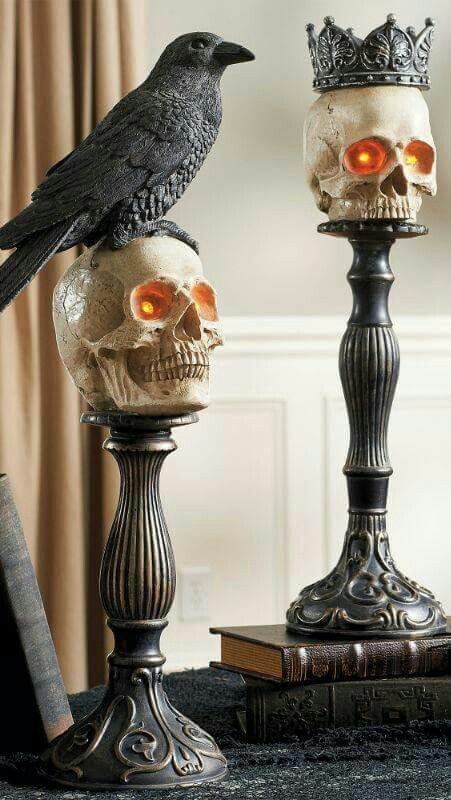
10) Severed Skull Displays
Candle holders can be used to display items other than candles, too. Instead of heads on pikes, try skulls on pedestals!
You’ll need:
Tall candle holders with a flat base (the thicker the base, the better)
Skulls that will fit on top of the candle holders
Faux crows
Hot glue gun (optional)
A crown that fits on one of the skulls
How to make this decor:
- Place the candle holders where you want to display the skulls, then place the skulls on the candle holders. This would be your skulls on pedestals.
- On one of the skulls (or several), add a crown over top. This would be the skull of a king you once “slaughtered”.
- On some of the skulls, you may place a crow over top. If the crow is not stable enough to balance on the skull, use the hot glue gun to secure it.
You may of course pick and choose your favourite DIYs from this list and make the decorations that work best for your decor plan. But the best part about these vintage decor ideas is that you could do them all at once if you’re fresh out of ideas and still totally nail your Halloween decor!
Easy-peasy kid-friendly DIY decor ideas
Trying to keep your home Halloween ready, but still kid-friendly? These decor ideas are not only Rated-G, but they also make great DIY activities for kids of all ages!
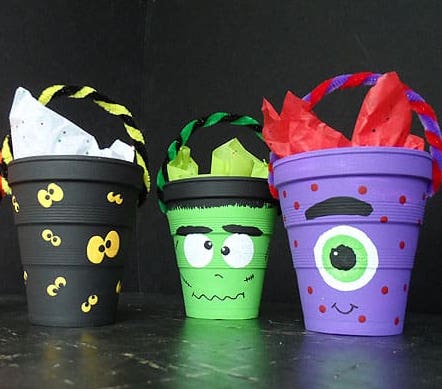
1) Monster Treat Cups
First order of business: candy! The kids would love to make their very own treat cup with their favourite monster to take when going trick-or-treating. This DIY is super fun and easy to make. It even doubles as Halloween decoration way before the night of trick-or-treating.
You’ll need:
Styrofoam cup
Craft paint we used orange, green, purple, red, yellow, black and white
2 pipe cleaners we used green, black, orange, red, yellow and purple
Paintbrush
Sponge pouncers
Sharpie markers
Toothpick
How to make these Halloween treat cups:
- Paint each cup with desired colours and allow them to dry. 2-3 coats may be needed, depending on your paint.
- Use the paintbrush or any other tool you have to draw the monster faces, eyeballs, and facial features on the dried cups.
- You may use Sharpie markers to draw on finer details such as stitches, mouths, eyebrows and even for outlining.
- Make the cup handles by first twisting two pipe cleaners together.
- Punch a hole on both sides of the cup just below the rim, using the toothpick.
- Then, insert the ends of the pipe cleaner handles into the holes on the outside of the cup.
- From the inside of the cup, bend the ends of the pipe cleaners to secure them in place.
- Repeat this process to make as many treat cups as desired.
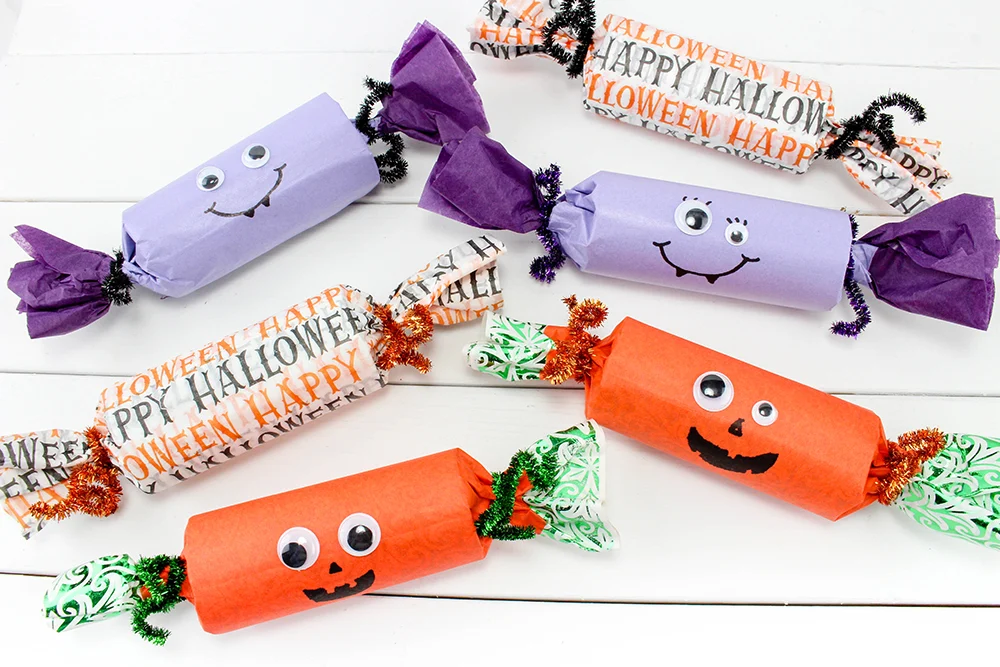
2) Friendly Monster Poppers
Crank up your trick-or-treat game a few notches with these awesome party poppers! They also make great party favours for kids and adults alike.
You’ll need:
Empty toilet paper tubes (save them, don’t throw them away!)
Craft paper – orange, green, purple, light purple, Halloween print, etc.
Pipe cleaners
Googly eyes
Glue stick
Small candies and small toys
Marker pens
How to make these poppers:
- Use 2-3 sheets of paper and lay the toilet paper tube on it.
- Glue the sheets of paper down to the toilet paper tube, and roll it tightly. Glue the other end as well.
- Hold the ends of one tube on one side and twist the pipe cleaner tightly to seal it.
- Fill the tube with small candy pieces, tiny toys, and other treat items you have.
- Twist a pipe cleaner on the other end to seal it shut.
- Draw a mouth with or a face with marker pens and stick googly eyes to complete the look!
Feel free to use different wrapping papers and any kind of decorations to stick on the monster poppers.
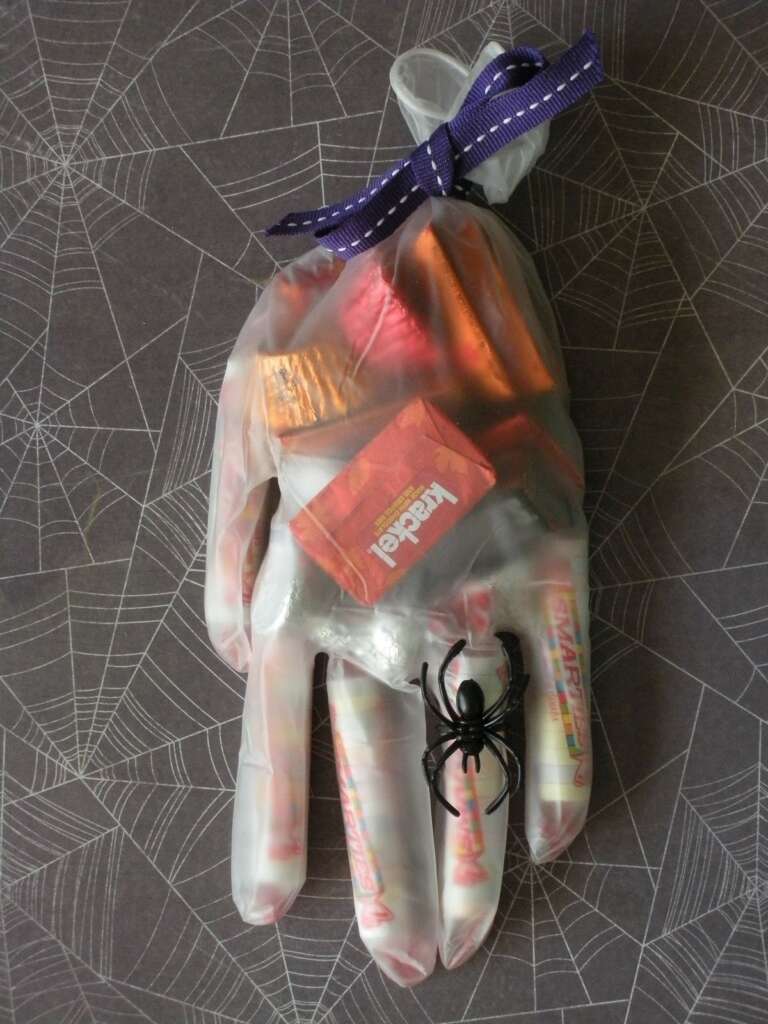
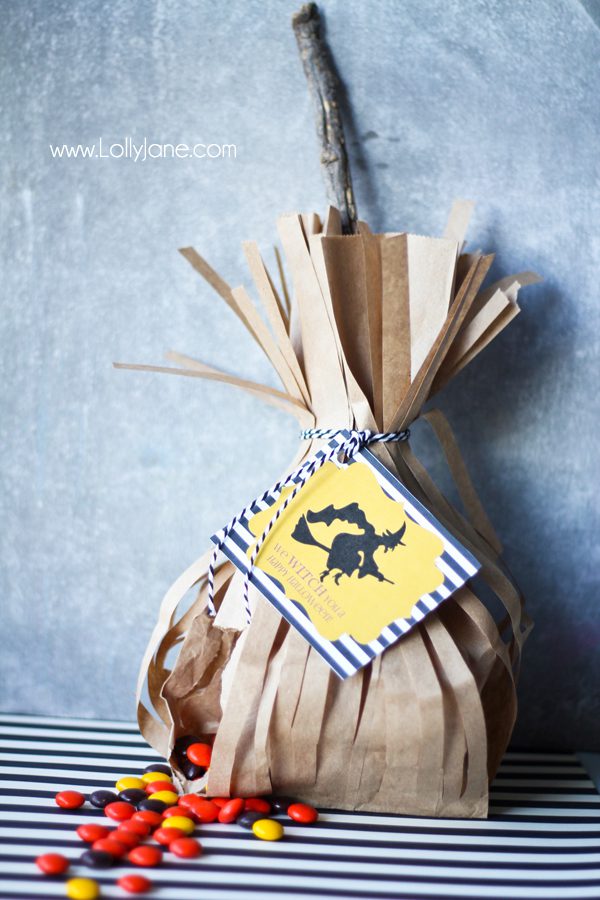
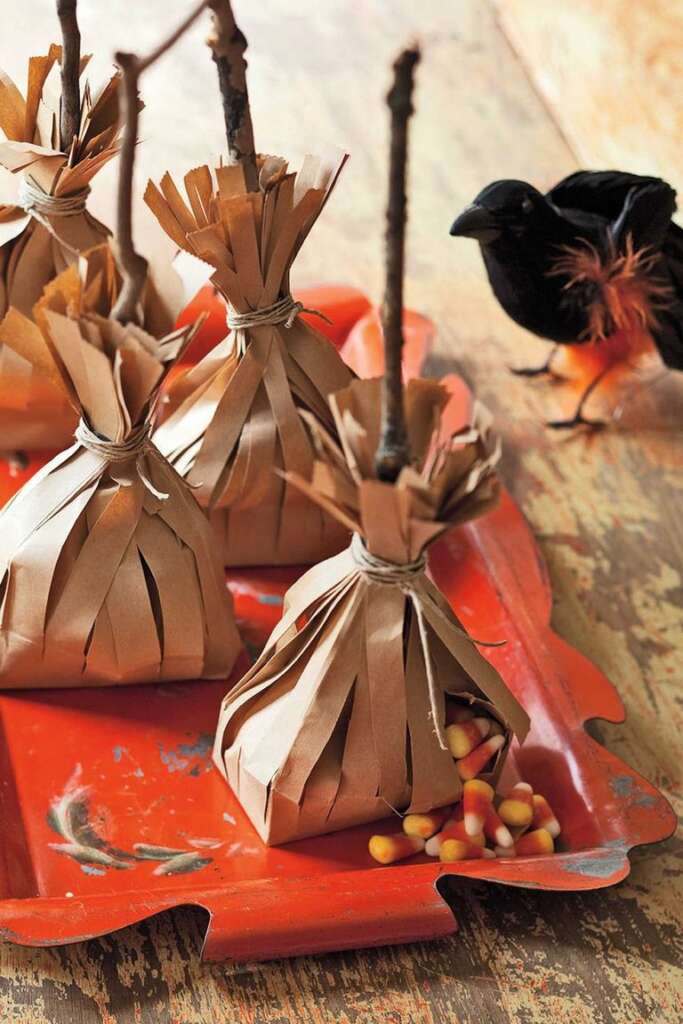
3) Broom Candy Baggies
Another fun DIY project to decorate your window sills or hold napkins down on dinner place settings. And just as you think the fun is over – your guests (and kids) get to open their broom bag filled with treats!
You’ll need:
Brown paper lunch bags (2 for each favour)
Scissors
Wrapped candies
Small branches
Twine
How to make these candy bags:
- Cut one bag into narrow strips starting from the upper edge, and stopping just above the bottom base.
- Cut the same narrow strips on the upper edge of the second bag and stop somewhere in the middle (you’ll need some space to fill this bag with treats).
- Insert the second bag into the first bag and fill it with candies.
- Insert a branch in the middle of the bag so that it sticks out.
- Tie twine around the bag to seal it shut, from around 1-2 inches from the top.
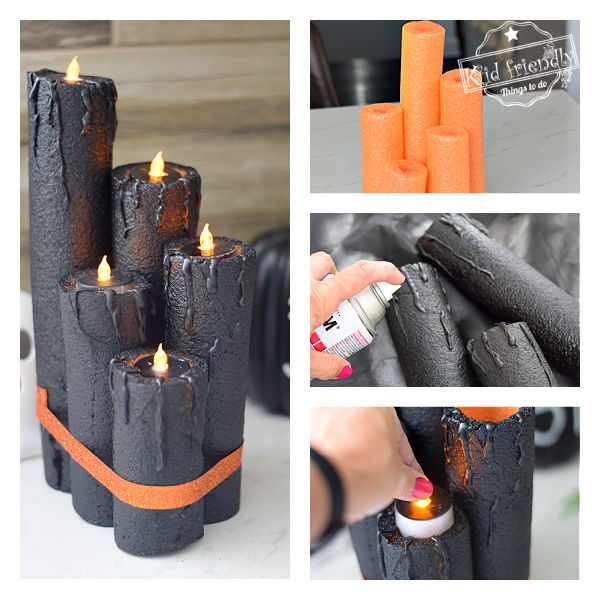
4) Pool Noodle Candles
You won’t have to worry about these candles ever burning out – or burning things down!
You’ll need:
1 pool noodle
Scissors
Low temp glue gun and glue sticks
Black spray paint – I used a FLAT black Rust-oleum enamel spray paint
Battery-operated tea lights
Masking tape
Ribbon or string
How to make these candles:
- Cut the pool noodle at varying lengths.
- Stand your noodles up and squeeze out melted glue at the top of the pool noodles, going down the sides – (this will be your melted wax illusion).
- Tape the wick portion of the tea lights (this will protect them from the paint).
- Take your pool noodle pieces and the tea lights out to a well-ventilated area (outdoors is best) to spray them with the black paint.
- Spray noodles and tea lights – let dry, then remove the masking tape.
- When the noodles are dry, cut the centre hole a little wider, just enough to fit the tea light inside (you only need to do this at the top – the same end as the melted wax).
- Group the candles together and tie a string to secure. You may also glue ribbon around them instead.
- Pop them wherever you want them to be around the house!
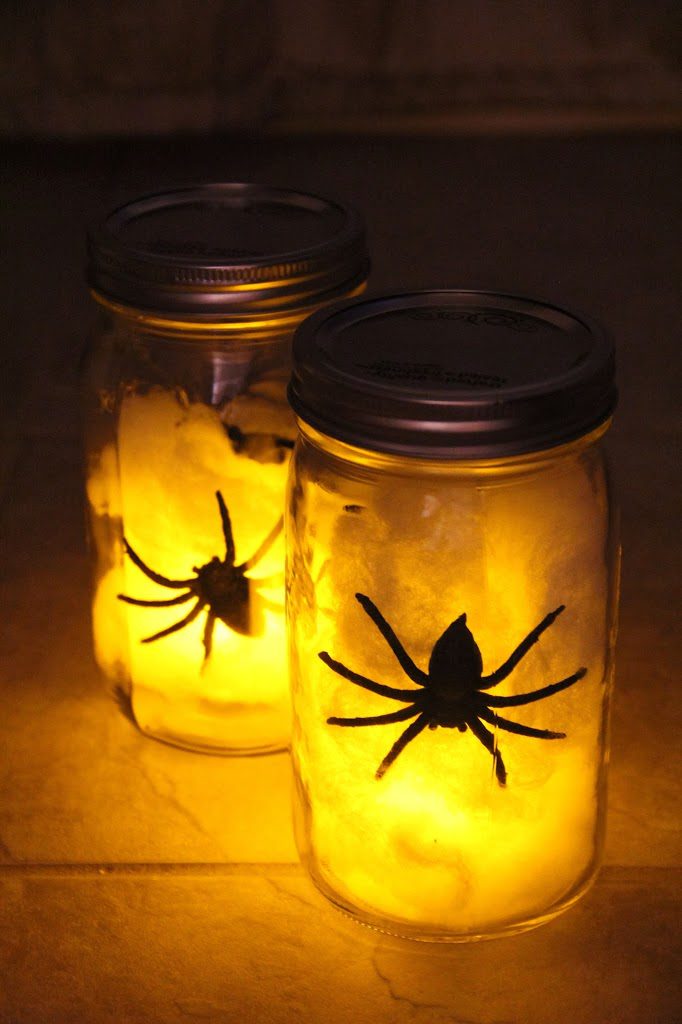
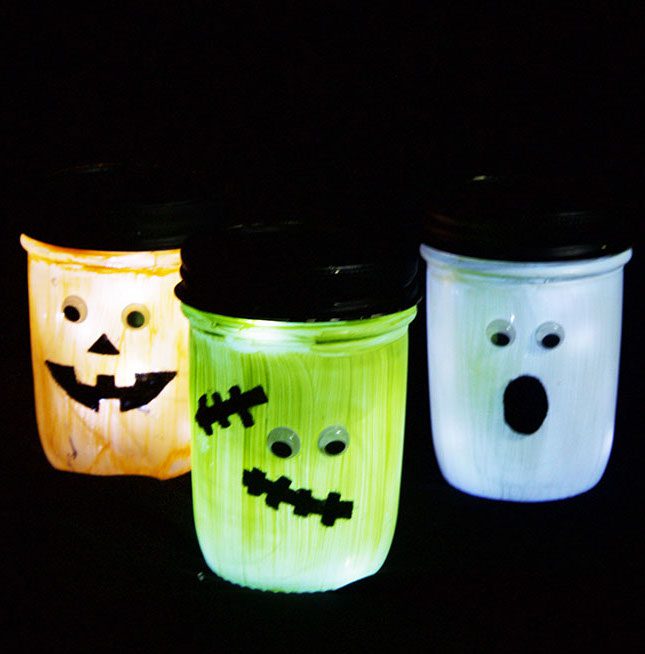
5) Mason Jar Lanterns
Here is another safe light decoration that your kids will have a blast making! The best part about it is that it can be reused every year – or even painted over for a new look.
You’ll need:
Mason jars
Acrylic paint
Black felt marker/black felt
Battery-powered fairy lights
Googly eyes
Hot glue gun
How to make these lanterns:
- Paint one coat of paint on the jars on all sides and let dry. The translucence of the paint will allow light to shine through.
- You may also paint the jar lids black or any other colour you prefer.
- Add googly eyes and draw mouths and faces on the dried jars using your black felt marker pen. If you prefer a more textured finish, cut mouth shapes out of black felt and hot glue it onto the jar instead of drawing it on.
- Put the fairy lights inside the jar and close the jar. When ready, turn the fairy lights on and place the jar wherever you want them in the house.
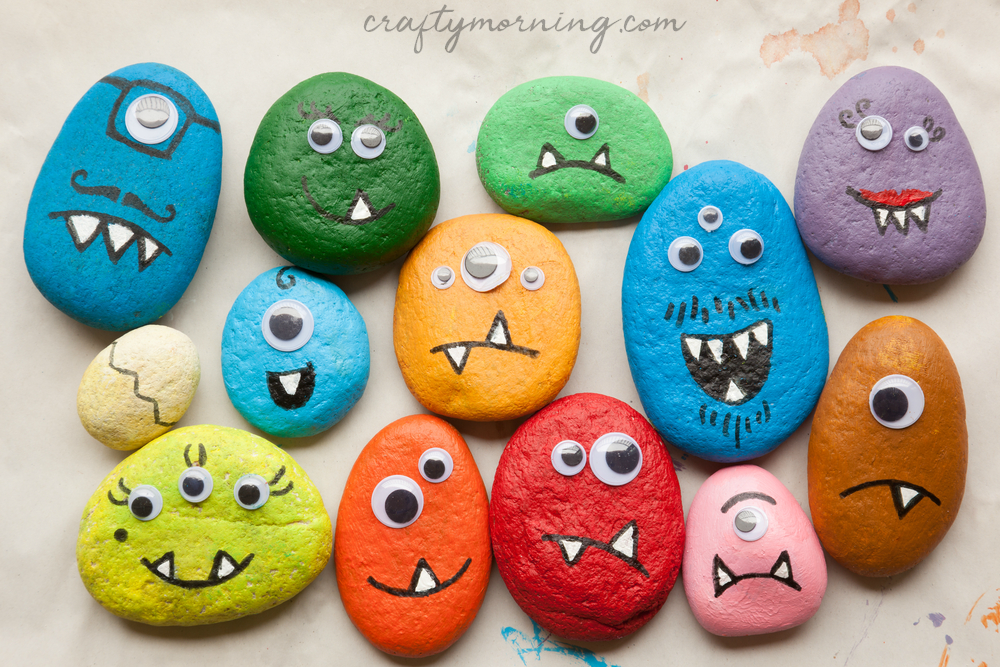
6) Monster Pet Rocks
Put a whole new twist to pet rocks on Halloween! They’re great fun for little kids and they also make great paperweights to hold down table napkins on dinner table place settings.
You’ll need:
Flat stones
Acrylic paint
Marker pens
Googly eyes
Hot glue gun
How to make these little critters:
- Paint the rocks one side at a time, with any desired colour. Let dry, then paint the other side and let that dry too.
- Stick some googly eyes with hot glue onto the rocks, and be sure it is dry and cooled down.
- Draw mouth and teeth with a black marker pen (or any colour). You may even paint the teeth if you wish!
- Put these rocks in the garden, in bathrooms, and even at the dinner table for each sitting place.
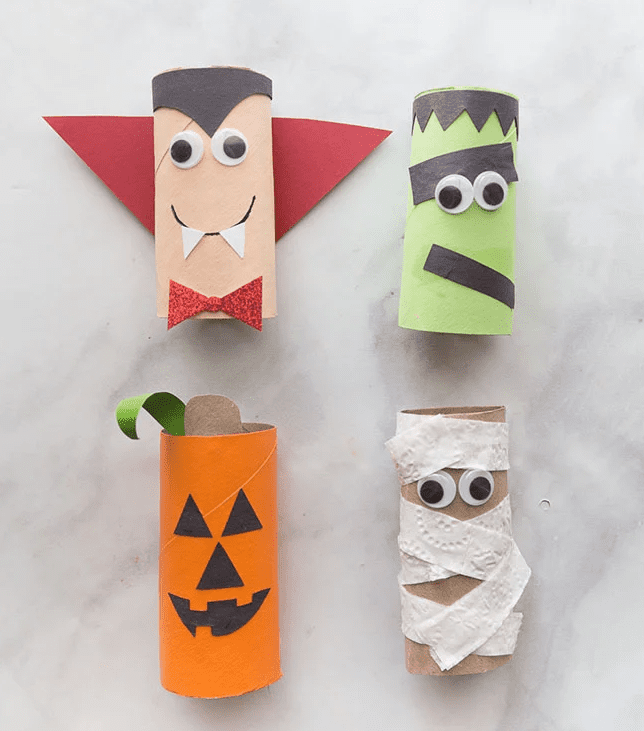
7) Ghoul & Goblin Rolls
Here is yet another way to turn your empty toilet rolls into a Halloween decor project that your kids will enjoy making.
You’ll need:
Leftover toilet paper rolls
Some toilet paper (if you’re making a mummy monster)
Paint of various colours
Coloured paper
Marker pen
Glue
Scissors
Googly eyes
How to make these decorations:
- Paint the paper rolls in whatever colour you wish and let them dry.
- Cut out eye shapes, nose, mouth, teeth, hair, and any other parts of the face you want with coloured paper.
- Stick the face parts onto the paper rolls and then finish off with googly eyes wherever necessary.
- You may draw certain parts of the face or even outline with the marker pen.
- If you’re making a mummy monster, you may cut thin strips of toilet paper and wrap it around the roll.
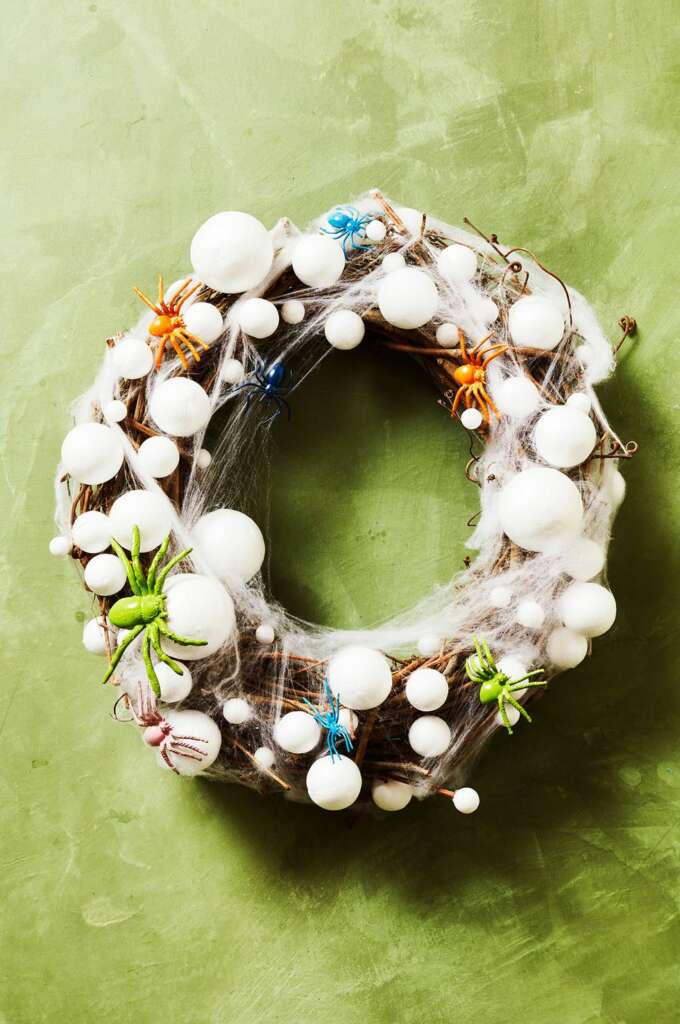
8) Spider Egg Wreath
This is actually pretty creepy – but all in good fun! You may tweak this project by changing the colour of the spiders and eggs if your kids feel icky about it!
You’ll need:
A wreath
Cotton gauze or cotton balls
Styrofoam balls of various sizes
Rubber or plastic spiders
Spray paint of different colours
Hot glue gun
How to make this wreath:
- Spray paint the spiders and styrofoam balls (optional) in any colour you wish, let dry.
- Using the hot glue gun, stick the balls randomly on the wreath. Once done, stick the spiders over, under, and in between them as you wish.
- Once dried, tear cotton gauze up and stretch it over the entire wreath, making it thicker on certain parts and thinner on other parts.
- Hang on your door (or anywhere you want to display this masterpiece!).
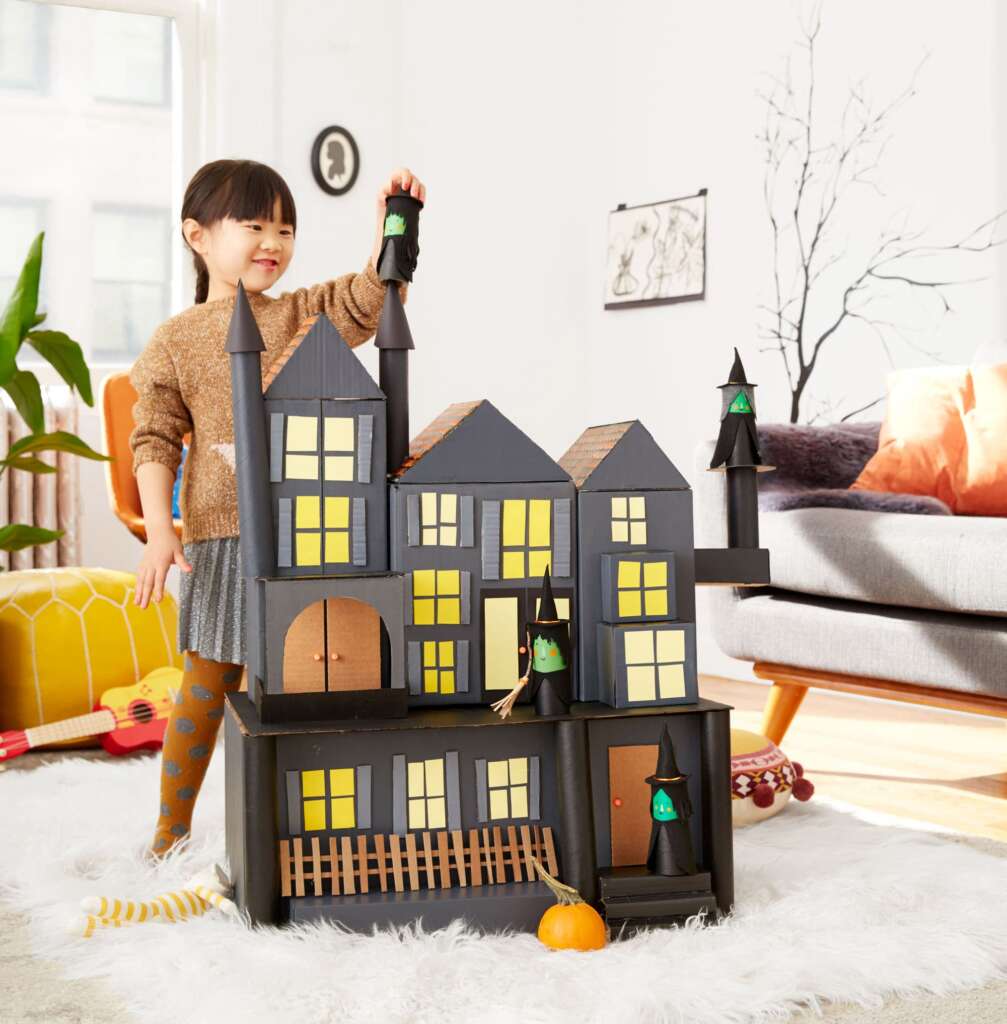
9) Cardboard Haunted House
Grab all of your empty Amazon boxes (we know you have them), empty tissue boxes and empty shoe boxes for this project. Your children and you are going to build their dream haunted house!
You’ll need:
Various empty cardboard boxes
Hot glue gun
Normal paper glue
Acrylic paint
Coloured paper
Empty paper towel rolls and toilet tissue rolls
Round coloured beads
Various colours of felt
Marker pens
How to make this haunted house:
- Stack various boxes until you get the shape of the house you want. Hot glue them together.
- Paint the boxes dark grey or any colour you want, using the acrylic paint. Also do the same for the toilet paper rolls and paper towel rolls and let dry.
- Make the rooftops by folding a piece of cardboard in half (a V shape) and then gluing it to the top of the house with the holes facing the front of the house. Cover those holes by cutting triangles out of cardboard and gluing them to the front and back of the rooftops. Paint these in whatever colour you would want the roofs to look like.
- Cut out sets of yellow squares and grey rectangles and glue them to the front of the house to make the windows and window panes.
- Cut out yellow and black rectangles to make the doors and stick them to the front of the house. Use a round bead as the door knob and stick that on the door with a hot glue gun.
- You may also make toilet paper roll witches and monsters just like the Ghoul & Goblin Roll DIY, and glue them onto the house (wherever you want them to be!).
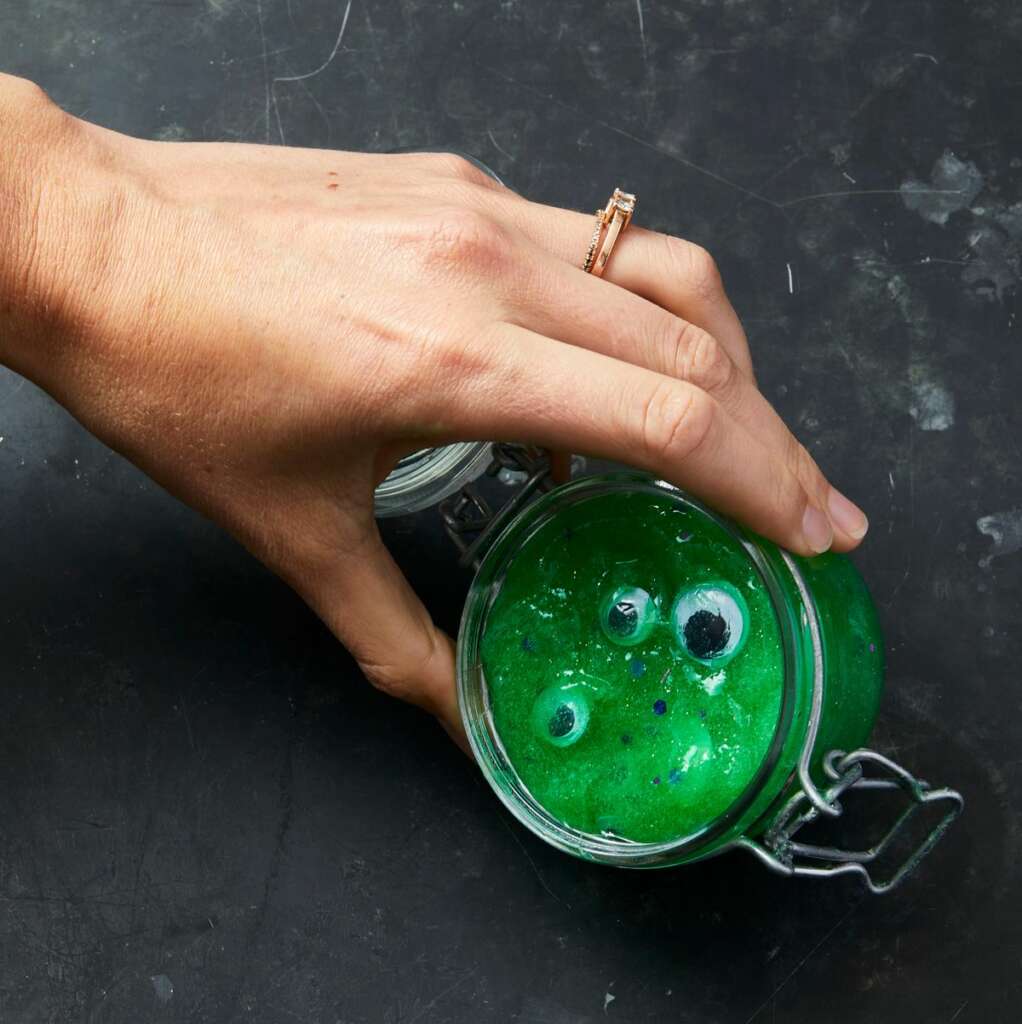
10) Shiny Eyeball Slime
This looks great in jars – a mix of cute and spooky, but as with all fun things for children, it also doubles as a fun toy to play with! It’s also so much easier to make than one might think.
You’ll need:
5 oz clear glue
1 teaspoon of baking soda
Green glitter paint
3 tablespoons of lens solution
Googly eyes
A jar with an air-tight lid
How to make the slime:
- Squeeze 5 oz of clear glue into the jar.
- Add 1 tablespoon of baking soda.
- Add glitter paint and stop once you’ve reached the desired colour.
- Stir this solution until completely mixed, then add 3 tablespoons of lens solution.
- Roll the slime in your hands until it no longer sticks (approx. 5 minutes). If it is still too sticky, add small amounts of lens solution.
- Add the googly eyes at the end and you’re done!
Among all of these DIY Halloween decoration, you’re sure to find something special for every part of your home. Don’t be afraid to mix and match things until you find a combination that really works for your Halloween theme!
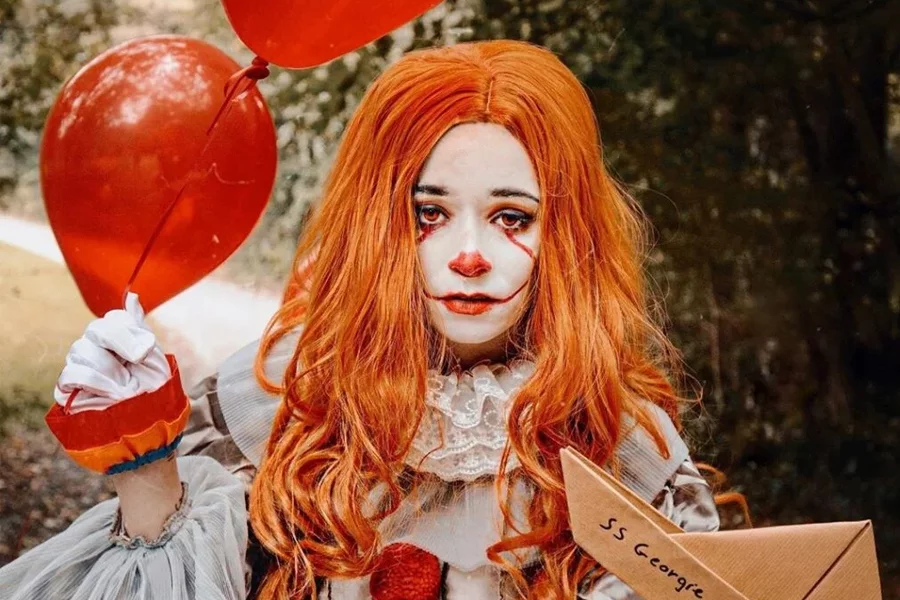
Now that your house is all set up, it’s time to take a look at the best Halloween costumes you could pull off this 2022!
Best Halloween costumes