The best Halloween costume ideas of all time

It’s that time of the year again.

Although Halloween may popularly be one of the best times of the year, it is admittedly a hectic season. From house parties to home decorations, it sometimes feels like we barely have any time left for an epic costume. 

Don’t panic, we’ve got your back. Whether you’re planning for a proper get-up for yourself or some interesting yet easy-to-make costumes for your kids, we have a list of the best Halloween costume ideas of all time, right here!

Beware: Some of these looks could scare the hair off a cat!

TABLE OF CONTENTS

  1. Last minute (and super easy) costume ideas
  2. Nostalgic vintage costume ideas
  3. Kids’ costume ideas
  4. Group and couples’ costume ideas

Last-minute (and super easy) costume ideas 


If you’re looking at a blog post for Halloween ideas, then you’re either being really prepared, or you’re really late and desperate for ideas. So, we figured we’d start with the easiest costumes you can whip up at the very last minute and still be Halloween-ready!

1) Shego


This one looks difficult but isn’t too hard to pull off – you just need a black upper lip, green eyes and sleek eyebrows. If you’re a makeup kind of person, this may be a nice last-minute costume for you.

And if you don’t have a full body suit in green, you can always wear all black :)


2) A comic book character


Another one for the makeup geeks! There are tons of tutorials out there, and you don’t even need a special outfit for this. Once you’ve found the look you like, copy it on yourself and call it a day.


3) Scarecrow


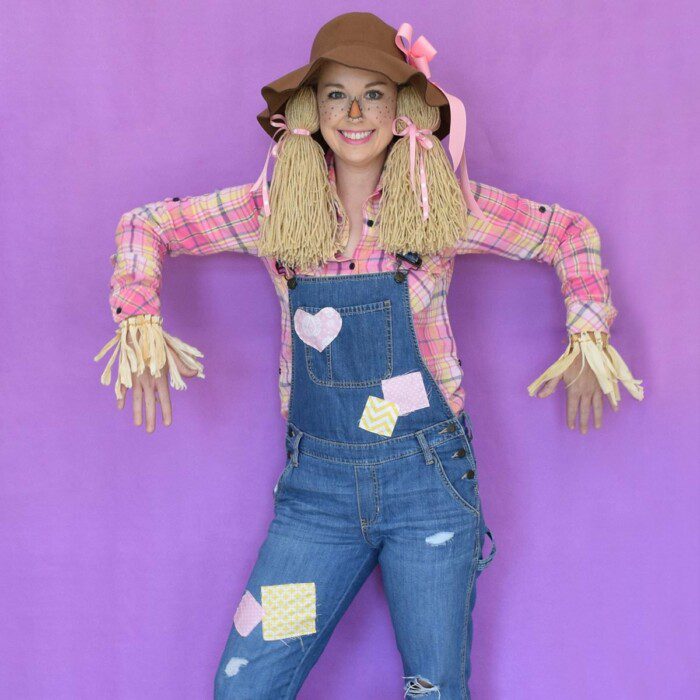
This would work very nicely if you’ve got dungarees! Grab some ribbons, string, and put together a fringe for your sleeves and fake scarecrow hair (stick it to a headband and then cover it with a hat over top). 

All you’ll need to complete this look is to draw some fake freckles!  


4) Skeleton head 


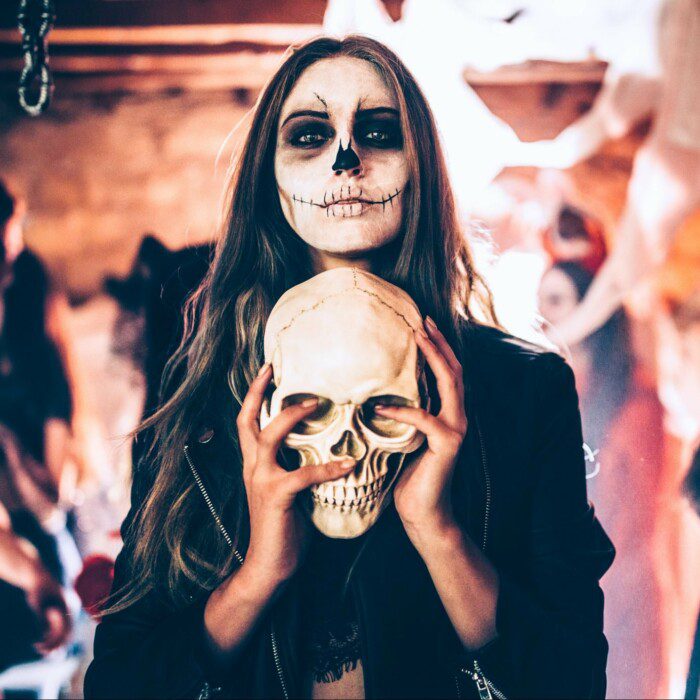
This is one of the classics – the skeleton! Or rather, just the head. Contrary to popular belief, you don’t need apt makeup skills to pull this one off. The key is to smudge dark black kohl around the eyes, draw a simple skull nose and teeth lines, and wear light-coloured contact lenses. 

Tip: It also helps to use the same black kohl to draw over your eyebrows, and smudge them over the hollows of your face. 


5) A mummy 


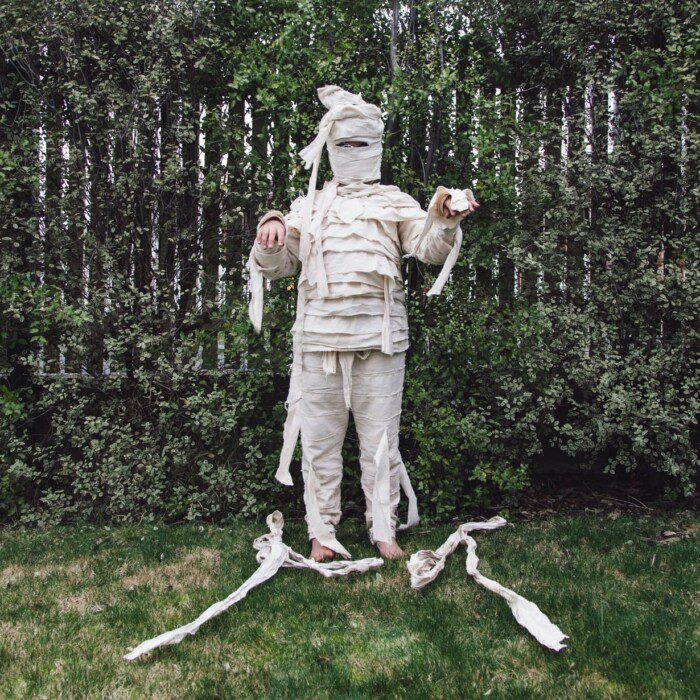
This is for when you really want to wear a costume, but don’t have much time at all. 

Wear white clothing from top to toe, and then wrap (or glue on) white bandage/tissue paper/gauze around your entire outfit. Don’t forget to also cover your head!

6) Stranger Things characters


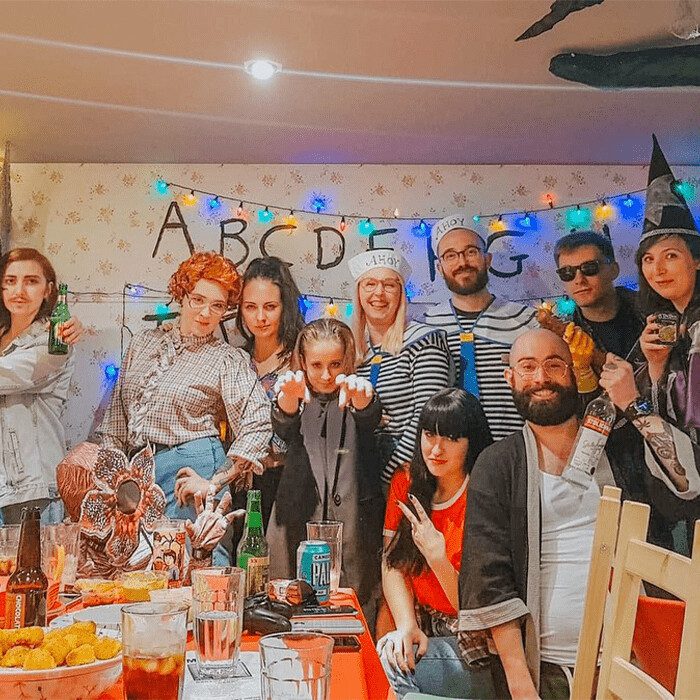
This one’s fun! Depending on the character you want to dress up as, you may either need some sailor’s uniform or old-fashioned clothes. Otherwise, you can always throw on a beard, carry an empty liquor bottle and tell people you’re Murray.


7) Wednesday Addams 


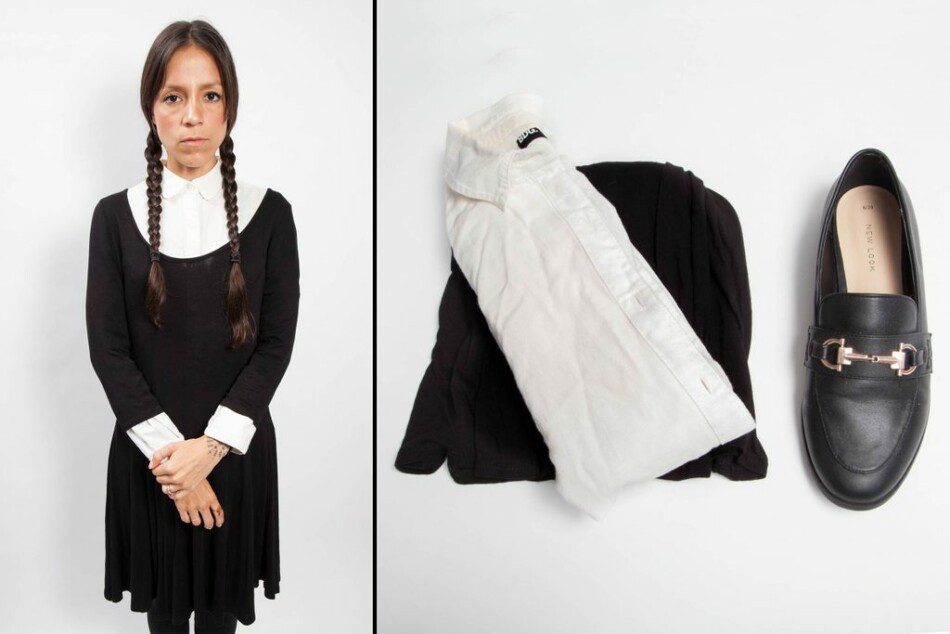
This one is probably the easiest, most effective costume ever. With a black long-sleeved dress, pigtail braids, and a solemn expression, no one will miss the fact that you’re Wednesday Addams.


8) Bandit


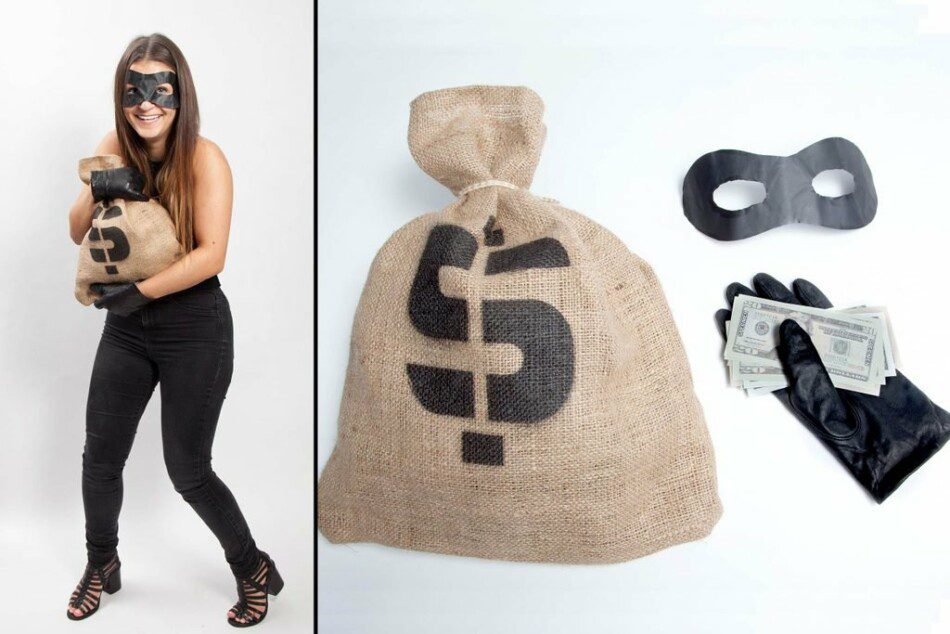
Now, this one’s easy yet fun. All you’ll have to do is get a black Zorro-looking mask, some black clothes and a burlap sack with a dollar sign on it.

Tip: Black gloves really help too!

9) Cowgirl/Cowboy


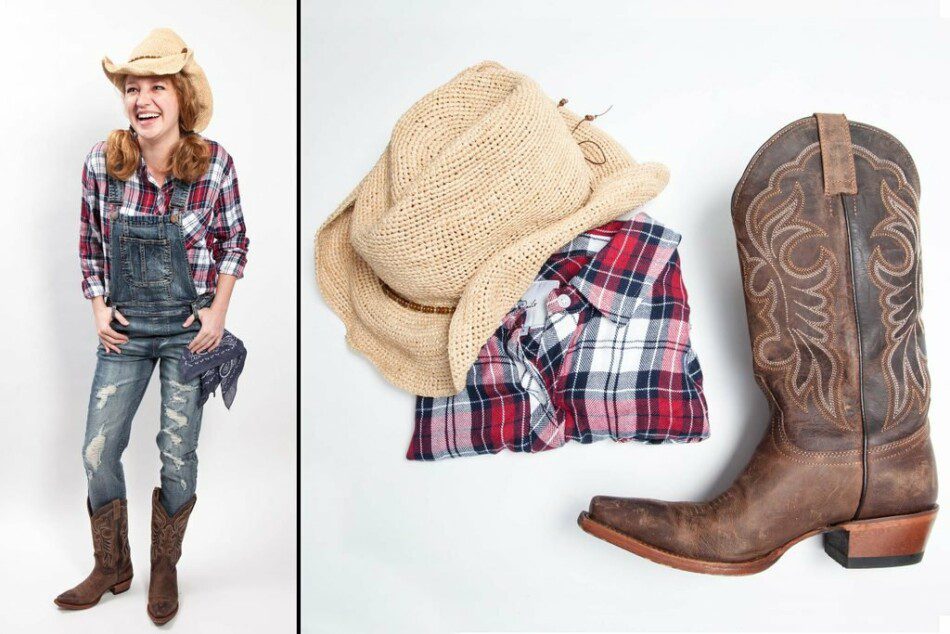
When in doubt, grab your favourite boots, cowboy hat and jeans and call it a day. 

If you don’t have boots or a cowboy hat, don’t worry. It won’t be difficult to find one around the Halloween holidays!

10) Pirate


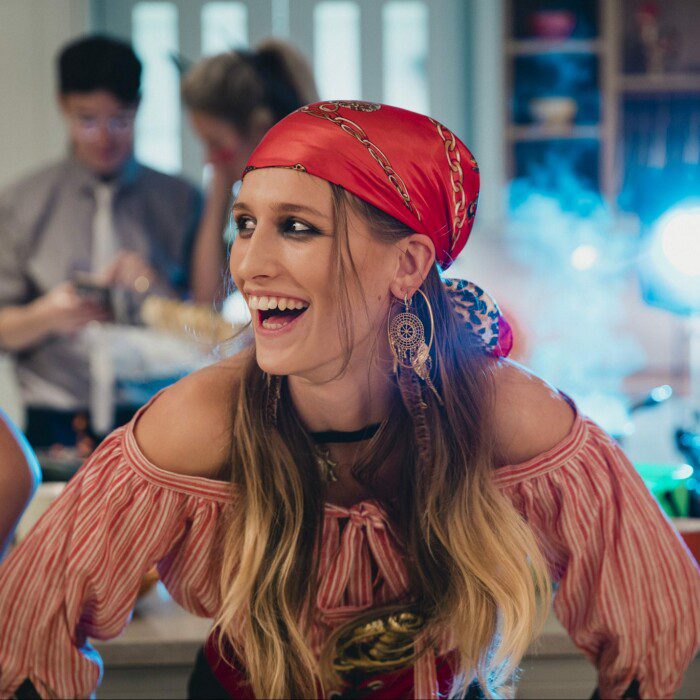
Easy yet effective – one of the classics. Wrap a bandana around your head, smudge some dark eyeliner around your eyes and wear some extra gold earrings (if that’s your thing).

Nostalgic vintage costume ideas

Have you ever wished you were born in a different era? Well, this is your one night of the year to catapult yourself (and your friends) to a time once been.

Here are some of the best vintage costume ideas we’ve come up with, inspired by icons and famous looks from the past. From a solo costume to a posse of horror, we’ve got you covered. Here are the most terrifying vintage costumes of all time!

1) Classic pin-up (hair and makeup)


Here are some classic pin-up looks that are achievable through some simple makeup rules and hairstyles.

pin-up girl Halloween costume idea
Image: finder.com

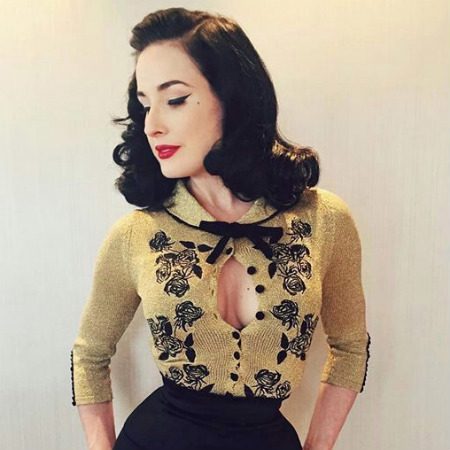
Pin-up makeup is known for the high-winged eyeliner, beauty mark, porcelain complexion and the iconic bold red lip. The hardest part about nailing this makeup look would be getting the eyeliner just right.

When in doubt, follow these steps:

  1. Using a pencil liner, start with making a very thin line across your entire eyelid, sticking very closely to the eyelashes. Don’t stray too far from above your lashes. 
  2. Once you’ve created a nice neat line, go over it again, just a little thicker. 
  3. Using a fine-tip liquid liner, extend the tail of your eyeliner even longer, so that it goes past the end of your lash line. You may start with a short tail on each side first. 
  4. Working on both sides simultaneously, keep a cotton swab with some makeup remover to erase any mistakes you make along the way. Once you’re happy with the length of your eyeliner wings, apply some mascare (or falsies). 
  5. Using the same liquid liner, carefully make a dot either above your lip or below your eyes near the cheekbones to make a beauty mark. 
  6. Apply some light foundation and powder to your skin, focusing more on any area that needs more coverage. 
  7. Apply your favourite bold red lipstick and be careful not to smudge! 
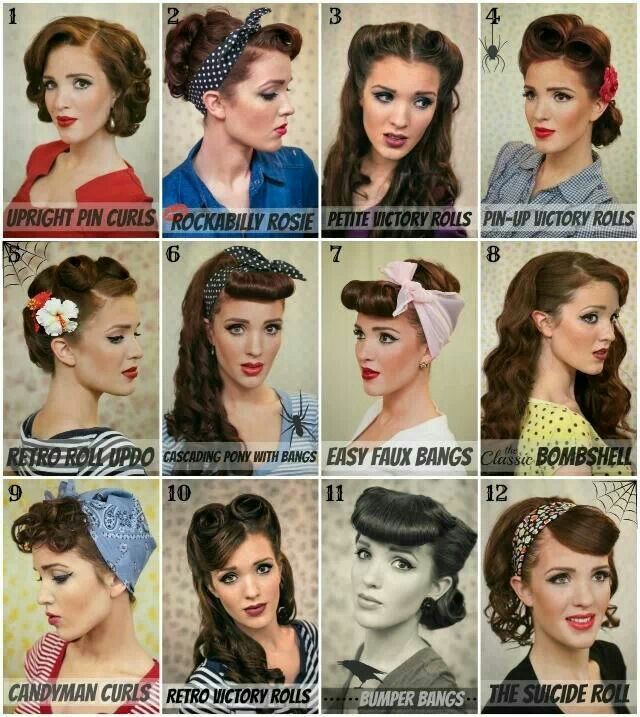
  8. The next order of pin-up business would be hair! It involves a lot of styling, hairspray, and pins, but you could also opt to have a wig styled for you.

Here are some looks to try out:

2) Rockabilly style pin-up


This one’s for the ladies with tattoos and a whole lot of edge! 

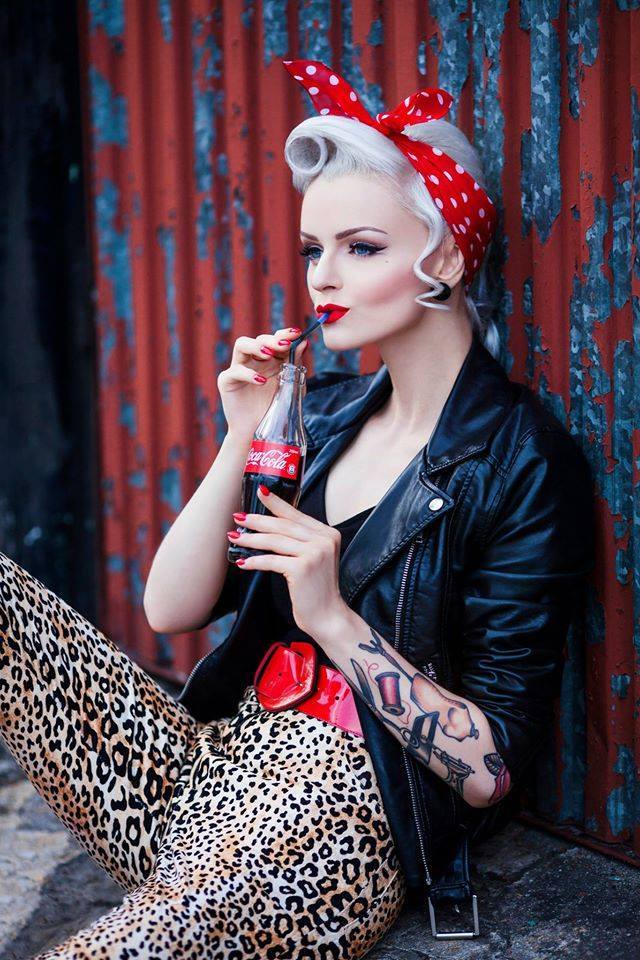
The key to a Rockabilly look is to add elements of toughness to a classic pin-up look. Switch it up with some arm tattoos (either real or fake), bandanas in the hair, a leather jacket, some animal-print pants, or even frayed denim shorts.


3) 40’s sailor women 

POV: It’s the 1940’s, you are on a yacht with your Captain husband, kids, and friends on a nice summer day.

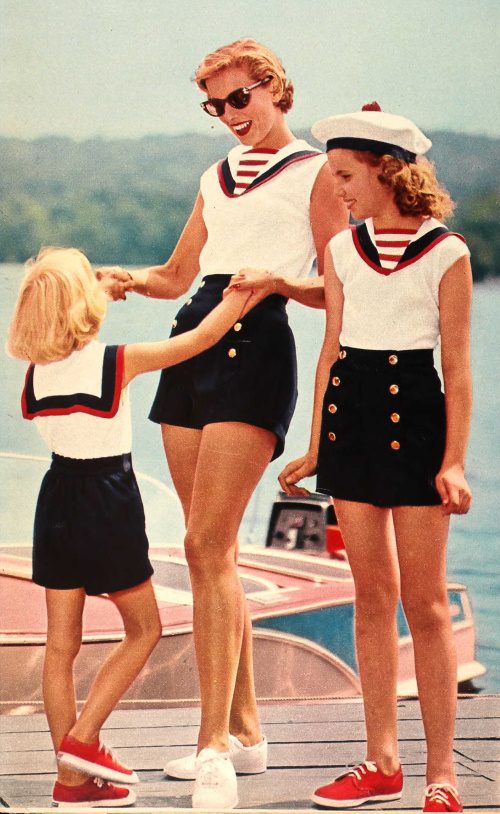
The key to this look is not just following an old-fashioned pin-up hairstyle and makeup look, but of course, wearing spot-on nautical outfits.

1940's Donna heels sailor girl look Halloween costume ideas
Image: Donna heels

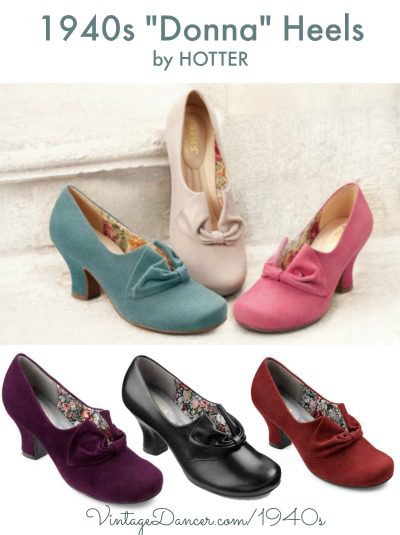
Shirts with large v-collars and a matching scarf around it, sailor dresses with midi-length skirts, sailor shirts paired with shorts and even wide-legged pants, finished off with some tennis-style shoes, summer shoes, or Donna heels. 

Top this off with some light daytime makeup, pin-up curls with a ribbon, and you’re done.


4) Era: WW2

If you’re not feeling a sailor vibe from the 40s, then you might consider a more classic look that was worn during the World War II era.
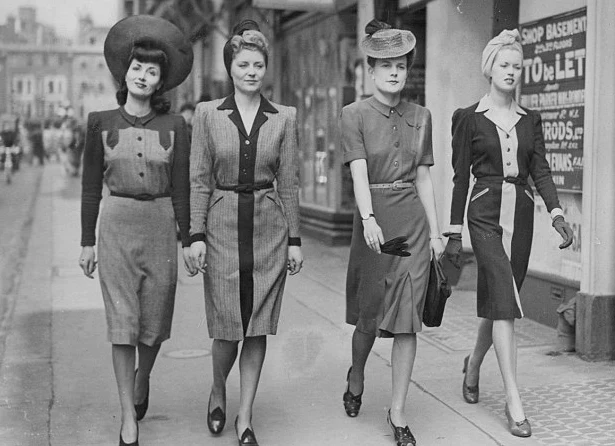
WW2 women outfit Halloween costume ideas
Image: Women in WW2

For women:
The look encompasses old-fashioned pin-up hairstyles, hats and scarves, formal collared dresses or suits, and Donna heels.
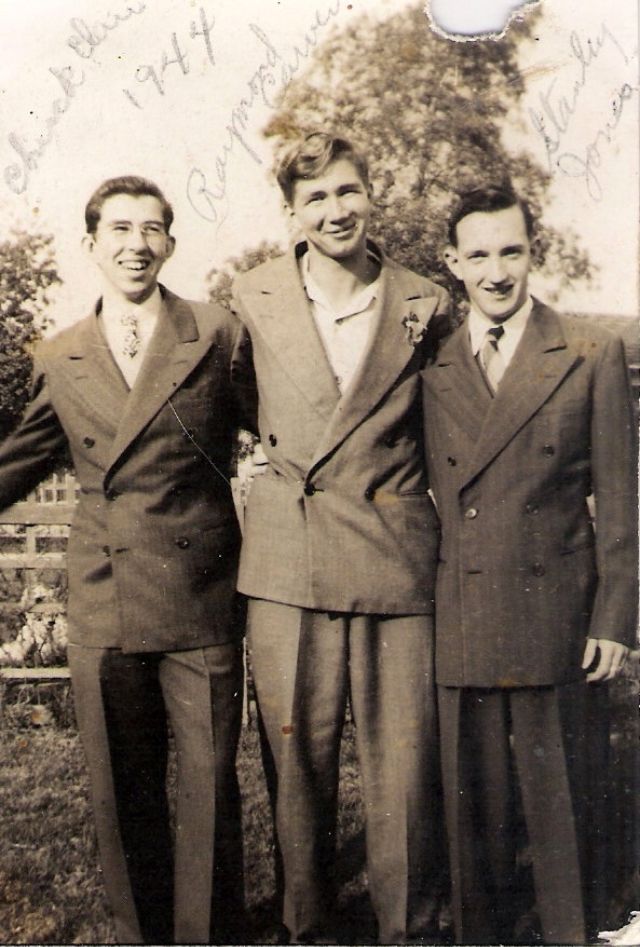
WW2 men outift Halloween costume ideas
Image: Men in WW2

For men: 

The look encompasses an old-school suit and slicked back hair. And of course, old-fashioned dress shoes.

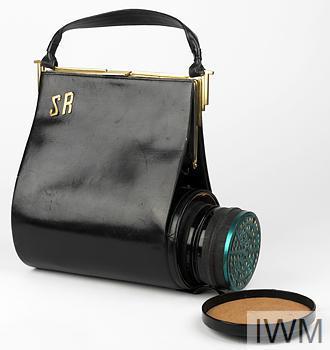
Bonus: did you know that it was common for ladies’ handbags in the 40s during WW2 to have a compartment for gas masks?

5) 40’s kids’ fashion

Make it a family event and dress your kids in some 40’s getup, and go trick-or-treating together!

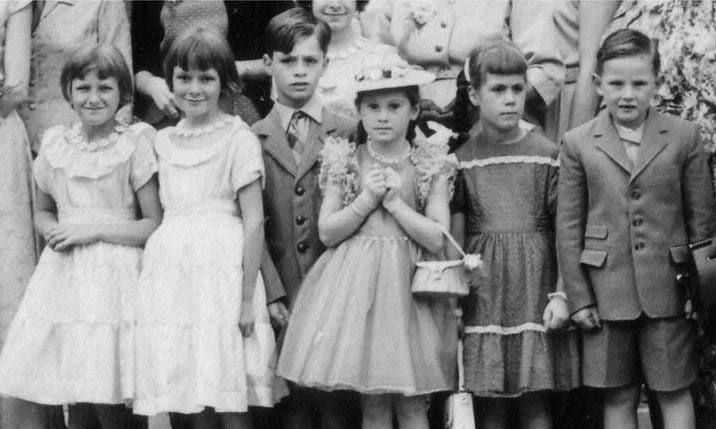
There were apparently many rules on dressing children appropriately, but we’ve narrowed this down without complicating things too much.

For boys: 

  1. This was simple – they were dressed in very similar attire as their fathers’ or men in general, with the exception that most boys wore shorts instead of pants with their shirts and suits. 
  2. Dress shoes were always worn with long socks, never without it. 
  3. Suits and clothes were never made too tight, they were supposed to fit comfortably without creasing too much. They were also frequently worn with walking hats or fedoras – which you may get off Amazon!
  4. The hair was combed back and slicked with gel.
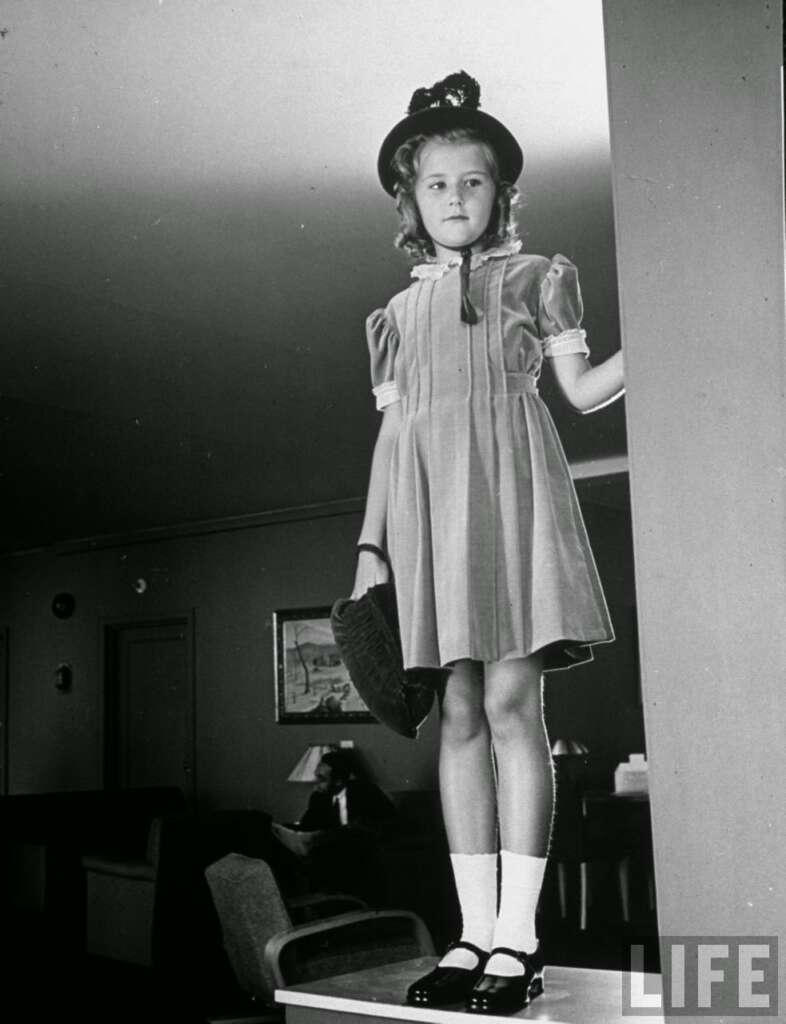
For girls: 

  1. Girls were dressed in many different outfits, but among them, jumper skirts and shirtwaist dresses were considered outstanding outfits. 
  2. Girls too, wore dress shoes with long socks. 
  3. Party dresses were worn with feathered bonnets. 
  4. The hair was curled and pinned to the sides at the very least.

6) 1930’s men’s fashion

This goes all the way back to an era of working-class men who had responsibilities to their home and country, who were conservative, practical, and confident as they worked hard to overcome a recovering economy. 

The look seems to be driven by suits that were made slightly oversized, paired with matching pants and finished off with dress shoes.

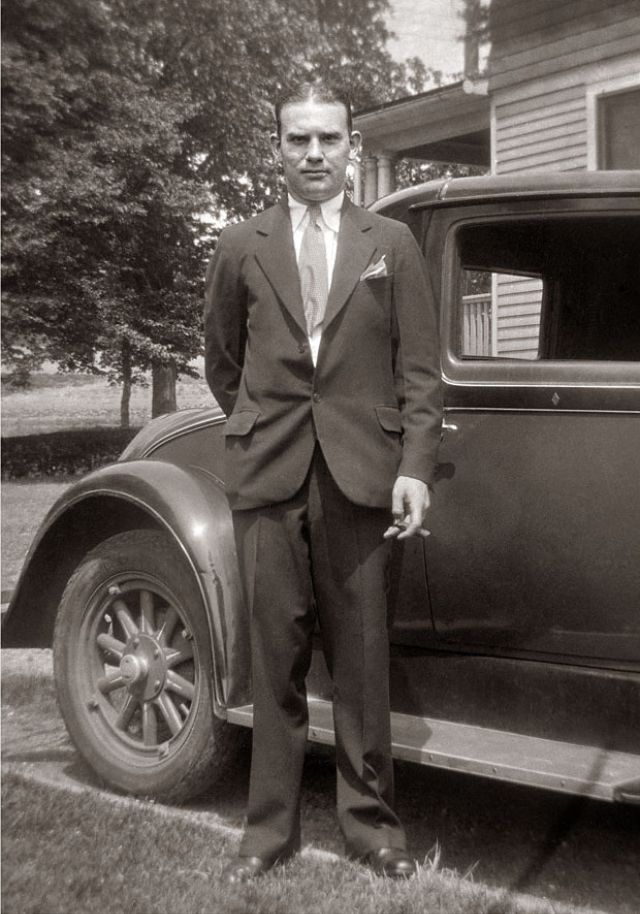
The finer details of this look include slicked back hair, the use of various kind of hats (eg. fedoras, walking hats, boaters, etc.), broad and short ties, bows, and a cigar. 


7) Bruce Lee

This is one martial arts legend that would be unmistakable anywhere, so you’re sure to be a hit with this. Whichever outfit you decide to wear, just always remember to style your hair to Bruce Lee’s signature hairstyle.

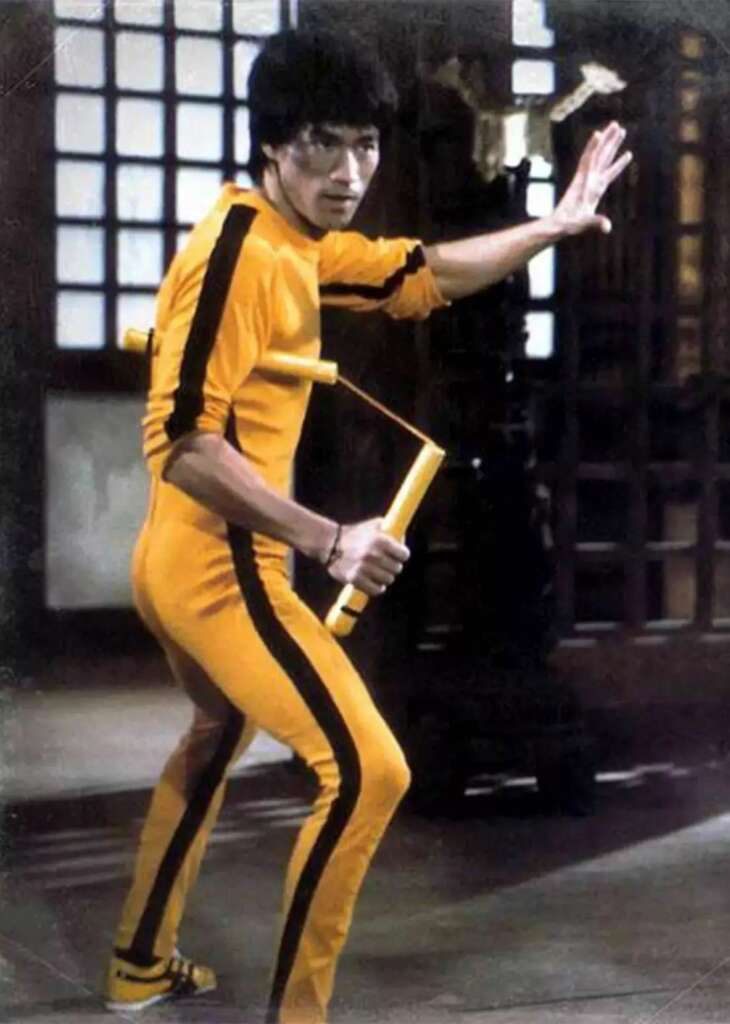
Bruce Lee’s iconic yellow jumpsuit from Game of Death is easy to recreate – the costume is available on Amazon along with other stores both online and offline. Just wear this with yellow and black sports shoes and yellow nunchucks to match.

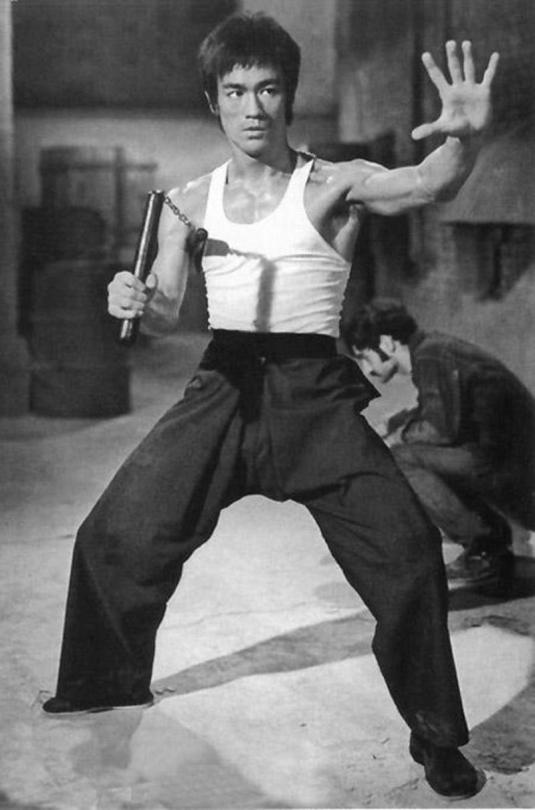
Here is another iconic look by Bruce Lee, featuring a simple white wife-beater, black slacks that tie around the waist, black kung fu shoes and black nunchucks.

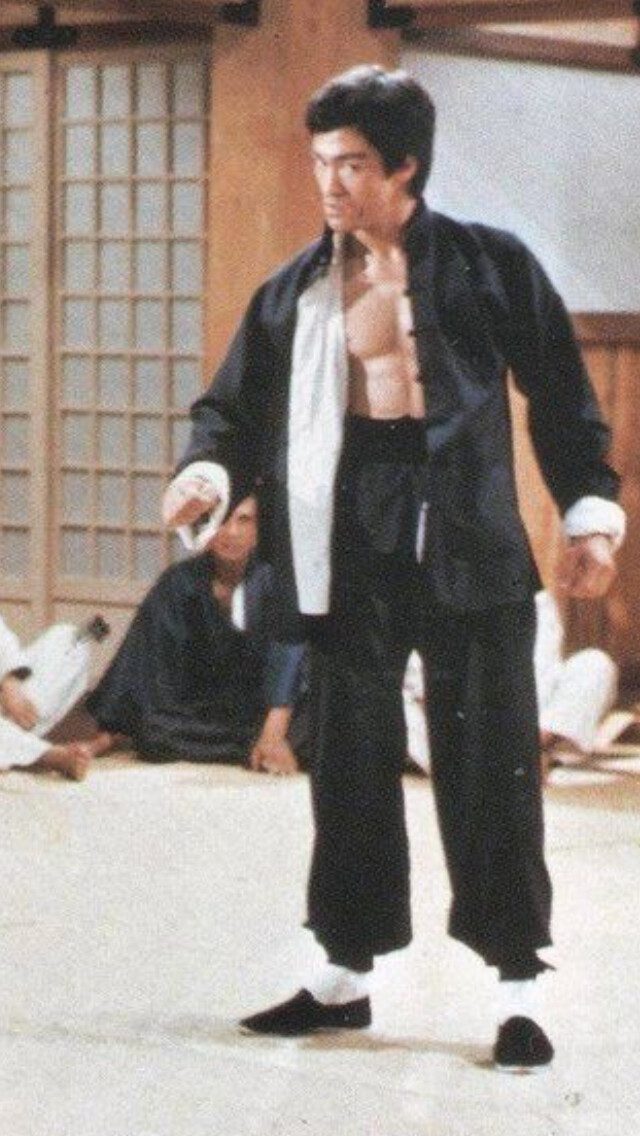
Something that will not go unnoticed would be Bruce Lee’s martial arts Wing Chun uniform, which features a black traditional Chinese kung fu top, black pants, black kung fu shoes, and white socks.

Bruce Lee 70s retro outfit neon green shirt bell bottom pants Halloween costume ideas
Image: Bruce Lee in a retro suit

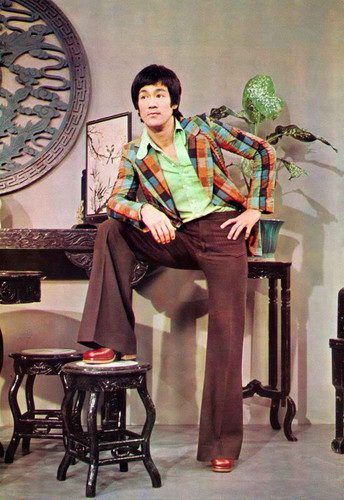
And if you really want to capture Bruce Lee in the 70s, you may also cop one of his looks which involve bell-bottom pants, bright brown heeled shoes, an almost neon green collared shirt, and a colourful jacket with large collars.

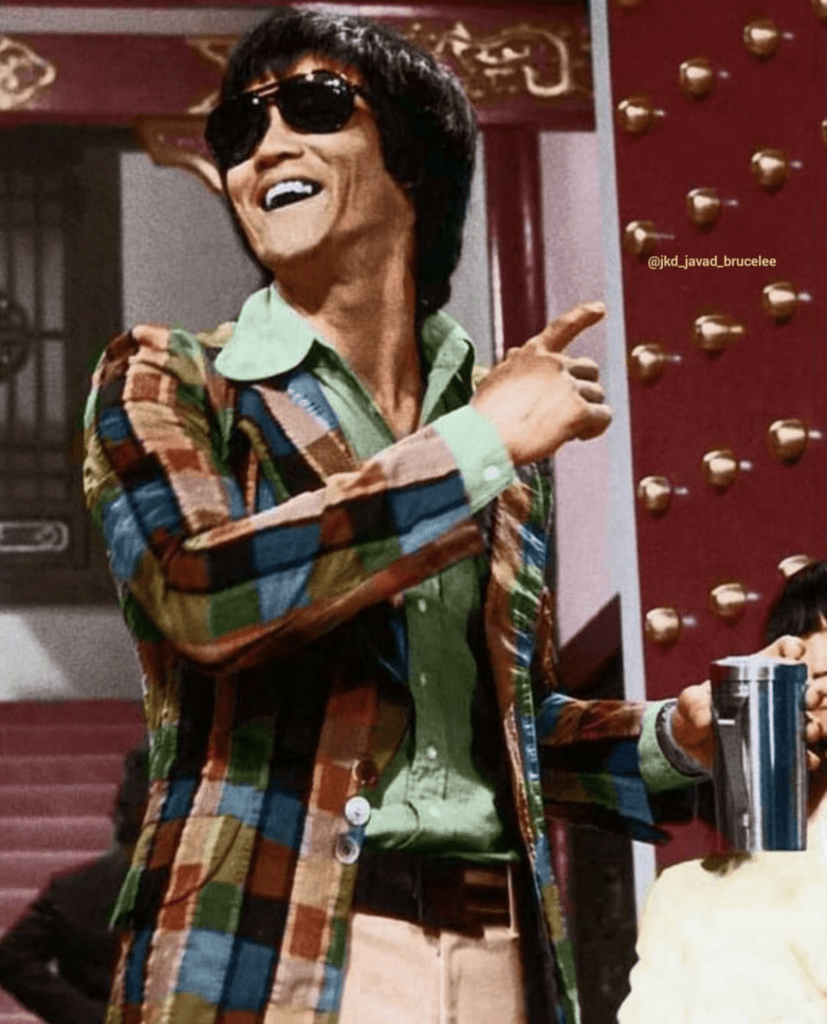
In most of these kinds of looks, he also wore large brown sunglasses.

8) James Dean

There’s nothing more poignant and nostalgic than watching Rebel Without A Cause as a child (in present times), discovering, and falling in love with James Dean for the legend that he is, and then finding out right after that he had died 50 years before you ever watched the movie.

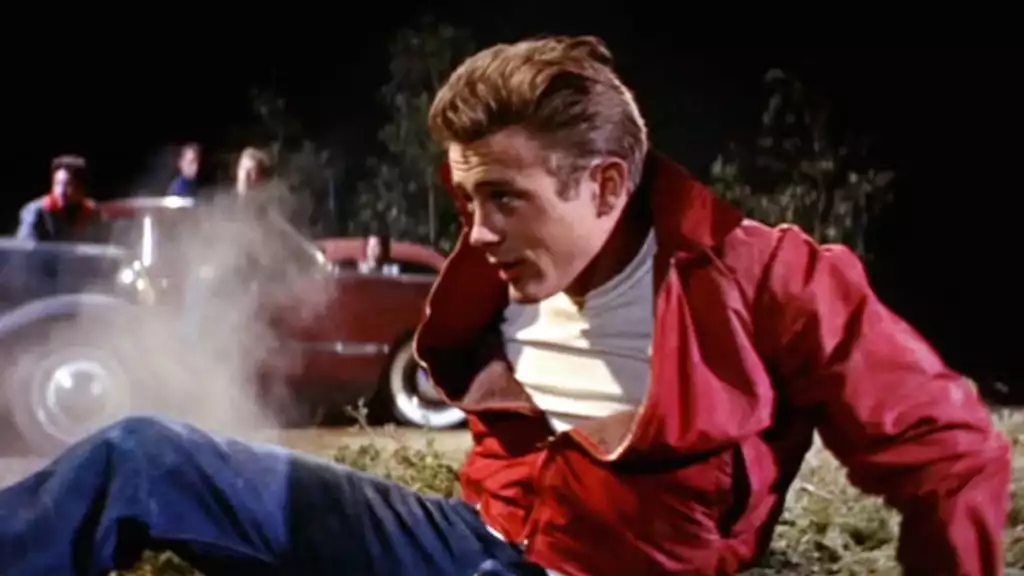
James Dean was known for his insanely authentic method acting, his dashing looks, and his reckless abandon. This was all portrayed perfectly in one of the most iconic movies of all time, Rebel Without A Cause.

For this look, all you’ll need is some blue jeans, a white shirt, a red bomber jacket, black boots/shoes, slicked back hair, and a cigarette.

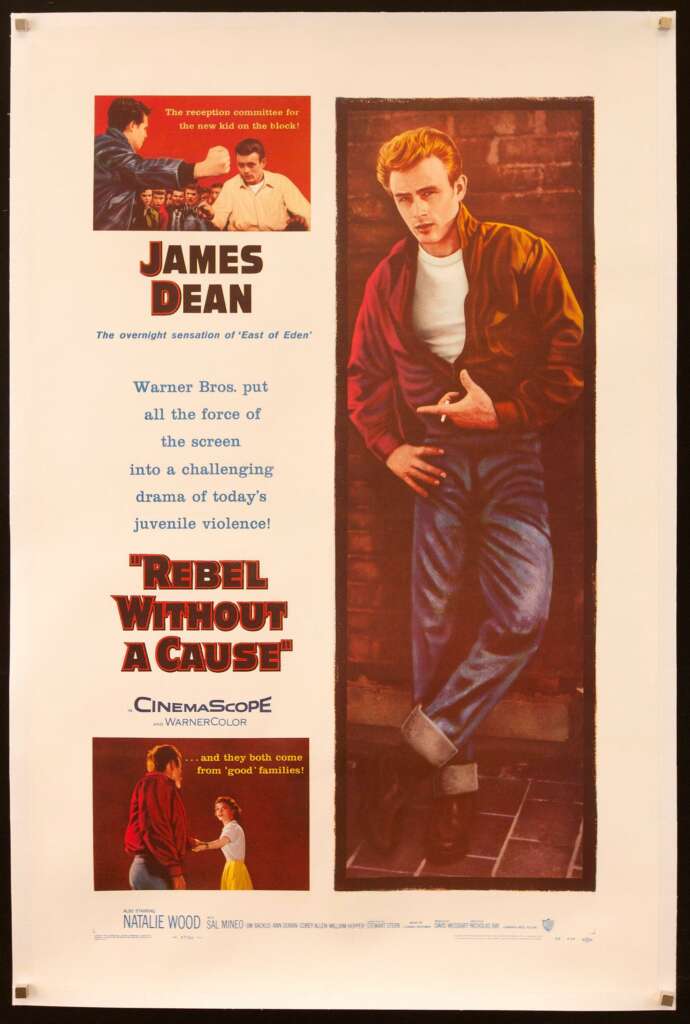
Tip: You can also get a fake cigarette prop and hold on to it all night as part of the costume without worrying about it burning away!

9) Charlie Chaplin

This is yet another icon – a true legend of the age of silent movies. 

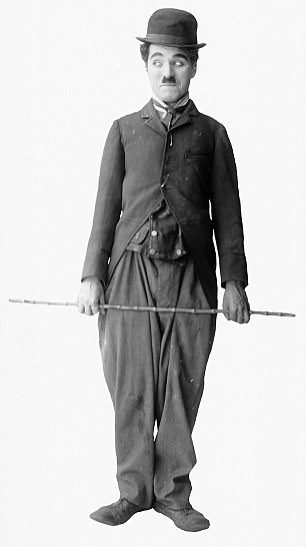
To dress as the famous Charlie Chaplin, you’ll need a suit consisting of an inner white shirt, a tie, a loose button-down long sleeve outer shirt, and loose slacks. You will also need a bowler derby hat and a walking stick, and some plain black shoes to go with the entire outfit. 

However, the hallmark of Chaplin’s look isn’t just in his dressing; it’s his thick dark eyebrows and short, curt moustache. For this, you may shave to fit yours – or just get a stick-on moustache from Amazon.

10) Archie comic characters 

This is for those of you who are fans of old comics – Archie is a timeless comic series from those days that is still enjoyed even now.

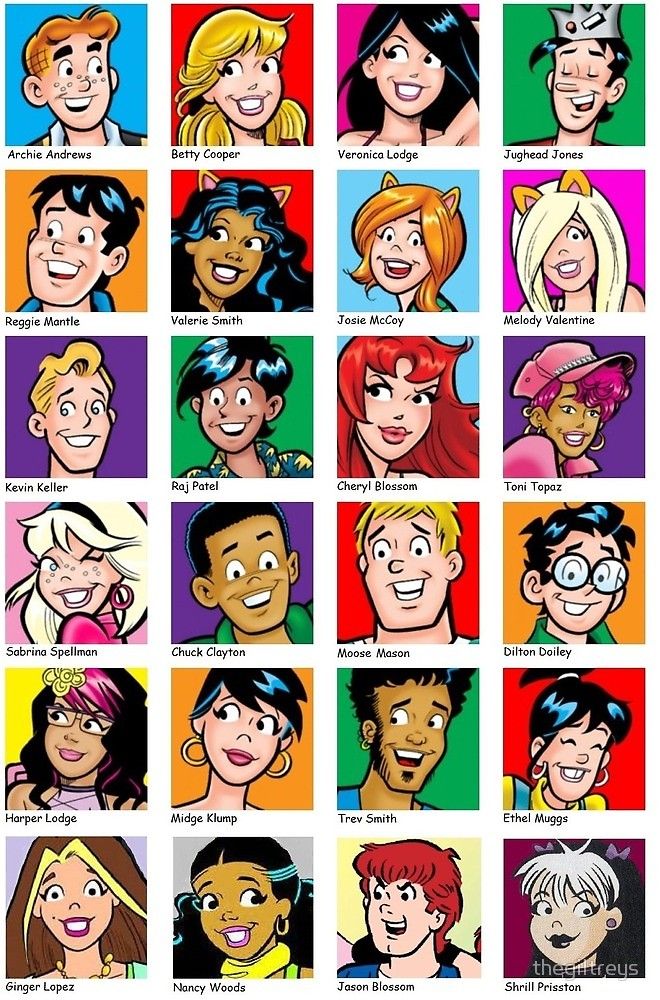
Using similar pin-up makeup steps, you may dress as any of the Archie characters and put together a similar outfit as what is typically illustrated in the comics. 

You could also draw inspiration from the TV series Riverdale, since it is the live action of the comics. 

If not, you could approach a whole different look by following some step-by-step comic style makeup tutorials on YouTube and then dressing up in Archie character costumes.

Kids’ costume ideas

Young children often have wild and vivid imaginations, which often lead them to come up with the most creative ideas. When Halloween comes around, it becomes our job as parents (or older siblings/cool aunties and uncles), to keep up with them and make their vision come true. 

Here are some of the simplest yet most creative kids’ costume ideas for Halloween.

1) Creepy-crawly

Pool noodles, a bath mat and some black tape can suddenly become a creepy-crawly spider costume! 

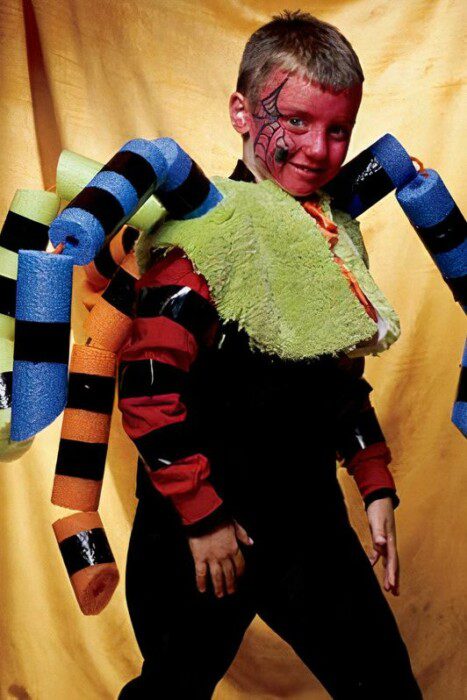
This spider leg costume may be slightly bulky, but it is guaranteed to be worth the effort. Cut pool noodles into 3 parts, and then connect them using string or pipe cleaners.

Then, attach them to a bath mat using a hot glue gun. Cut a hole around the middle of the mat so that a child can wear it.

Once this is done, just stick black tape around the spider legs to make the spider stripes. Don’t forget to do the same to the sleeves of the costume! Top it off with some makeup or face paint and viola!

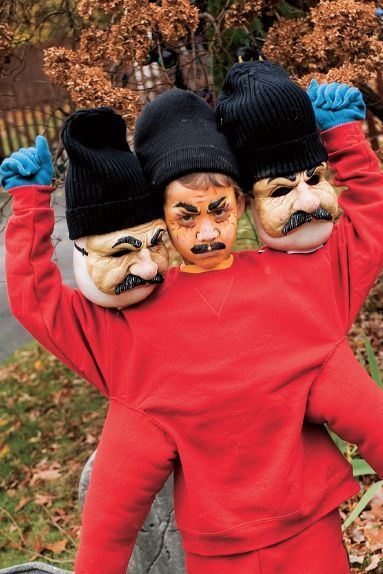
2) Three-headed four-armed monster

A unique and very creative costume that is unlikely to be worn by anyone else.

To create this costume, here’s what you’ll need: 

Materials:

Knee-high stockings
Polyester fiberfill stuffing
2 rubber full-head masks
3 black knit ski caps
Needle and thread
Scissors
Hot-glue gun
2 red sweatshirts
2 pairs of blue knit gloves
Red sweatpants
Safety pins
Bandanna (optional)

Directions:

Stuff stockings with fibre fill; tie the ends. Place the masks over them to form monster heads.
Glue a cap onto each head (child will wear remaining cap).
Hand-stitch a monster head to each side of child’s cap.
Cut arms off one sweatshirt. Glue wrist ends shut. Stuff arms with fiberfill; glue upper ends shut to make fake arms.
Stuff 2 gloves with fiberfill; glue over wrist ends of fake arms.
Sew fake arms to sides of remaining sweatshirt, under sleeves.

Dress child in sweatshirt, sweatpants and remaining gloves. Place middle cap on child’s head; pin fake heads to shoulders of the sweatshirt. If using, tie bandanna around neck.

3) Swamp monster

Probably the sweetest swamp monster you’ll ever see around! 

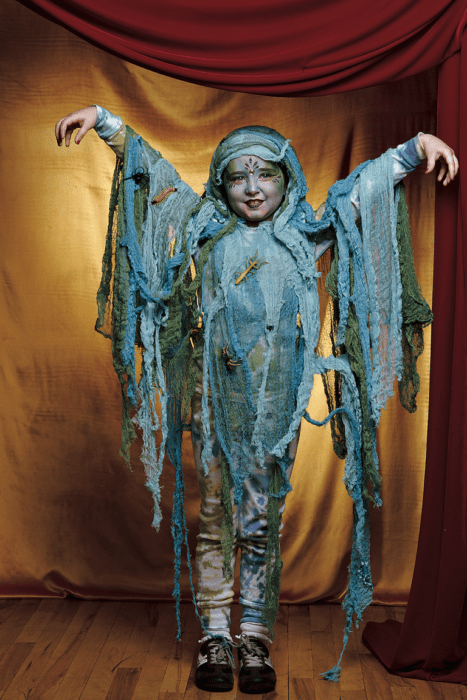
You’ll need a white top and bottom, some fabric green and blue dye, thin white fabric, plastic insects, a hot glue gun, and face paint. 

Dip-dye the white top and bottom in the fabric dye. Cut the thin white fabric into random strips and dye those too, separately. Once dried, glue the plastic insects all over the fabric strips. Wrap the fabric strips all over – or sew them to the dip-dyed outfit. Save some strips to place over the head, too.

4) Spotted octopus

This costume is so easy to make it’s almost a cheat!

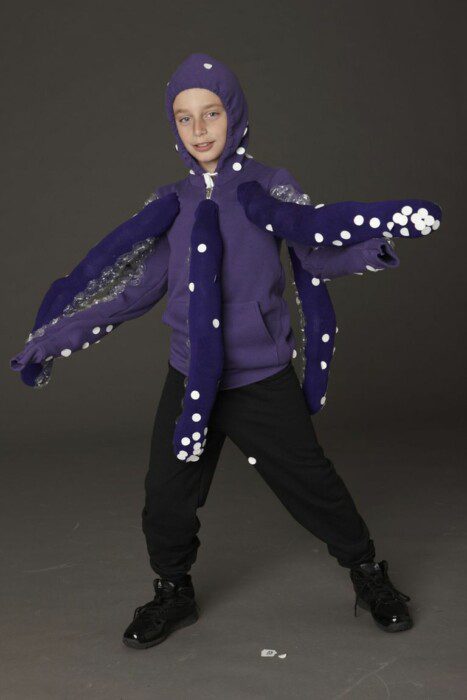
You’ll need some long athletic socks, batting, a hoodie (in a complimenting colour), hot glue gun, white round adhesive stickers, sweatpants and shoes.

Stuff batting into the socks and sew the ends shut – these make the tentacles. You may make as many as you’d like, though 4 is recommended. Stick the white adhesive stickers all over the tentacles and then sew them or hot glue them to the hoodie. 

Stick the rest of the white adhesive stickers all over the rest of the hoodie and pants and you’re done!


5) Peter Pan’s shadow

Halloween is when shadows become mischievous! This shadow costume involves 100% fun and 0% sewing. 

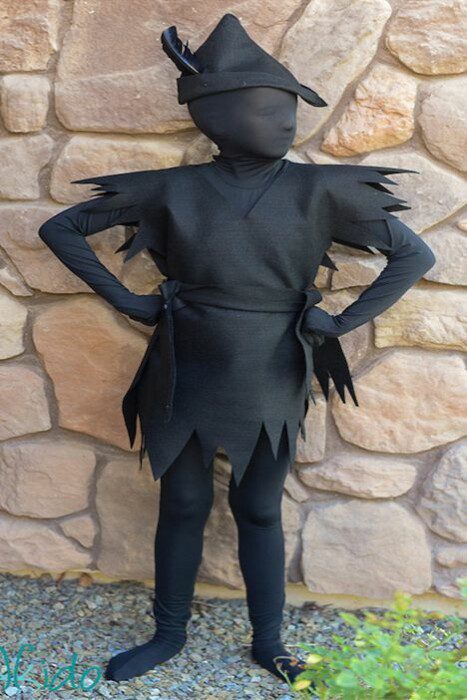
You’ll need to get a black morphsuit and some black felt, a hot glue gun, scissors, and a single black feather. 

Cut out a tunic, a dagger sheath, and a single long strip to make a belt. Then, make Peter Pan’s hat and hot-glue it together. Don’t forget to also attach the black feather. 

That’s pretty much it. Your kiddo will have so much fun being a mischievous shadow, you’ll find it difficult to get them to take the costume off! Good luck.


6) Baby scarecrow

Similar to the adult scarecrow costume, this tiny counterpart is almost as easy – and so much more fun to make! 

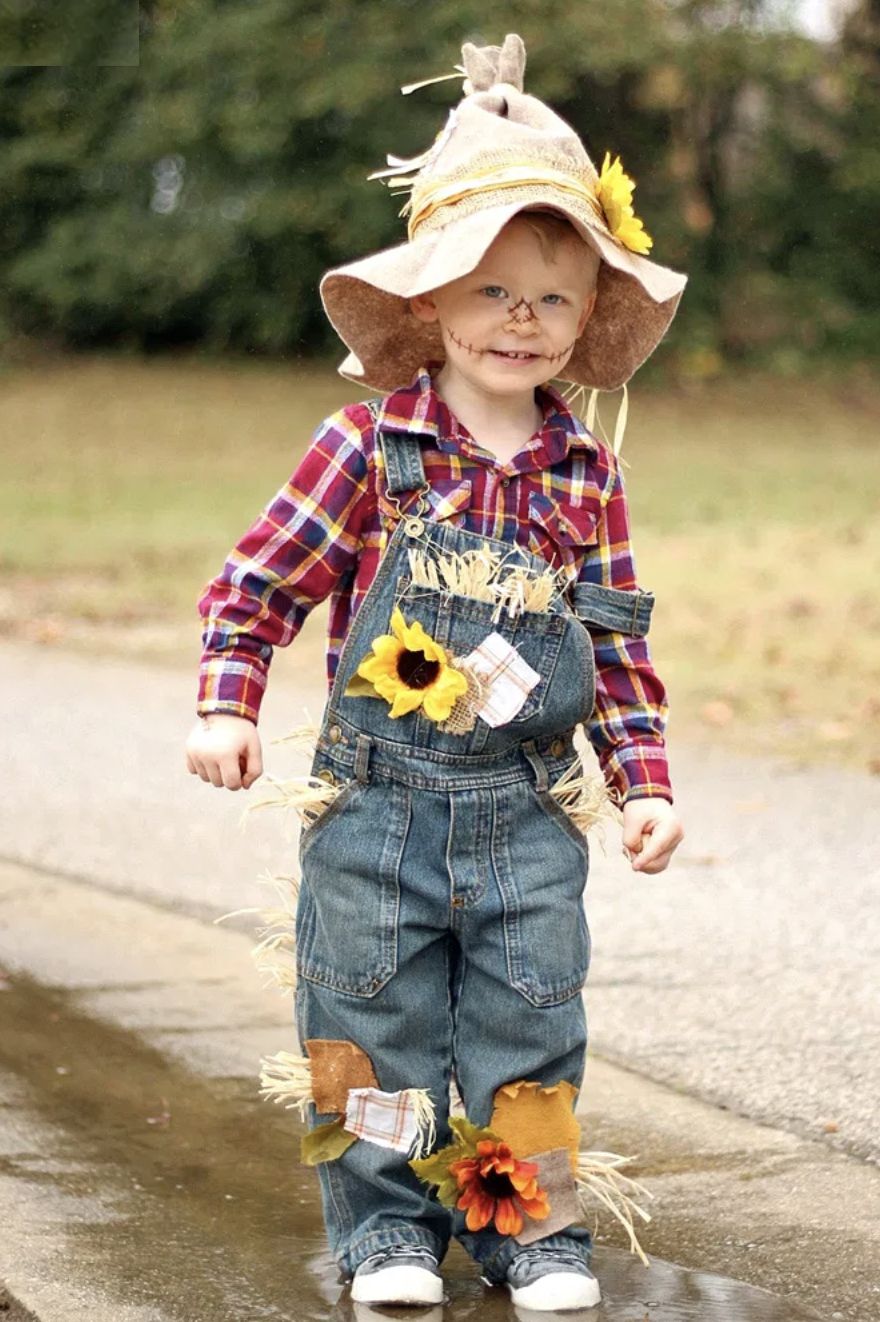
You’ll need some felt, burlap, a spare plaid shirt or table cloth, hot glue gun, fake flowers and leaves, raffia, denim overalls, and some brown eyeliner. 

Cut up some scrap pieces of burlap and plaid fabric into little squares (or any shape you want). Using the hot glue gun, stick the fabric scraps onto random places on the denim overalls. Follow with the fake flowers and leaves, and fringes of raffia. 

Using more felt, some raffia string and the hot glue gun, make the scarecrow’s hat. Finish the look off with some fake freckles and lines on your child’s face.

7) Werewolf

While this looks cool, it definitely comes in handy as a last-minute costume. To really make this look come to life, be sure to use pigmented face paint that is guaranteed to last all day (or all night!). 

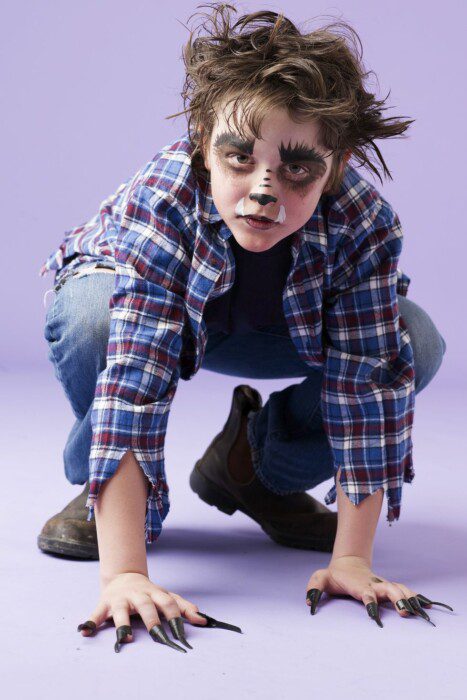
You’ll need some face paint in black, brown, and white, some hair gel, and a vampire teeth and nails set. You’ll also need a typical werewolf outfit (plaid shirt, turtleneck, jeans and boots). 

Draw the furry eyebrows on your kiddo and smudge the brown face paint around the eyes. If they aren’t comfortable wearing vampire teeth (which is highly unlikely), then paint the fangs white on the face. Don’t forget to attach the fake vampire nails!

8) Knight in shining (tinfoil) armour

Warning: this costume involves a LOT of tinfoil. 

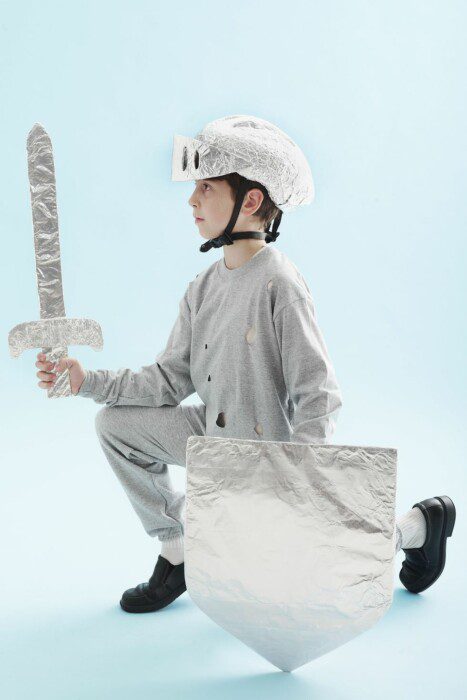
Using cardboard, cut out the shapes of a sword and a shield – and then cover it in foil. It can either be hot-glued or simply wrapped. Do the same with a bicycle helmet. If you’re feeling extra handy, cut out an armour vest and finish with foil to complete the look!


9) Robin Hood and Marian

This adorable couple costume is ideal for siblings that fight a lot – they’ll HAVE to settle down and be a team for this one night!

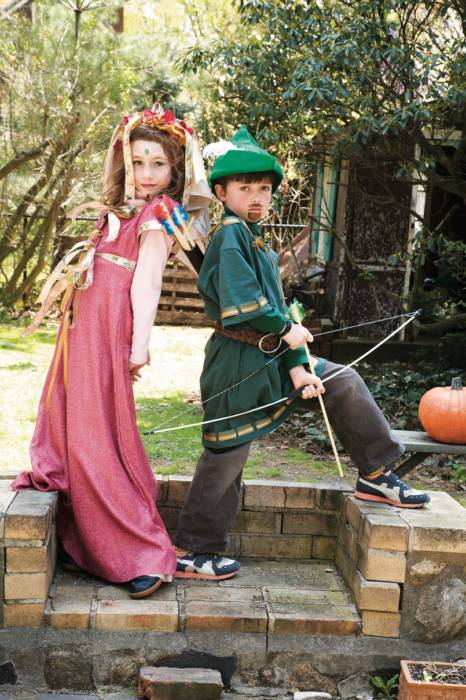
For Marian’s costume, prepare a long pink dress with loads of ribbons and a veil to decorate with. For Robin’s costume, you’ll need a toy bow & arrow set, a brown belt, a green tunic and hat set. 

You can also always include makeup to make the moustache on Robin!

10) Harry Potter and Hermione Granger

Are your kids Potterheads? If so, then this costume may be perfect for them…and it may be the one time they enjoy wearing school uniforms. 

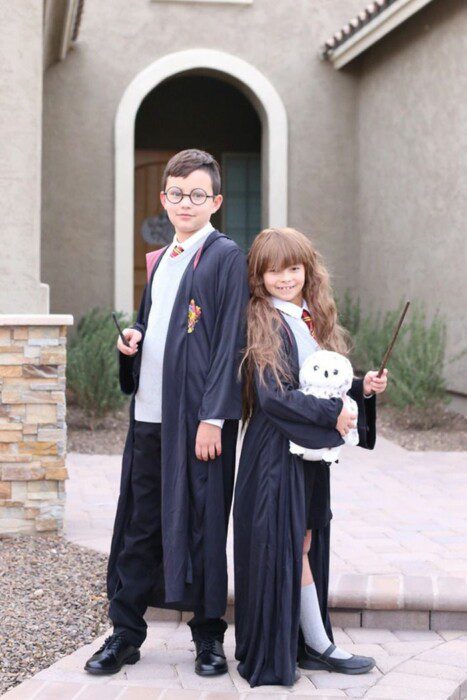
You’ll need some Harry Potter robes, the magic wands, Harry’s glasses, some brown eyeliner, collared shirts, Harry Potter-themed ties, school shoes, school vests/sweaters, pants and a plaid skirt. Oh and don’t forget their house scarves! 

The look is pretty simple, all you need is the props. And of course for Harry, you’ll want to draw his scar with some brown or red eyeliner.

Group and couples’ costume ideas

Most times, wearing a couple’s costume means having to stick by each other all day or night in order for others to understand the costume. Unless you’re dressed as a corpse bride; in which case, you would clearly be a corpse bride no matter where your rotten other half is. 

Whether it’s platonic or romantic, here are our favourite couples’ costumes – some are also expandable to become group costumes!

1) The Shining twins

Wearing this also requires a solemn expression and hardly any talking (other than “come play with us”).

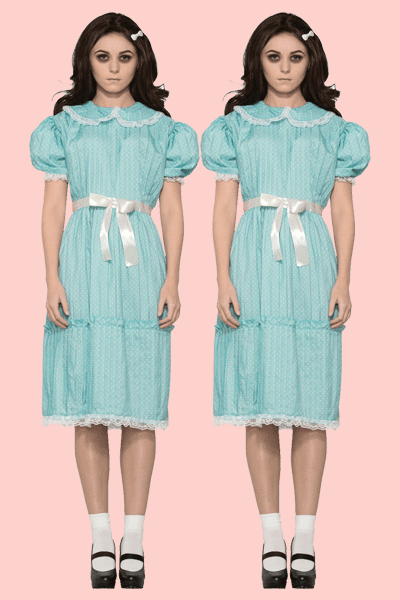
This one’s perfect for identical twins, but really, anyone can do it. Just grab 2 identical old-fashioned bright blue dresses, 2 pairs of long white socks, 2 pairs of the same type of dress shoes and tie your hair into pigtails. 

You can always put your own spin on it by adding some dark circles under your eyes or wear identical wigs!

2) Morticia and Gomez Addams

A classic! Who doesn’t want to be this couple? All Halloween lovers understand that Morticia and Gomez are the dream couple of all time.

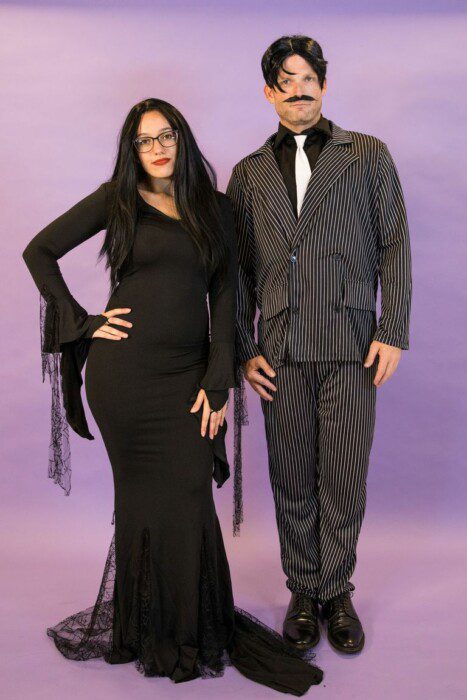
A sleek, long-sleeved black dress, red lips, smokey eyes, and long black hair makes the perfect Morticia. Gomez wears dark and dreary yet classy suits that are either B&W-striped, black and maroon, and always pairs them with either a bow or a tie. He also has his black hair slicked back with a middle parting, and a long black moustache. 

To keep in character, show everyone how much you simply adore each other just like Morticia and Gomez do in the movies!

3) Wednesday and Pugsley Addams


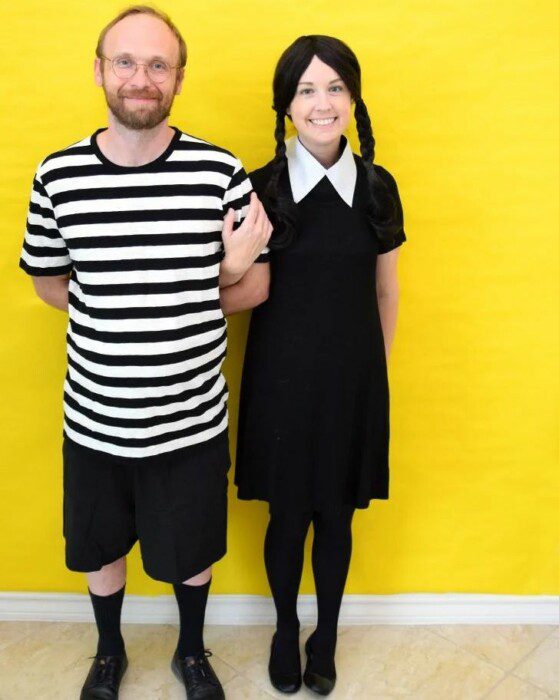
Here’s an extension of the Addams Family! Perfect for siblings, besties, and anyone else who is a fan of this iconic duo.

The outfits are pretty simple – a black long sleeve dress with a round white collar (and pigtailed braids) for Wednesday, and a B&W striped t-shirt with black shorts for Pugsley.

4) Beetlejuice – and Lydia Deetz!

Now you might need a wig for this one. 

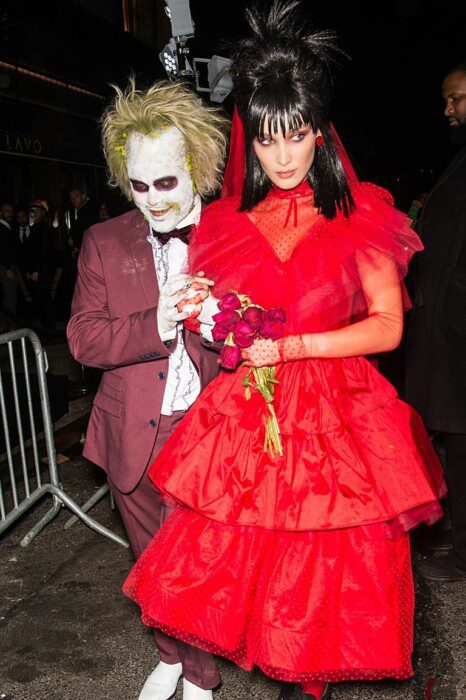
The iconic Lydia Deetz look, fashioned with a jet-black fork-fringed wig, a black choker, a large black sun hat, and a long-sleeved black dress would stand out on its own. It would be near impossible for people to not know who you’re dressed as! But if you’re a couple, consider going as Lydia and Beetlejuice. 

As Beetlejuice himself, be prepared to sport a bright maroon suit with a gold ruffled shirt and a black bow, along with some ghastly makeup and a wild yellow-green wig. This will be one whacky couple that will definitely not go unnoticed!

5) Chucky and Tiffany

Another iconic duo! Chucky was the toy character that made up all children’s nightmares. We watched the movie, we remembered the killer toy doll that snuck around and murdered everyone in the most gory ways. And then Tiffany came along, and then there were two…

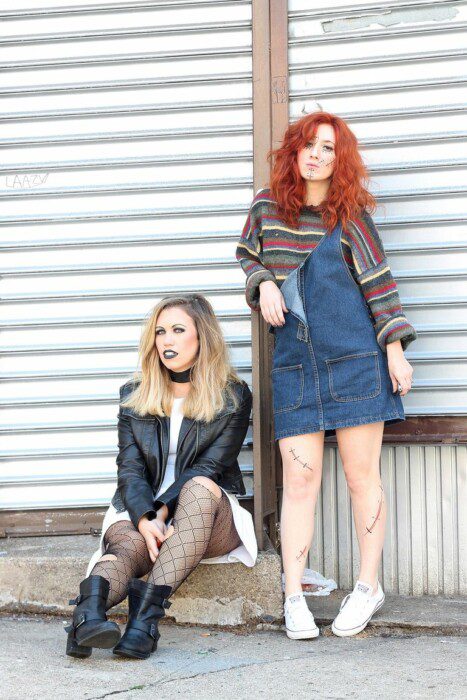
To be Chucky, you’ll need dungarees, a colourful striped long-sleeve top, sneakers, a (blunt) kitchen knife, glassy contact lenses, makeup stitches, and wild red hair. To be Tiffany, you’ll need a white wedding-like dress, a leather jacket, black heeled boots, black stockings, very dark eye makeup, and black lipstick. Don’t forget to draw the heart-shaped tattoo on your chest!


6) Zombie couplet

Resident Evil, anyone?

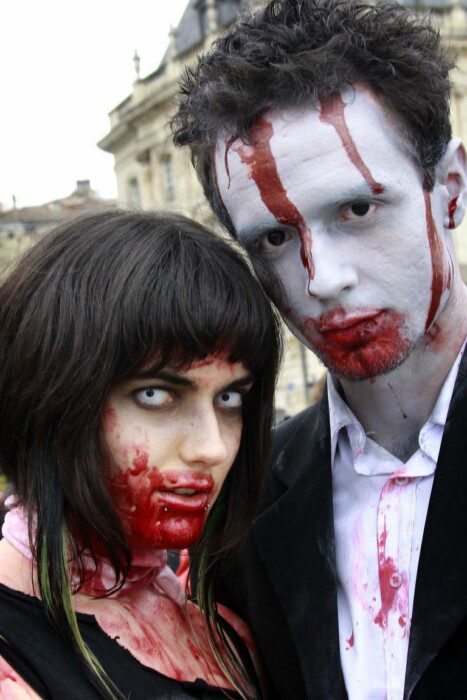
This has got to be one of our favourites, as you can go as mild or as crazy as you want. Of course the crazier, the better. This takes the least amount of effort and gets you the best results – just rock some fake blood and wear literally anything you want. A suit? A wedding dress? A school uniform? Pyjamas? They all work just the same. The key is to get the most realistic looking fake blood. 

Tip: You can make your own fake blood. My personal favourite recipe involves instant coffee powder and red food colouring. That’s it! This combo gets the blood looking wet when it dries, and it sticks on ALL day. It’s even edible, tastes great and smells wonderful (and sure scares the heck out of everyone!).

Tip #2: Wear white contact lenses, it really pulls the look together.


7) Rockstars

Dressing up as your favourite rockstar has got to be one of the most fun-filled ways to celebrate Halloween. It’s even a great conversation starter at parties!

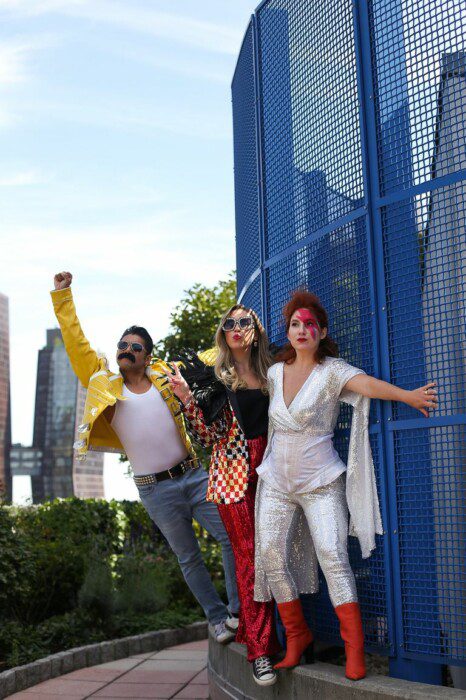
Taylor Momsen, Hendricks, Elvis, Freddie Mercury, The Cranberries, Kiss….the possibilities are endless! For this look, you’ll have to get a photo of your favourite rockstar and recreate their outfit from head to toe. Feel free to improvise with accessories and materials or even clothing that you already have!

8) Greek Gods

What’s the best thing about Greek Mythology? They’re all cool, they’ve got powers, but most of all; they’re one BIG family.

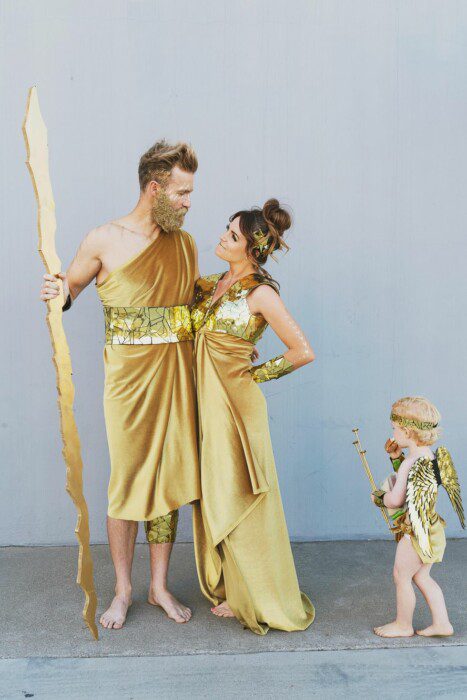
This means you can either go as a Greek God on your own – or with a special someone – or with your whole family! 

It’s not so difficult, either. Just sport some white or gold fabric (into a toga), and then get matching accessories to go with it. Wear them in your hair or around your arms/waist/legs. And of course, don’t forget to grab a signature weapon according to who you’re going as :)


9) Alien Family

Think of the Jetsons, but totally silver.

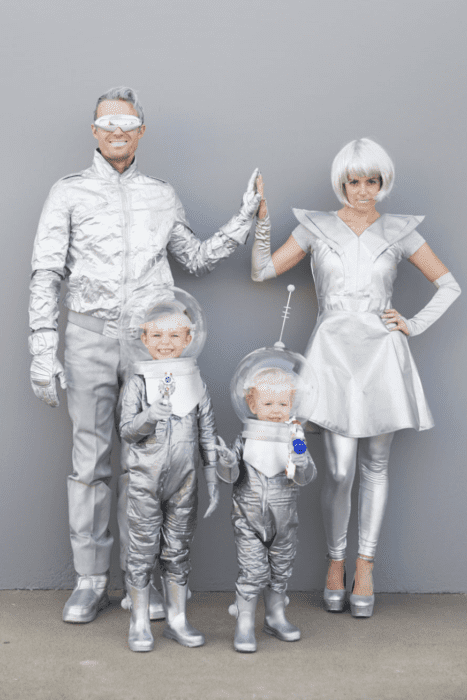
There are many ways to go about this, but the key is to follow the space-themed outfit designs and keep them all in one colour. Silver works nicely – plus you can use tinfoil for most of it! And who wouldn’t want to rock silver hair, silver lips, and silver boots? 

Of course, feel free to mix and match any combination of colours you want. We just like the idea of a colour-coordinated family from outer space!


10) The Royal Deck

You know what they say; always save the best for last.

This has got to be the awesomest couple/group Halloween costume theme, ever. You can even go solo on this. 

The rules are pretty simple; choose a card out of the classic deck of playing cards, and then dress accordingly. You can be as simple or as creative as you wish. The most common theme would be the royal suit, but you could always go as a number if you wish!

You’ll just need to colour-coordinate your costumes in red, black, and white, and display your suit symbols somehow.

And there you have it! These are some of our top favourite looks for Halloween. We hope there’s something here for everyone. 

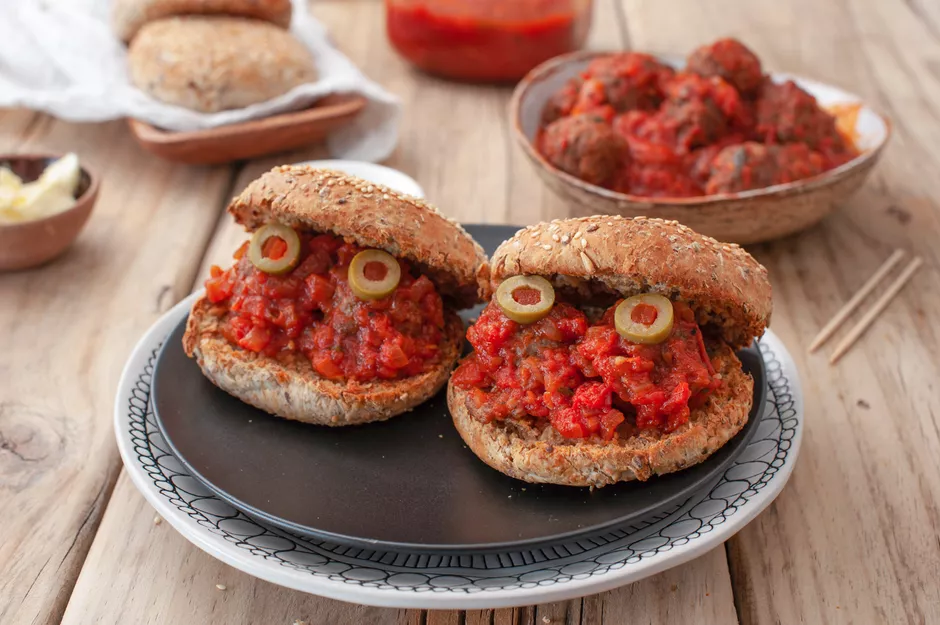
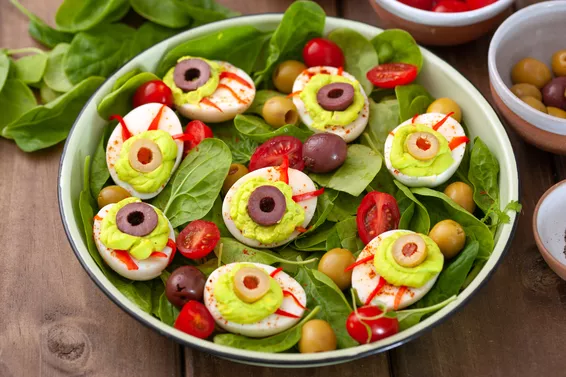
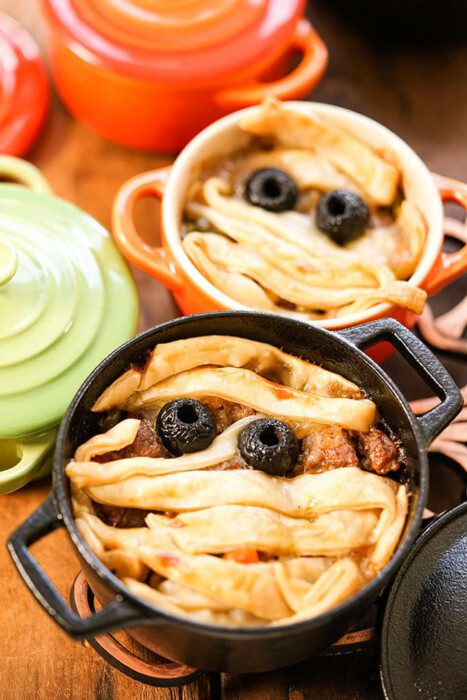
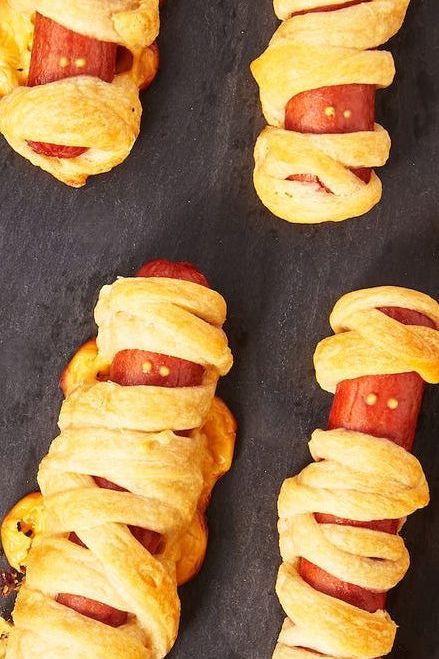
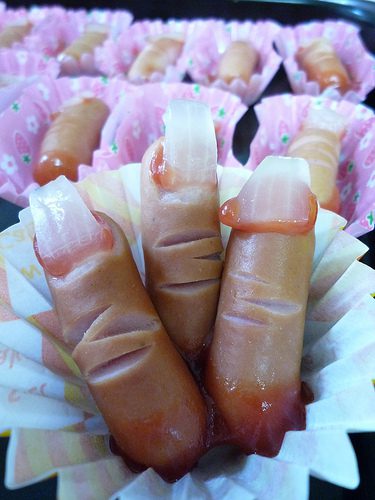
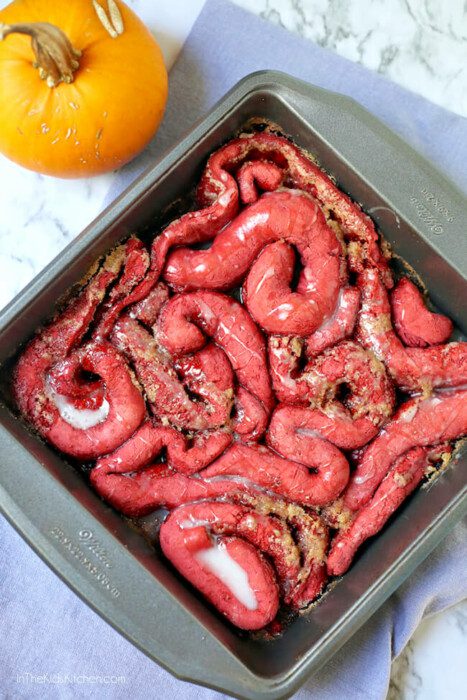
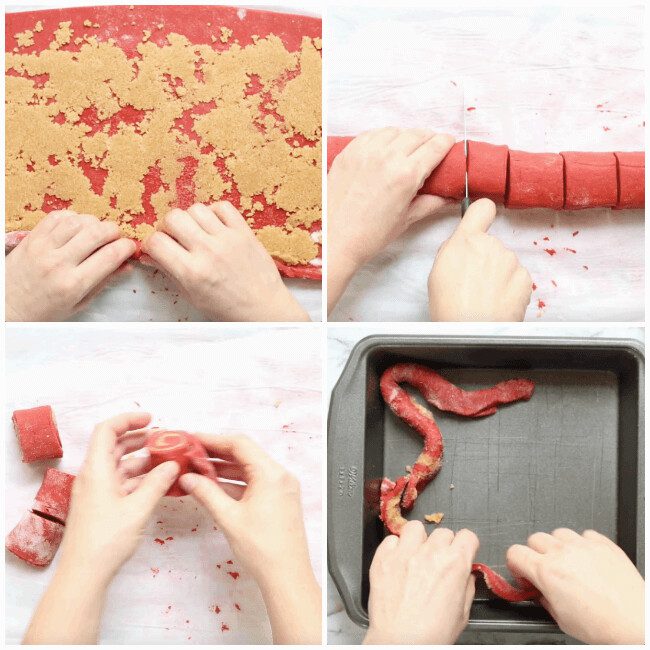
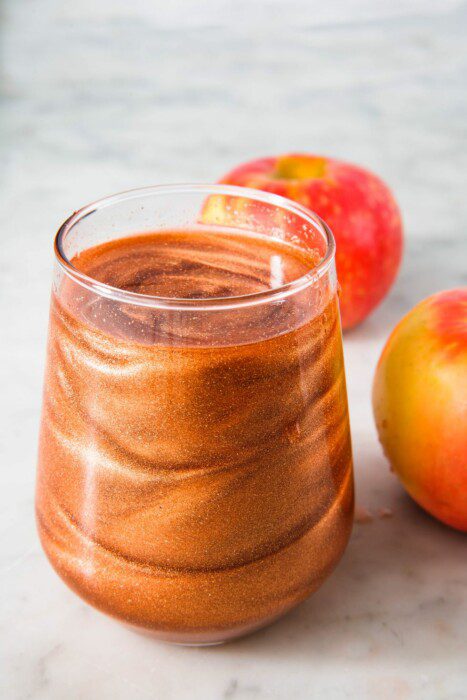
Wearing the best Halloween costume isn’t enough. Take a look at the best Halloween food recipes that you can make on your own for your guests!

Best Halloween food recipes

The best Halloween food recipes ever 

So, Halloween is just around the corner and you’re racking your brain for Halloween-centric food and treats. You may even be thinking about preparing some of it beforehand – before all the Halloween craziness sets in. 

But how? How does one prepare snacks, treats, and even dishes that not only taste good, but also look especially Halloween-worthy?

Fret not, we have a list of the best quick and creative ideas – from cute-spooky treats to downright frightening finger food. We’ve got you covered (in cobwebs)! >:)

Read on to discover the best Halloween food recipes ever!

TABLE OF CONTENTS

1) At-home Halloween Food Recipes 
2) Halloween Cocktail Recipes 
3) Easy Halloween Recipes (For Kids To Make!)

At-home Halloween Food Recipes 

1) Meatball Monster Sandwiches

Now this one’s a treat the kids will especially love. It’s bite-sized and packed with (scary fun) protein! 

meatball sandwiches with olive eyes for halloween
Image: The Spruce

You’ll need:

24 frozen precooked meatballs 
2 cups (or 473 ml) of spaghetti/pasta sauce 
3 tablespoons of softened butter 
24 pimento-stuffed olive slices 

Follow these instructions to make it – it’s pretty simple and you can’t go wrong with this. Be sure to arrange each little sandwich so that the top bun is slightly pushed back and you’ll have space just under it for the olive slice eyes.

2) Devilled (Eyeball) Eggs

Simple to make and can either be served on its own or in a salad, this recipe is too good to pass off.

eyeball shaped eggs salad Halloween
Image: The Spruce

You’ll need: 

6 large eggs 
¼ cup (or 59 ml) of mayonnaise 
1 teaspoon of Dijon mustard 
⅛ teaspoon of salt 
12 to 20 pitted black olives

Even with these same ingredients, you may either slice the pitted olives to make the “iris” parts on the eyeballs, or you may follow the decoration methods in the instructions and make spiders instead. 

3) Mummy Pot Pie 

How cute! These small pies are a meal on their own – and their spooky appearance definitely sets the mood for a nice Halloween dinner. 

Mummy Pot Pies Halloween
Image: Bowl Me Over

Follow the full instructions here.
Tip: you can swap out black olives for green ones for extra rotten looking mummy eyes ;) 

4) Rotting Evil Pumpkins

Here is one of my favourites – the tiny Jack-O-Lanterns filled with worms! This meal is cleverly encased in carved bell peppers, making them absolutely on point for Halloween. 

spaghetti in carved bell peppers halloween Jack-O'-Lantern
Image: Fountain Avenue Kitchen

Make your own favourite pasta or follow this simple 3-step recipe. You can even add some brown or pink food colouring into the spaghetti and the pasta sauce to make it look even more like worms!

5) Mummy-dogs 

This one’s a classic – one of the fun ones!

Baked hot dogs wrapped in dough that look like mummies
Image: Delish

You’ll need: 

Your favourite sausages 
Crescent dough (or any bread dough you can make) 
American cheese slices 
Dijon mustard

Basically, you’re going to wrap your hotdogs like in this video here in cheese slices and dough, and bake them until they’re cooked. Dot some mustard to make the glowing yellow eyes and you’re done!

6) Ghostly Pizza

This haunted delight is made possible by simply re-arranging the same old ingredients on a pizza to form your ghostly apparitions. 

Pizza with ingredients that are arranged to look like ghosts flying around
Image: Woman’s Day

You’ll need: 

Pizza base (you could also hand-make some pizza dough) 
Marinara sauce 
Large pitted olives (black and green for best results) 
Sliced mozzarella 

For this to work, you’ll have to first bake the crust with ONLY the marinara sauce on it for around 15 minutes at 425°F​ (or 218°C). Cut the olives to make into spiders and then cut the cheese slices into ghostly shapes. Once the pizza base is done, put all the ghosts and spiders together and voila! 

Tip: The olives also make up the ghost eyes and mouth!

7) Severed Fingers

Get ready to prepare some truly frightening finger food! 

Cocktail sausages that are made to look like severed fingers
Image: Coldwell Banker

You’ll need:

Cocktail sausages
Ketchup or homemade chilli sauce 
Fresh onions (you may substitute this with almond slices) 

All you’ll need to do is boil the sausages, make slits in the middle (to make the knuckles) and carve out the nail beds at the tip of each sausage. Then, stick onion slices onto the tips (to make the nails). Use ketchup or homemade chilli dip for blood and as a sticking agent.

Tip: Almond slices will make pretty gory-looking fingernails! Just carve out the nail beds and stick the almond slices right in it.

8) Cinnamon Intestines 

Beware: this is a dessert you may not have the stomach for! We promise that it tastes wayyy more delicious than it looks.

Cinnamon roll dyed red and made to look like intestines
Image: In The Kids’ Kitchen
Photo instructions on how to make intestine shaped cinnamon rolls
Image: In The Kids’ Kitchen

You’ll need some typical cinnamon roll ingredients plus a load of red food colouring for the gutted, bloody look. Then of course, roll them into slim long intestines instead of thick rolls and voila! 

Halloween Cocktail Recipes

1) Poison Apple Cocktail

Nothing screams poison drink like a swirl of edible glitter!

An apple cocktail with edible gold glitter swirling inside it
Image: Delish

You’ll need: 

1/3 c. apple cider
1/3 c. cranberry juice
2 oz. fireball
1 oz. grenadine
1/4 tsp. edible gold glitter
Some ice

All you’ll have to do is combine the ingredients into a shaker and shake it until the drink is totally cold. Don’t forget to REALLY swirl the glitter – or it won’t have the same effect!

2) Bloody (Mary) Syringes

A trick and treat all in one! These shooters make the perfect addition to any Halloween dinner table or party. Best of all? They’re unbelievably easy to and only take 5 minutes to whip up. 

Bloody Mary in syringes Halloween
Image: Delish

You’ll need:

2 c. tomato juice
8 oz. vodka 
2 tbsp. Worcestershire sauce
1 tbsp. horseradish
2 tsp. hot sauce (such as Tabasco)
Juice of 1/2 a lemon
Freshly ground black pepper

Throw these into a large bowl and whisk it well. And then, fill up those syringes! 

3) Jell-glo shots 

Now here are some jell-o shots that will mess with your head before you even drink (or eat?) them! 

Jell-O shots that glow in the dark
Image: Delish

You’ll need: 

2 c. tonic water, divided
2 packages of Jell-O (two flavours; this uses pineapple and orange)
1 c. water
1 c. vodka

If you’re planning on having a Halloween party with loads of black light, then this recipe is perfect for you. It may take a while to wait for the jell-o shots to freeze in between preparation, but it’s totally worth it in the end. 

4) Fluorescent Margaritas 

Watch as your Margarita changes colour while you party – and wonder if it’s just the alcohol playing tricks on you. 

Colour-changing margarita made of red cabbage ice cubes
Image: Delish

This genius idea simply combines ice made of steeped purple cabbage (totally flavourless, don’t worry) and your favourite margarita recipe. If you don’t know what kind of Margarita to make, you could also cop this recipe.

5) Boozy Screamsicle Shakes

Beware: children will want some, so make sure you make mocktail versions of this too!

orange sugary Halloween drink milkshake cocktail
Image: Delish

You’ll need: 

Chocolate sauce, for garnish
6 Oreos, finely crushed
1 qt. orange sorbet
3/4 c. milk
8 oz. vanilla vodka
Whipped cream, for garnish
Orange & black sprinkles, for garnish

Dip the rim of your glasses in chocolate and then in the Oreo crumbs. Blend the sorbet, milk, and vodka and serve in the chocolate-drizzled, Oreo-rimmed glasses. Top off with sprinkles!

Tip: If you can get a hold of spider-shaped sprinkles, the drink would be extra spooky.
Tip #2: You could definitely sneak a couple of plastic spiders to give your drunk party guests an extra scare!

Easy Halloween Recipes (For Kids To Make!)

1) Witch Hat Cone-Cakes 

How cute! This might be a little messy when making, but the process is fun and totally worth it. Kids will love decorating these little treats :) 

Halloween treat made of ice cream cones and icing to look like witch hats
Image: Wilton

You’ll need: 

Ice cream cones (the pointier, the better) 
Black food colouring (if the cones aren’t already dark coloured) 
Yellow and purple food colouring (any colour you’d like the hat belts to be!) 
Your kids’ favourite icing 
Dark coloured store-bought cookies (or homemade cookies) 

If the cones aren’t already dark-coloured, you’ll want to paint or spray them with black food colouring and leave to dry. 
Afterwards, you’ll want to mix up some food colouring and icing to make purple, yellow, or any colours you prefer. 
Then, fill the cones with icing and stick some cookies to make the base hats. 
Next, decorate the cone with colourful icing to make the witch-hat belts like in the photo. And that does it!

2) Witch Fingers

This is a spooky sugary treat that your kids will love making AND eating! 

Cookies that are shaped like witches' fingers and dyed green
Image: Wilton

 You’ll need: 

Cookie dough (prepared beforehand) 
Green & red food colouring 
Favourite icing (or red candy melts) 
Almond slices 

To make things easier, prepare your favourite cookie dough beforehand, and add some green food colouring in until it becomes the perfect witch finger-green. If you don’t have a recipe, you could also follow this one.
Mix some red colouring into your favourite icing (also prepared beforehand), OR simply get some red candy melts and melt according to packet instructions.
Let your kids roll them out into long 4 or 5-inch finger sticks, and make depressions on the “fingertips” (to form nail beds) and thin slits to form the knuckles. 

Once the cookies are baked, let them cool and then add red candy melts (or red icing) to stick on the almond slice into the nail beds. Add more at the base of the fingers for a severed bloody look.

3) Monster-Mallows 

This set of treats are almost as easy to prepare as they are to eat. 

Marshmallows decorated to look like cute Halloween monsters
Image: Wilton

You’ll need: 

Marshmallows 
Blue, green, and orange food colour spray (or you could make them with food colouring) 
Toothpicks and cake pop sticks 
Black icing or candy melts 

Before getting the kids involved, you may want to spray or paint the marshmallows beforehand. If you can find already-coloured marshmallows, even better!
Get your kids to slowly stick the coloured marshmallows onto the cake pops (preferable 3 on a stick).Using the candy melts (or black icing), decorate the marshmallow to make the monster faces and hair. Let it cool in the refrigerator and then stick in a bucket of your favourite candy to prop it up!

4) Haunted House  

Remember Hansel & Gretel? Kids will enjoy participating in all the fun making this edible haunted house. 

Warning: This recipe involves a LOT of icing. 

Halloween cookie house with candy ghost decorations
Image: Wilton

You’ll need: 

Cookie house kit 
Candy corn and any candy you’ll want as decorations for the house 
Soft black and purple icing (or any colour you’ll want the house to be) 
Coloured fondant icing 

Once you’ve put the cookie house together, start with the roof. Spread black icing with a spatula and attach the orange fondant icing (in pieces) as roof tiles. Feel free to add any ghoulish candy pieces on the roof at this point, but be careful not to break it!

Make the front door and all the windows with your soft coloured icing. Make sure to solidify the edges with more icing, which will definitely help keep it together. Stick candy to make the door knobs and more candy to decorate all the windows and walls. 

Now, finish up the rest of the house by putting more icing to the floor all around the house (this keeps the house together while making it look complete).
A bed of black grass? Green swamp? Red blood? You can do anything with the “ground” surrounding your spooky house!

5) Tiny Horrors (Cupcakes)

A classic in any Halloween party. And quite possibly the easiest to make!

Mini cupcakes with icing for Halloween
Image: Wilton

You’ll need: 

Your favourite cupcake recipe 
Mini cupcake moulds and liners 
Loads of different food colouring
Soft icing 
Decorative candy in various shapes
Sprinkles 

Bake the mini cupcakes and let them cool. 
Tint batches of icing in all the colours you’ll want to decorate with. 
And start decorating your cupcakes! 
With this simple recipe, you can go as simple or as crazy as you want with the decorations. Kids love this because it allows their imagination to run wild and they will be proud of their work once it’s done!
Best part of it all? They’re cute, yummy, and bite-sized. 

Whether it’s an adults-only party, a kids party, or a family gig, these recipes have got you covered. The cocktails can be tweaked to be made into mocktail versions – without compromising on the excitement and fun. 

What are you waiting for? Go ahead and start planning your graveyard party!

Oh, if you’re worried about spills on your sofa this Halloween, get these Performance Weave slipcovers to protect your sofa from spills and any messy food.

SEE our PERFORMANCE FABRIC SLIPCOVERS

From funky to fresh: How to get that dog smell out of your couch in 7 steps

You probably came here to know how to get that musky, familiar yet unpleasant dog smell out of your couch.

We’ve all been there. Whether you’ve got a new puppy who still needs to be potty trained or a doggo who likes to get messy, these smells happen.

As loving pet owners, we might personally be able to ignore the odours that our pets leave around the house., 
However, it is not so easy for guests to get used to it.

Imagine your guests coming over and being greeted with a fresh-smelling couch — it makes all the difference in setting a warm, inviting mood.

Having your home smell pleasant is also important for your own well-being according to Rachel Herz, Brown University neuroscientist

“Smell can instantly trigger an emotional response along with a memory, and our emotional states have a very strong effect on our physical well-being,” she says.

Having a refreshing smelling home can uplift your mood, and make your home feel even cleaner. 

Before we go into how to get dog smell out of couch, let’s look at how these scents get stuck in the first place. 

get that dog smell out of couch
How does that dog smell get onto your couch? (Image credit: Pexel)

Why do odours stick to your couch?

Fabrics are porous, much like a sponge. 

Think about how your clothes absorb sweat and smells as you go about your day.

Your sofa fabric works the same way. 

It absorbs and holds onto moisture, oils, and particles from pets, food, and daily use.

Pet odours, in particular, can linger because dogs produce natural oils that can easily penetrate and cling to the fabric fibres. 

When dogs sweat, the bacteria on their skin mix with these oils, creating that familiar musky scent.

Similarly, your sofa can pick up cooking smells if it’s near your stove or smoke smell if a cigarette is lit near it. 

Over time, these particles break down and release odour-causing bacteria.

If you don’t clean your couch regularly or have them in a ventilated space, trapped moisture can lead to mould and mildew growth, intensifying the smell. 

Pet odours can linger on furniture after some time, and in some instances, they can be extra tricky to get rid of. 

So if your sofa has been smelling a lot like your pet lately, try some of these 7 tricks that will help you get that dog smell out of your couch.

7 easy tricks to get that dog smell out of your couch

1. White vinegar and water

get that dog smell out of couch
White vinegar is an eco-friendly way to get that dog smell out of your couch. (Image credit: Pexel)

When it comes to cleaning out odours, white vinegar is your best friend.

The acetic acid in white vinegar breaks down grease, neutralises odours, and kills bacteria. 

It’s a natural disinfectant that can tackle even the toughest pet smells without leaving any residue.

Its highly-acidic properties make it an effective cleaner that can break down and dissolve even the most stubborn buildups in your fabric fibres.

To get rid of the remnants of wet dog and also cat puke (plus their accompanying scents) from your sofa, fill a spray bottle with equal parts white vinegar and water, then spray it on your sofa.

Leave the solution to settle in for a few minutes so the vinegar can work its magic, then remove it by giving your sofa a gentle wipe down.

Voila! You’ve got yourself a smell-free sofa.

2. Baking soda

eco-friendly cleaning
Baking soda is an effective deodoriser. (Image credit: Comfort Works)

If vinegar is your best friend when it comes to odour neutralising and stain dissolving, then baking soda will make the perfect runner-up.

In fact, both these methods are the best eco-friendly cleaning solutions for most upholstery. 

Baking soda absorbs moisture and neutralises odours, making it perfect for eliminating smells embedded in your sofa fabric. 

It’s gentle yet effective and works especially well after using vinegar.

Unlike other household cleaners, baking soda is non-toxic, and just like vinegar, it does a great job at breaking down dirt and grease.

The best time to use baking soda is right after you’ve sprayed your sofa with a water-vinegar solution.

 But before you give your sofa a wipe down, apply a thick coat of baking soda onto your sofa and let it rest for a few hours (or overnight) before cleaning it up.

Important note: Be sure to apply the baking soda only when the surface of your sofa is completely dry. 

Try using a fan to help speed up the drying process before applying baking soda.

3. Unflavoured vodka

Make sure you use unflavoured vodka to get that dog smell out of couch. (Image credit: Pixabay)

More than a great shot after hours, this stuff can work double duty to remove stains and odours from your sofa.

The alcohol in vodka acts as a solvent that binds to and evaporates odour-causing compounds. 

It leaves no smell behind, making it a quick solution for musty or pet-odoured fabrics.

Inexpensive vodka works fine for cleaning, just make sure that it’s unflavoured since sugar and other added additives can end up complicating your cleaning efforts.

To clean with it, fill your spray bottle with vodka, neat (avoid diluting it with water).

Try not to wet the fabric too much to the point of making it damp. 

Aim for a light mist instead. 

The alcohol will collect the odorants that are clinging to the sofa fabric, and as the alcohol evaporates into the air, it takes the smell along with it.

4. Enzymatic cleaners

Check out your local supermarket for an enzymatic cleaner. (Image credit: Pexel)

Many professional cleaning companies have been looking into bio-enzymatic cleaners for cleaning, and for good reason.

These products use “good” bacteria, which effectively digest waste, stains and bad odours.

These bacteria produce enzymes specifically designed to break down certain molecules into smaller pieces, which then becomes a source of nutrition for them. 

This means that they literally ‘eat up’ the source of those pesky odours that linger on your sofa.

Before using an enzymatic cleaner, remove any dirt or hair from the surface of your sofa.

Let the solution sit on your sofa’s surface for around ten minutes before wiping it off with a microfibre cloth, and you’re all done!

5. Air-drying

Sometimes fresh air and sunlight is all your sofa needs. (Image credit: Pexel)

If you’re not a fan of chemicals and liquid cleaning solutions, then simply airing out your sofa could be the best option for you.

Fresh air and sunlight are natural deodorisers. 

They not only remove musty odours but also help kill bacteria and mould spores, which thrive in damp, poorly-ventilated conditions.

Opening your windows or better yet, bringing your furniture outside for a couple of hours in the sun can go a long way in terms of getting rid of funky, lingering smells.

6. Upholstery or carpet vacuum-cleaning

get that dog smell out of your couch
Having your sofa professionally cleaned can save you time. (Image credit: Pixabay)

If you’re in need of some heavy-duty cleaning, you might want to drop by your local carpet cleaner or upholsterer to see if you can rent one of their heavy-duty vacuum cleaners.

Heavy-duty vacuums remove dirt, dander, and other debris trapped within the fabric. 

Switching to a wet setting can help lift deeper, ground-in dirt and lingering odours.

These cleaners with an upholstery attachment can be toggled between dry and wet cleaning for a thorough dirt and smell removal.

To avoid ending up with a wet dog smell, try using the wet vacuum option at the very end after you’ve removed as much dirt as possible.

7. Activated charcoal

Activated bamboo charcoal bags
You can source activated charcoal online. (Image credit: Amazon)

Activated charcoal is like a vacuum cleaner but it absorbs odours in the air instead of dust. 

Due to its large surface area, activated charcoal can absorb a high amount of gas particles, removing unpleasant smells in your couch. 

This is also an option for people who prefer using natural products. 

Pick up a few sachets of activated charcoal and place them in the corner of your sofas where they’re not visible. Let them work wonders over time!

Prevention is better than cure

get that dog smell out of your couch
(Image credit: Pexel)

Now that you’ve learned how to get that dog smell out of your couch, perhaps it is time to take on more preventative measures.

You may have gotten rid of the smell, but is your sofa covered in fabric that’s not ideal for a household with pets?

We have the solution for you: durable slipcovers that are designed with your pet in mind:

How long does a couch last and what to do with your old couch

You’re probably wondering how long does a couch last.

Typically, a couch can last anywhere from 7 to 15 years.

To every beginning there’s an end – not even the trusty couch can escape these philosophical words.

Through years of parties and movie nights, your couch has faithfully served by your side and now it’s looking a little worse for wear. Teary-eyed, you know what must be done.

In classic Marie Kondo fashion the time has come to thank your couch for its service, say your goodbyes and prepare to see it off… except it’s not quite that simple this time.

It’s a hulking piece of furniture after all – you can’t simply put it in the bin. So what exactly are you supposed to do with your old sofa?

That’s exactly what we’re going to answer today with a list of ways you can get rid of that old sofa, or if you’re lucky, find it a new life! 


TABLE OF CONTENTS

1. Give it away to friends & family
2. Donate it to chair-ity
3. Reupholster it
4. Search for takers online
5. Schedule a large item pick-up
6. Leave it on the curb (responsibly)
7. Bring in the professionals
8. Break it down
9. Restore it with a custom slipcover

1) Give it away to friends or family

family with kids and dog on yellow couch
Image: Pexels

If you ask around, I’m pretty sure there are people who are waiting to pounce on the offer of a free couch which can still be used. The couch is often the most expensive piece of living room furniture and could be greatly appreciated by someone in your immediate circle of contacts if it’s in good condition.

There’s no tedious research involved and no dealing with strangers. To top it all off you’ll know your couch is going to a better place.

men in uniforms moving couch outdoors
Image: lovetoknow

Even if nobody you know needs a couch, there’s someone out there who does. That’s where the Salvation Army, Goodwill or your local equivalent comes in. Provided the couch is in half-decent condition, you’ll find that they will be willing to pick up your couch donation free of charge in many cities.

Other options include scouting out local orphanages and churches to find out if they can use what you have. A couple of calls is all it takes to know if this is possible, and you might discover that you’ll be doing someone a great service at the same time.

3) Reupholster it

Saving your couch instead of sending it to the landfill is a great way to reuse what you have and it’s great for the earth as well. Upholstery is expensive but there are some cases where it can make sense to splurge on it for your couch.

They don’t make couches like how they used to anymore so if you’ve got a quality couch from the days of bygone craftsmanship, it might be worth going the reupholstery route. Cushions deflated? Get them stuffed! Fabric tearing? Let them refabric (now a word) it. Upholstery really can fix just about any problem your sofa might have if you’re willing to pay the price.

Should you reupholster your sofa?

4) Search for takers online

It’s the 21st century and some of the quickest and most convenient ways to get rid of an old couch are to list it online. There’s no shortage of people looking for a usable couch especially if it’s dirt cheap or free. Bonus: they’ll usually even agree to pick it up themselves.

If you just want the couch gone, listing it as free on Craigslist or Facebook Marketplace is a sure-proof way to get your couch snatched up in no time at all. The key is to include some good-looking photos and it will be fought over like TVs on a Black Friday.

5) Schedule a large item pick-up

A neat option that’s available to property owners in most cities in the United States is to schedule a large item/bulky item pickup with the city’s waste management. This way, everything will be taken care of conveniently, and for free.

Getting rid of your couch using this method is one of the most straightforward and should be one of the first choices if there’s no one else to give it to and you can’t repair it. All it takes is a quick call to the city’s waste management and to set a day and time.

Plus, as a property owner you’re entitled to a couple of these a year so don’t let those credits go to waste if the option is there!

6) Leave it on the curb (responsibly)

sofa on curbside of neighborhood
Image: Reddit

It may be basic, but it really does work surprisingly well. Simply leave your couch out by the curbside on a sunny day with a sign advertising it as free and there’s an excellent chance that junkers or someone in need of it will pick it up.

Just make sure to be mindful of local laws since this is completely illegal in some states. Also be prepared to haul it in before it rains as nobody wants to deal with a soggy, heavy mess of a couch.

7) Bring in the professionals

Sometimes, the couch in question is simply damaged beyond repair. The frame may have given way or the bonded leather may have peeled into a flaky mess. Nobody’s going to want that.

Times like these you can always rely on the furniture/junk removal services operating in your area. These are available almost everywhere globally and a sure way to get rid of the couch, if you’re willing to shell out.

The typical costs for couch removal in the US range from $50-$100, but may be well worth it if you need that couch gone and need it gone now.

8) Break it down

How to break up a couch

Got some pent-up stress that needs to be released? Solve both your problems at once by breaking down the couch (or disassembling it if possible) and bagging the parts up. Yes people do this, especially in high-rise apartments where getting the couch out any other way would be something that belongs on the anti-bucket list.

Sure it’s physically intensive and not the most appreciated option for the aching back, but many hands will make quick work of it. Invite a couple of strong friends over for a beer and pizza party… and an extra couple of hours of surprise manual labour 🙂

9) Restore it with a custom slipcover

IKEA Farlov sofa white replacement slipcovers
IKEA Farlov sofa in Eco Weave White slipcovers

Got a couch that’s still going strong in the frame and cushion departments? Bring it back to life with a tailor-made slipcover!

Just like upholstery, a slipcover can reverse time on a sad-looking couch, but is far more affordable. Think of it as paying only for the fabric portion of the couch.

You can even customise everything from the colour, material, and style of the slipcover to completely overhaul the look of your couch. It’s like getting a new couch without buying a new one.

The best part? To make sure your “new” couch remains pristine, the covers are machine-washable (except the leather ones) to keep them looking great.

Interested in saving your couch? Visit our website to learn more on how you can renew your couch affordably with a slipcover and keep it from becoming landfill:

DISCOVER BESPOKE SOFA COVERS

IKEA Lycksele sofa bed review – a convertible wonder

In this review, we will be taking a look at the IKEA Lycksele. The great thing about it is that you can choose the sofa bed mattress *and* cover to customise it exactly the way you want.

TABLE OF CONTENTS

  1. The basics
  2. Design & aesthetics
  3. Comfort
  4. Price
  5. Verdict
  6. Slipcoverable: Yay or nay?

The basics

The IKEA Lycksele series is currently available in the US and UK stores. It comes in a chair bed and a 2-seat sofa bed. As with all things, unfortunately, we can’t have it all the chair bed is not available in the US.

So if you’ve been thinking about that Europe trip, this would be the perfect time (ahem, excuse).

The chair bed looked exactly how I thought it would small, and easy to move around to make room for the occasional house guest.

Its frame measures a width of 80cm, depth of 100cm, and height of 87cm.

The sofa bed, on the other hand, was much smaller than I had expected. 

After taking a quick look at the tag, I was shocked to find that the frame measures the same as that of the chair bed, with the exception of its width of 142cm.

Design & aesthetics

One thing I noticed about the IKEA Lycksele sofa bed was that the back actually forms part of the mattress.

To convert it to its bed form, all you’d need to do is to lift the bottom up and gently pull it towards you until it fully extends. 

After a quick run to the covers section, IKEA has them in 5 colours:

  • Ransta natural
  • Knisa light grey
  • Tutstad multicolour
  • Vansbro bright green
  • Vansbro dark grey

Personally, the Vansbro bright green looks like something straight out of a maximalist living room feature.

Comfort

The Lycksele feels quite firm, its wadding is made of 100% polyester. For those of you who make use of your couch’s armrests, we have some sad news the Lycksele does not have any armrests.

You’d think that a sofa bed would cater to people of all shapes and sizes.

One thing I will say is that it isn’t very petite-people-friendly to sit on. Fortunately for me, IKEA added a back cushion to the display (sold separately, of course.)

I appreciated the extra back support and being propped up enough to rest my feet on the ground highly recommend getting one if you’re on the petite side.

Lying on the Lycksele sofa bed, even my 5’1 frame only just fit onto the mattress (I can only imagine what it’d be like for those with taller frames).

Price

If you’re just as picky (read: frugal) as I am, fret not you have three options:

  • The Lövås mattress (made of polyurethane foam)
  • The Murbo mattress (made of high resilient foam, polyurethane foam)
  • The Håvet mattress (made of latex, high resilient polyurethane foam)

As of 2022, here are some ballpark costs for the chair bed:

  • The Lycksele Lövås (starts at £199)
  • The Lycksele Murbo (starts at £229)
  • The Lycksele Håvet (starts at £279)

As for the sofa bed:

  • The Lycksele Lövås (starts at £299)
  • The Lycksele Murbo (starts at £329)
  • The Lycksele Håvet (starts at £379)

Price-wise, I just have to say: you get exactly what you pay for. I’d suggest going to your local IKEA and testing the mattresses out for yourself before making a final decision.

Verdict

  • Design & aesthetics: 6/10
  • Comfort: 6/10
  • Price: 8/10

Overall, I’d say that the IKEA Lycksele sofa bed is great in terms of value for money. It caters to people with different budgets, as well as preferences (i.e. softness vs. firmness).

It is best if you’re going to be a casual user of its sofa bed function (or just have excited younger kids that really like camping out in the living room).

One thing you could also consider would be to get it as a fun add-on to your main furniture setup.

Slipcoverable: Yay or nay?

Before you ask: Yes, covers for the IKEA Lycksele are available on our site! 

Explore customised Lycksele sofa covers

If you found this helpful and want to find out more about other IKEA sofa models, click the button below for the best IKEA sofa reviews!

Read our IKEA sofa reviews

How to clean your leather sofa safely and effectively

Classy, luxe, and completely functional, there’s a lot to love when it comes to the leather sofa. There’s also a lot to know when it comes to cleaning leather sofas.

If you’re the proud owner of a leather sofa, chances are you chose it partly because of how easy it is to maintain. Liquids don’t seep into the cushions and fur doesn’t cling to it like a bee to honey.

That’s true and all, but what do you do when it’s finally time to clean the leather sofa? The guests have had one too many drinks and have done the unthinkable to your precious sofa.

Now you’re worried. It’s a whole lot more painful to see such an expensive piece of furniture stained like that, especially after all those years of treating it like a delicate child.

To make things worse, searching for a solution online just unearths a trove of conflicting information and “remedies”. 

Some of these quick fixes even end up doing more harm than good!

But enough with the panic talk, we’ve got you covered. Here’s the best and safest way to clean that leather sofa once and for all. And by the way, this works for faux leather as well.

Here’s what you’ll need in your epic quest to save that leather sofa:

  • Vacuum (optional)
  • A few microfiber or cotton cleaning cloths which colors don’t run
  • Reverse osmosis bottled water from any supermarket (or distill some yourself)
  • Leather cleaner and conditioner (Leather Master, Lexol, Bick 4 is recommended. Read on to find out which to use)

Got everything? Let’s get down to business.

TABLE OF CONTENTS

Step 1: Follow the manufacturers recommendation if they have it
Step 2: Figure out what leather you’re working with
Step 3: Vacuum the sofa gently and wipe with a damp cloth
Step 4: Still dirty? Pick up some cleaner specifically designed for leather
Step 5: Give your leather the deep clean
What to do if your leather sofa is beyond saving?

Check out some of the easy leather-cleaning methods in this video:

3 EASY Steps To Make Leather Look Brand NEW Again

Step 1: Follow the manufacturers’ recommendation if they have it

Care instructions for a leather couch on IKEA's website
Sofa care instructions from IKEA. Look for these, but for your own sofa!

The first step that nobody should overlook when cleaning their leather sofa is boring but oh so important. Follow the manufacturer’s cleaning recommendation if it was given. 

They know best when it comes to cleaning your leather sofa.

This is especially true with leather sofas since different leathers have different finishings. The one set of cleaning instructions that nicely polished up your neighbors’ leather sofa may spell disaster for yours.

Because of this, avoid any homespun cleaning concoctions you may stumble across unless you know exactly what you’re dealing with. These remedies are almost always made with top-coated leather in mind and even then they can damage that protective coating.

This means keeping your paws away from the:

  • Vinegar
  • Baby Wipes
  • Detergent 
  • Magic erasers
  • Saddle soap
  • Other random “diy remedies”

Avoid these things unless you want to risk a heartbreak over the ruin of your expensive leather sofa.

If you haven’t received  specific cleaning advice for your sofa, then grab those cleaning supplies and prepare for some legwork! It’s time to DIY deep clean that leather on your sofa, in the safest and easiest method possible.

Step 2: Figure out what leather you’re working with

different colours leather fabrics
Leather fabrics

If you don’t know the recommended way to clean your leather sofa, it would be best to know what kind of leather you’re dealing with. The quality and finishing of your leather will determine how much of the rough stuff you can give it.

Here’s a general overview for what to expect.

  • Full grain/top grain leather – Thick, quality leather that’s hardy. You don’t have to be overly delicate with it since it’s highly unlikely to split or peel when brushed or rubbed roughly.
  • Suede and Nubuck Leather – Sofas are rarely made from suede or nubuck leather because they are difficult to clean. It’s still durable, quality leather but make sure to only use specific cleaners when it comes to these.
  • Bonded/Split/Genuine leather – These types of leather are pretty much leather scraps that have been glued together. Be extra careful when cleaning these as they are naturally prone to crumbling and flaking. You don’t want to quicken that process so be mindful of how much cleaning product you use and how rough you brush it.
  • Faux Leather – Even though faux leather isn’t real leather, it is surprisingly resilient and can be cleaned the same way as leather. Quality faux leather is also durable and doesn’t disintegrate as easily as bonded leather.
  • Semi aniline coating – Semi-aniline leathers have a protective coat over the leather. This makes it more stain-resistant and hard wearing compared to it’s full-aniline (uncoated) counterpart. Many DIY remedies have this leather in mind which makes it too harsh for unprotected leather.
  • Aniline leather – Full-aniline leather is left without a protective coat to allow it to readily develop a beautiful patina. On the other hand, this leather is delicate and stains readily so it must be cleaned carefully with specific products.

Got all that? Great.

While this information isn’t mandatory to know when it comes to cleaning your leather sofa, you should keep it in mind to understand how delicate you should be when handling your leather.

So take your search online and look for your sofa details. Once you’re done, it’s time to clean that leather sofa.

Step 3: Vacuum the sofa gently and wipe with a damp cloth

It’s time to begin the clean. 

Start by removing the cushions on your sofa where possible and give them and what was underneath them a gentle vacuum. 

You’ll want to get as much of the dirt and dust out before you start wiping it down with water because who likes wet, sticky dust? Also, remember to be extra tender when handling bonded leather sofas.

Once that’s done, wet a soft microfiber/cotton cloth until damp and give your sofa a thorough wipe down. Make sure the colors on the cloth doesn’t bleed; remember we’re trying to clean that sofa over here.

If you want to be extra fancy, you can even use distilled water (or reverse osmosis bottled water from the store) when you’re wiping down. On a serious note, this is advised because chemicals and minerals in water like chlorine can damage poor quality leather.

You see, leather doesn’t actually hate water that much – it hates the chemicals and minerals inside it. If you’ve ever so much as worn a nice pair of leather boots through snow that has been salted, you may unfortunately know the damage that can be caused.

That’s another reason why it’s safer to wipe away any excess water from your leather sofa instead of letting it seep in. Who knows what was in that water?

Step 4: Still dirty? Pick up some cleaner specifically designed for leather

Note: The leather cleaners and conditioners specified in this section are not for nubuck or suede leather sofas which are uncommon. Those require specific cleaners for suede or nubuck.

Aaaand you’re done! Leather sofas are so easy to maintain that a wipe-down is all it takes to loosen and soak up the grime.

Most of the time that is. 

So if your sofa is looking clean and lively, you can stop right now. But for those households with particularly nasty leather sofas of the visibility stained and dated kind, you’ll need to bring out something heavier duty than water.

What are the big guns you’ll be using on your leather sofa? Two words: “leather cleaner”. It’s made to clean leather after all so it’s a mystery where and why all these other inventive DIY leather cleaning methods are coming from…

Anyway, you’ll want to pick up a leather cleaner and conditioner. You can find these easily in the general good stores or on Amazon.

Which leather cleaner? Well, a good starting point would be to use the Leather Master cleaner and conditioner. Not only is Leather Master one of the gentlest cleaners out there, but it’s also suitable for aniline and top-coated leathers alike.

It’s the safest choice and will get the job done unless you have some sticky, ancient stains that have by now become part of the sofa. In these cases, you might need something stronger, like Lexol or Bick 4.

Step 5: Give your leather the deep clean

With leather cleaner in your hands, it’s time to go to town on your sofa. Give it the ol’ razzle dazzle!

Bonus if you’re doing your cleaning on a warm day as well. Leather is porous and gentle heat will open it up to make the leather cleaner work all the better.

The process to clean your leather sofa is easy as can be: Just put leather cleaner on microfiber/cotton cloth and agitate it into the leather in a circular motion. Nothing too forceful needed.

You can use a soft bristled brush as well if you have one.

Before you get to work however, test the cleaner on an inconspicuous part of your sofa first and wait for a couple of hours to dry. This is important because the dye on your leather can run if it’s poor quality

This can also happen if the coating on top-coated leather has already previously been damaged.

While it isn’t the end of the world since you can re-apply that pigment, who wants the extra work? If the pigment runs, you’ll need to be prepared to re-apply the pigment or find another safe way to clean the sofa.

Or you know… simply live with the dirty sofa forever.

Unless you’re super unlucky however, none of this will be a problem. The cleaners recommended in the previous section are gentle, all-purpose leather cleaners after all.

Once you confirm that the leather cleaner is safe to use, then apply it everywhere on your sofa that needs cleaning. 

If the sofa is feeling tacky when you’re done, wipe it off with a cloth to reduce the curing time and let it set for a couple of hours.

Step 6: Condition your sofa

At last, you are one step away from unveiling your snazzy, revitalised sofa. All that’s left to do is to condition the leather, which simply means to give it nourishment.

Now I’m not crazy, and supplying nutrients to literal dead skin isn’t my idea of talking sense, but in this case, that’s exactly what’s up.

You see, leather cleaner pulls out dirt and grime from the leather but in the process also removes natural oils needed to keep the leather supple and healthy (as healthy as can be for something dead). 

If too much of the oils get stripped away, your leather sofa will become more prone to drying out and cracking. Think of it like how conditioner keeps your hair looking fresh – it’s that important.

To condition your sofa, do pretty much the same thing as you did with the leather cleaner. Grab the conditioner from the cleaning set and buff it gently into the sofa.

Just like before, wipe it down when you’re done to soak up the excess and finish off. It goes without saying you should wait for a few hours for it to dry out and you’re ready to enjoy your fresh leather sofa!

What to do if your leather sofa is beyond saving?

Sometimes it happens. You’ve tried everything in the book from stronger products to calling in a professional, but nothing has revived your leather sofa from it’s sorry state.

Well don’t break up with it just yet! It might look frumpy but it’s still perfectly functional. Instead, consider using a custom sofa cover to bring it back to life.

Bespoke sofa covers are something we sew right here at Comfort Works. Think of them as the secret to sofa immortality – a fountain of youth of sorts.

Slip one on a sofa where the frame and cushions are holding up and you’ve got a brand “new” living room centrepiece. Granted that so-called new sofa won’t be leather (though we do make covers in faux leather), but it will look pretty darn good… like an entirely different stand-alone fabric sofa.

These are tailor made to fit your sofa after all.

woman put on sofa slipcover
Put on sofa slipcovers

The best part is that they are machine-washable… except for the faux leather ones, and a breeze to slip on, making them just as easy or even easier to maintain as a leather sofa (take that leather sofas!).

And if you have a specific sofa design you want to bring to life, we’ve got you covered on that too. We’re talking over 200 fabric, color and styling combinations to absolutely transform your sofa into a personalised, one of a kind item!

There’s even a fabric stand up to cats and animals for all of you who dreamt of having fur babies but didn’t want to send your luxury furniture to a quick death. All while being swanky enough to belong in an Instagrammer’s home as well:

IKEA Nockeby sofa IKEA Nockeby Stocksund Armchair slipcovers
IKEA Nockeby sofa and Stocksund armchair in Claw-proof Velvet

So if you’ve got a leather sofa that’s on its way to the afterlife and nothing else works seems to be working, consider using a slipcover to give it a second round of faithful service.

Or just use the covers for a temporary makeover of your sofa… cause people do that as well.

Anyway, hope you’ve learned everything you need to know on how to safely get your leather sofa sparkly clean and looking lively in this post!

Happy cleaning :)

Got scratches on your leather sofa? Check out how to lighten leather scratches in this post.


HOW TO FIX LEATHER SCRATCHES

Sofa struggles? We've got you covered.

From pet mishaps to everyday spills, our sofa covers tackle life's little messes effortlessly.

Find the perfect sofa cover
Stuck with a stained sofa?

Stuck with a stained sofa?

Spills happen, but our sofa covers make cleanup effortless.

Find a cover
Need something for outdoors?

Need something for outdoors?

Sun, rain, and spills are no match for our UV-protected sofa covers.

Upgrade my sofa
Pets love your sofa too?

Pets love your sofa too?

Our pet-friendly sofa covers are tough, stylish, and easy to clean.

Protect it now
Sofa doesn’t fit your space?

Sofa doesn’t fit your space?

Update your couch to match your new home with a sofa cover.

Revive your sofa